Difference Between a Sander and a Buffer: A Practical DIY Guide
Understand the difference between a sander and a buffer, including how they work, when to use each, finish quality, safety, and practical buying tips for homeowners and DIY enthusiasts.

The difference between a sander and a buffer lies in purpose, motion, and finish. A sander aggressively removes material and levels surfaces using grit-based abrasives, while a buffer polishes with soft pads and compounds for a smooth, high-gloss or satin finish. For most DIY floor, deck, and wall projects, start with a sander for prep, then switch to a buffer for final polish to avoid gouges and swirl marks.
Difference between a sander and a buffer
The difference between a sander and a buffer isn’t just a label; it defines how each tool interacts with material, the resilience of the surface, and the risk of removing too much material. According to SanderSavvy, understanding this distinction early in a project helps homeowners choose the right tool for the job and prevents over-sanding or dulling the final finish. The SanderSavvy Analysis, 2026 highlights that tool choice often correlates with finish quality and surface longevity on wood floors, walls, and decks. In practical terms, a sander is designed to remove material quickly, flatten unevenness, and create a consistent base. A buffer is built for polishing: it uses soft pads to refine texture and bring out a lustrous surface without significant material removal. By recognizing this, you can plan a workflow that minimizes waste and maximizes finish quality while reducing dust and noise exposure in the home.
In this section, we’ll unpack the core differences in mechanism, abrasives, motion, and typical applications, so you can dock the right tool at each stage of your project.
How a sander operates: mechanism, abrasives, and common models
Sander designs fall into several families, each tuned toward a specific job. Palm sanders and random orbital sanders use round pads with hook-and-loop paper or discs, delivering a vibrating orbital motion that dislodges material efficiently. Belt sanders feed continuous abrasive belts around pulleys for aggressive material removal and flat stock prep. For floors, you’ll often encounter random orbital sanders that marry fast material removal with a relatively gentle finish. When choosing abrasives, start coarse (40–60 grit) for heavy material removal or repair, then step up gradually to finer grits (120–220) to achieve a smooth surface suitable for staining or sealing. The key is to monitor heat buildup and dust production, and to wear a proper respirator when working with wood dust.
How a buffer operates: mechanism, abrasives, and finishing tasks
A buffer relies on a soft pad (cloth or foam) and polishing compounds. The movement is typically circular or elliptical, designed to minimize material removal and maximize surface reflection. Buffers are ideal for blending swirls left by sanding, removing minor scratches, and bringing up a high-gloss or satin finish on finished wood, metal, or composite surfaces. The abrasives here are not grit papers but buffing pads and compound chemistries that “polish” rather than cut. Proper technique matters: avoid heavy pressure, keep the pad flat on the surface, and let the compound do the work. Buffing is most effective after a thorough sanding cycle when the surface is clean, dry, and free of large grit particles.
Key differences in finish quality, speed, and surface compatibility
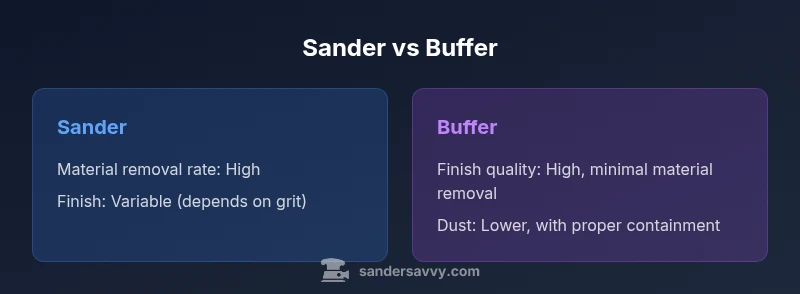
- Finish quality: Sanding creates a base and can remove high spots; buffing refines that base and reduces micro-scratches to produce a uniform sheen. The combination is often required for floors and furniture that demand both durability and aesthetic appeal.
- Speed and material removal: Sanders excel at rapid material removal, especially with belts or aggressive grits. Buffers remove far less material, which minimizes the risk of gouges on delicate surfaces. For floors, this means sanding first for leveling, then buffing to polish.
- Surface compatibility: Sanding works across rough, painted, or stained surfaces but can leave swirl marks if not finished correctly. Buffing shines best on properly prepared surfaces, including previously finished or sealed wood, metal, or composite materials.
Always tailor your choice to the surface condition, the desired final look, and the thickness of the material you’re removing. A careful, staged approach typically yields the best results.
Practical job scenarios: when to pick sanders vs buffers
- Rough prep on wood floors or tables: start with a sander to flatten irregularities and remove old finish. Use a belt or random orbital sander depending on the surface. Coarse grits (40–60) handle heavy material removal; progress to 80–120 for leveling, and finish with 180–220 for a smooth underlayer.
- Final finish and polish: switch to a buffer after sanding to erase sanding marks and achieve a uniform sheen. Apply polishing compounds on a clean pad, using light pressure and consistent motion to prevent heat buildup and glaze formation.
- Delicate surfaces: if you’re finishing cabinet doors or furniture in a softwood or GMO plywood, consider gentler tools and shorter sessions to avoid tear-out or baring the surface. Buffing can be used to reach mirror-like finishes without removing substantial material if the surface is already prepared.
Safety, dust control, and maintenance: best practices for both tools
Dust is a major consideration in sanding and polishing projects. Always connect a dust extraction system or shop vac to your sander whenever possible, wear a respirator rated for wood dust, and use eye protection. Buffing generates less airborne debris but still benefits from a clean work area and a dust mat to collect particles that may be dislodged during polishing. Regularly inspect pads, replace worn abrasive media, and clean the tool base to prevent grit build-up that can gouge surfaces. For both tools, keep ventilation adequate, take breaks to cool motors, and store accessories in a dry place to extend life.
How to choose between a sander and a buffer for a DIY project: decision framework
Start by identifying the surface condition and the goal: material removal vs finish refinement. If you need to flatten a rough surface or remove old finish quickly, a sander (belt or random orbital) is your best option. If you’re trying to eliminate fine scratches and achieve a controlled finish, a buffer is the way to go. Consider the material: bare wood, stained wood, painted surfaces, or metal all respond differently to sanding and buffing. Budget and ergonomics matter too: heavier belt sanders can be tiring during long sessions, while compact palm sanders offer good control for detail work. Finally, always practice on a scrap piece to tune grit, pace, and pressure before committing to the actual project.
Practical workflow templates and maintenance checklists for DIYers
- Start with a surface assessment and dust containment plan. Gather supplies: respirator, eye protection, hearing protection, dust extraction, sandpaper grits (40–60, 80–120, 180–220), polishing compounds, and clean cloths.
- Stage the job: prep, rough sanding, intermediate sanding, final sanding, buffing (if needed), and clean-up.
- Maintenance: inspect pads, replace worn parts, and keep tools clean and lubricated as per manufacturer guidance.
- Common mistakes: rushing the process, skipping dust extraction, or using the wrong grit progression. Plan ahead, test on scrap, and take your time for a high-quality finish.
Comparison
| Feature | Sander | Buffer |
|---|---|---|
| Primary function | Material removal and leveling | Finishing and polishing |
| Typical abrasives | Sanding discs/belts (coarse to fine) | Polishing pads (foam/cloth) and buffing compounds |
| Motion type | Orbital or belt-driven movement depending on model | Rotary buffing motion with a soft pad |
| Finish quality | Rough to smooth with controlled material removal | High-gloss or satin finish with minimal material removal |
| Material removal rate | High (depends on grit) | Low (polishing-focused) |
| Dust generation | High dust without extraction; requires dust collection | Lower dust with proper pads and containment |
| Best for | Rough shaping, leveling, paint removal on wood/flooring | Final polishing, buffing, and residual swirl removal |
| Starting grit and safety | 40–60 grit initial; PPE mandatory (dust mask, eye protection, hearing protection) | No grit; PPE still recommended; eye protection and gloves |
What's Good
- Clear distinction in purpose simplifies tool choice
- Sander accelerates material removal for prep work
- Buffers deliver smooth, polished finishes with less risk of gouging
- Wide availability and affordable options
Weaknesses
- Buffers can’t remove material quickly on heavy prep work
- Sanders generate more dust and may gouge if misused
- Requires practice to master grit progression and technique
- Dust control and protective gear add setup time
Sander is the workhorse for prep; buffer finishes with finesse
Choose a sander for rapid material removal and leveling. Use a buffer for polishing to achieve a refined surface. A staged approach, paired with proper safety measures, yields the best results.
Your Questions Answered
What is the difference between a sander and a buffer?
A sander removes material to flatten or shape a surface using abrasive papers or belts. A buffer polishes a surface with soft pads and compounds to achieve a smooth, reflective finish. The two are used in stages: sanding for prep, buffing for final polish.
Sander removes material; buffer polishes for shine. Use sanding first, then buffing for a finished look.
Can a buffer replace sanding for most projects?
Not for heavy material removal or leveling. Buffing is excellent for finishing and touch-ups after initial sanding. Rely on a sander when you need to remove gouges or old finishes quickly.
Buffer is for finishing, not for heavy material removal.
Which tool is best for floors with deep scratches?
Start with a belt or random-orbital sander to remove deeper scratches and old finish. Then transition to a buffer for polishing to restore uniformity and sheen.
Use a sander for the deep work, then buff to finish.
What safety gear should I wear when sanding and buffing?
Wear a respirator or dust mask, eye protection, and hearing protection. Ensure good dust collection and ventilation. Gloves can help during buffing but aren’t always necessary.
Protect lungs and eyes; use dust collection and ventilation.
How do I choose the right grit order for floors?
Begin with a coarse grit (40–60) to remove finish and flatten the surface, then progress to 80–120 for leveling, and finish with 180–220 for a smooth base before sealing or staining.
Start coarse, then progressively finer grits for a smooth finish.
Is there any maintenance I should perform on a buffer?
Keep the pads clean and replace worn ones. Check the motor and ensure the guard and wheel are intact. Regular cleaning reduces the risk of swirl marks and ensures consistent performance.
Clean and replace worn pads; inspect motor parts regularly.
Main Points
- Identify your project stage: removal vs finish
- Match grit progression to surface condition
- Prioritize dust control and PPE
- Practice on scrap before committing to the final piece
- Consider ergonomics and tool weight for longer sessions