How to Sand for Primer: Step-by-Step Prep for Wood and Walls
Learn how to sand for primer with a proven, safe workflow. From surface prep and grit selection to dust control and readiness, this guide helps homeowners achieve smooth, durable finishes before priming.

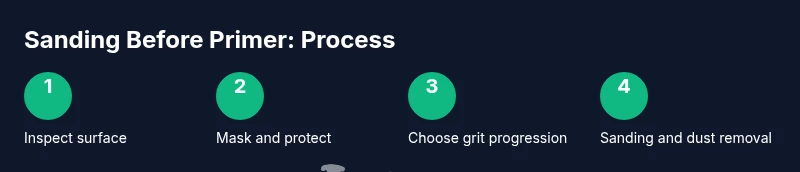
This guide outlines a safe, step-by-step workflow to sand for primer. You’ll start with surface inspection, choose the correct grit progression, protect surrounding areas, and thoroughly dust-clean the surface to ensure optimal primer adhesion. Following these steps helps you achieve a smooth, durable finish and reduces the risk of peeling after priming.
Why Sanding Before Primer Matters
Sanding before applying primer is the critical first step in achieving a durable, smooth finish. By removing gloss, lifting the top layer of any old coatings, and creating micro-abrasions, you give the primer something to grip. This mechanical keying helps reduce peeling and ensures even pigment adhesion across the surface. According to SanderSavvy, a properly abraded surface sets the stage for superior primer bite and long-lasting results. Without adequate sanding, you may see high spots, sags, or uneven absorption after priming. The goal is a surface that accepts the primer evenly, not just a “clean” surface. A well-sanded base paints the path for a flawless finish and minimizes the risk of defects that become visible after painting.
When sanding for primer, pay attention to the substrate. Wood fibers can raise when sanded aggressively, drywall can sand unevenly, and previously painted surfaces may require lighter passes to avoid burning through. A deliberate, methodical approach reduces rework and saves time in the long run. Consistency across the whole area is critical; spot-sanding won’t deliver uniform adhesion. Finally, keep safety in mind: protect your lungs, eyes, and hearing from dust and noise as you work.
Choosing the Right Grit and Sanding Method
Sanding for primer begins with grit selection and the right tool for the job. Start with a coarser grit to remove gloss and level rough spots, then progress to increasingly finer grits for a smooth finish. A typical progression for bare wood is 80–120 grit, then 180–220 grit for the final pass. On painted or glossy surfaces, begin with 120–150 grit to avoid excessive material removal while still providing keying. If you’re working on drywall or plaster, vary your approach to avoid gouging.
The choice between a random orbital sander and hand sanding depends on the surface and access. An orbital sander speeds up large, flat areas and provides consistent abrasion, while hand sanding is advantageous for curves, corners, and delicate edges. For small repairs or intricate details, switch to a sanding block or flexible pad to maintain contact and prevent gouging. Remember: the goal is an even, matte surface free of visible scratches before primer. Sander quality and clean, sharp discs produce noticeably better results.
Grit progression matters. Start rough enough to key the surface but not so rough that you create deep scratches, then refine with finer grits to remove those scratches. Always test a small, inconspicuous area first to confirm adhesion will be strong. A well-chosen grit sequence reduces the need for rework and yields an even primer layer. The SanderSavvy analysis shows that surfaces prepared with a deliberate grit progression exhibit better primer bite and a more uniform finish.
Surface Preparation Steps Before Sanding
Before you touch the surface with sandpaper, do a thorough prep pass. Clear the area and protect adjacent surfaces with drop cloths or plastic sheeting. Remove or tape off hardware, light fixtures, and outlets where possible. Clean the surface with a degreaser or mild soap to eliminate oils and wax residues that can interfere with primer adhesion. In dry environments, allow the surface to dry completely after cleaning.
Inspect for defects such as gouges, cracks, or peeling coatings. If you find repairs are needed, fill cracks or holes with an appropriate wood filler or spackle and allow it to dry fully before sanding. Once repairs are set, lightly sand those patches so they blend with the surrounding area. For high-traffic floors or wood that has seen water exposure, consider moisture testing to ensure the substrate is dry enough for sanding and priming. A clean, dry, repaired surface is the foundation of a durable primer finish.
Dust Control and Personal Safety
Dust control is not optional—it's essential for a safe, effective sanding project. Work in a well-ventilated area or use a dust-collection system connected to your sander. Wear a NIOSH-rated respirator or a properly fitted dust mask, safety goggles, and hearing protection. Use drop cloths to protect floors and nearby furniture, and seal off the work area with painter's tape where needed. Vacuuming or sweeping between passes helps keep dust down and reduces the chance of embedding dust into the primer.
To minimize airborne dust, consider a two-stage approach: first, perform rough sanding with your sander and then do fine sanding by hand in hard-to-reach areas. After sanding, wipe the surface with a tack cloth to pick up remaining dust. High-dust environments can compromise primer adhesion, so it’s worth investing in proper PPE and containment. The goal is a clean, dust-free surface that is ready for primer application.
Step-by-Step Sanding Workflow for Primer
- Inspect and plan the grit progression for the area to be primed. Mark any repairs and rough spots to target during sanding.
- Protect surrounding areas with drop cloths and tape off edges to keep dust contained.
- Clean the surface with a degreaser and allow it to dry completely before sanding.
- If needed, repair cracks or holes with wood filler and let it cure fully.
- Start sanding with 80–120 grit on flat surfaces to remove gloss and even out imperfections.
- Switch to 180–220 grit for the final pass to create a smooth, even texture.
- Sand corners and edges by hand with a sanding block to avoid rounding or gouging.
- Remove dust with a vacuum and finish with a tack cloth to capture fine particles.
- Perform a final visual check: the surface should look uniform with a matte finish and no glossy spots.
- If moisture is used, ensure all dust is removed before priming and allow any damp areas to dry completely.
Tip: Work with consistent pressure and keep the sander moving to avoid creating low spots. A small, handheld mirror can help you spot uneven sections you might miss from eye level.
Troubleshooting Common Sanding Issues
Swirl marks often appear when the sanding pad is worn or kept in one spot too long. Switch to a fresh disc and use overlapping passes with even pressure to minimize swirl patterns. If you see gouges, move to a finer grit and carefully feather the edge around the gouge to blend it back into the surface. Dust buildup can cause clogging and additional scratches; pause to clean the pad and underlying surface.
Raising wood fibers, especially on soft woods, is common after aggressive sanding. Lightly re-sand with a higher grit to flatten the raised grains. If a patchy glue-down area feels sticky or gummy, wipe it with a damp cloth and allow it to dry fully before continuing. When sanding previously painted surfaces, ensure the primer will adhere to the underlying layer by removing any loose or peeling paint first.
Edge and corner care is critical; use a hand-sanding block to avoid rounding, and inspect tight areas with a flashlight to ensure no high spots remain. Finally, check for consistency across large planes; if the surface looks dull in one area, re-sand with the appropriate grit and re-clean before priming.
How to Test for a Primer-Ready Surface
A primer-ready surface should be clean, dry, and uniformly dull with no glossy patches. Lightly rub the area with a tack cloth and run your fingers across the surface to feel for any remaining roughness. If you detect rough patches, re-sand with the appropriate grit and re-tack. A moisture test in the area is prudent if you’ve seen prior humidity issues; wait for the surface to be fully dry before priming.
Perform a small test area by applying a thin coat of primer in a inconspicuous spot. If it wets evenly and dries without showing uneven absorption, the surface is likely ready for full priming. If you notice excessive absorption or blotches, re-evaluate the sanding and prep steps. Consistency is the key to a solid bond between primer and substrate.
Finishing Up: Cleaning and Priming Readiness
Finish by giving the entire surface a final dusting with a tack cloth and a light vacuum pass. Inspect edges, corners, and patches to ensure nothing is left to hinder primer adhesion. Remove all dust from the area and around the room to prevent transport into the primer. Finally, follow the primer manufacturer's instructions for application, drying times, and recommended temperature and humidity ranges. A clean, dry, dust-free surface will give you the best possible primer bite and final finish.
Tools & Materials
- respirator or dust mask(NIOSH-rated respirator or equivalent for dust control)
- safety goggles(ANSI-approved eye protection)
- ear protection(Earplugs or earmuffs for noise protection)
- dust collection vacuum(HEPA-filter-equipped preferred)
- drop cloths or plastic sheeting(Protect floors and nearby surfaces)
- painter's tape(Seal off areas and protect trim edges)
- tack cloth(For final dust removal before priming)
- random orbital sander(With dust port; 5–6-inch pad)
- sanding discs (80–120–180–220 grit)(Have multiple grits ready for progression)
- hand sanding blocks or grip pads(For edges, corners, and detailed work)
- sanding paper sheets (80–320 grit)(Useful for handheld refinement and tight spots)
- wood filler and putty knife(Only if cracks or holes require repair before sanding)
- surface cleaner or degreaser(Remove oils and residues before sanding)
- primer(Have primer ready for after sanding)
Steps
Estimated time: 60-120 minutes
- 1
Inspect and plan
Walk the surface to identify gloss, stains, repairs, and problem spots. Mark areas that will need extra attention and decide the grit progression based on substrate. A quick plan saves time and reduces guesswork.
Tip: Document problem areas with notes or photos for reference. - 2
Protect the workspace
Move furniture, cover floors with drop cloths, and seal off doors or vents as needed. This minimizes dust migration and protects other surfaces.
Tip: Use painter’s tape to protect trim and adjacent walls. - 3
Clean the surface
Wipe down the surface with a mild cleaner or degreaser to remove oils, dust, and contaminants. Allow to dry completely before sanding.
Tip: Dried residue can clog discs and affect adhesion. - 4
Fill cracks and holes
If you find cracks or divots, fill them with wood filler and let cure fully. Once dry, lightly sand to make the surface even with surrounding area.
Tip: Overfill slightly and sand flush to avoid dips. - 5
Rough-sand to remove gloss
Start with 80–120 grit on flat areas to break the glossy surface and flatten uneven areas. Use smooth, even passes and avoid pressing hard.
Tip: Keep the sander moving to prevent gouging. - 6
Refine with finer grit
Switch to 180–220 grit for the final passes. This removes scratches left by the coarser grit and prepares the surface for primer bite.
Tip: Use hand sanding on edges and corners for better contact. - 7
Remove dust thoroughly
Vacuum the area and wipe with a tack cloth to remove fine dust. Do a second pass if needed to ensure a clean, matte surface.
Tip: Dust trapped in pores will ruin primer adhesion. - 8
Check for moisture and dryness
Ensure the surface is completely dry and free of moisture before priming. If you suspect dampness, wait until conditions are right.
Tip: Humidity and temperature affect drying times. - 9
Proceed to priming
With a clean, dry, and uniformly abraded surface, apply your primer per the manufacturer’s instructions. Expect better adhesion and a smoother final coat.
Tip: Test a small area first to confirm compatibility.
Your Questions Answered
What grit should I start with for sanding before primer?
Begin with a coarser grit (80–120) to remove gloss and level rough spots. If the surface is already painted or glossy, start closer to 120–150 to avoid removing too much material.
Start with a rough grit like 80 to remove gloss, then move to a finer grit.
Is water or dry sanding better for primer prep?
For most primer prep, dry sanding is preferred to avoid introducing moisture. Light dampening is acceptable only on stubborn dust, but avoid soaking the surface.
Dry sanding is usually best; dampen only if needed, and dry afterward.
Do I need to fill cracks or holes before sanding for primer?
Yes. Fill large cracks or holes with appropriate filler and allow it to dry before sanding so you achieve a smooth, uniform surface.
Yes—fill bigger defects before sanding for the best result.
Can I prime over painted surfaces without sanding?
Priming over paint without sanding can lead to poor adhesion. Lightly abrade to key the surface and remove gloss before priming.
Don’t skip abrasion when priming over paint—key the surface first.
How long should the surface dry after sanding before priming?
Allow the surface to dry according to the primer and cleaner labels. If in doubt, wait until the surface feels completely dry and dust-free.
Let it dry fully per product directions before priming.
Watch Video
Main Points
- Inspect, protect, and clean before sanding.
- Use a grit progression from rough to fine.
- Dust control is essential for primer adhesion.
- Test the surface and dry thoroughly before priming.