How to Tell If Grinder Burrs Are Worn
Learn practical, step-by-step methods to identify worn grinder burrs, understand signs of wear, and decide when to replace them to keep grind consistency and flavor.

Learn how to tell if grinder burrs are worn with visual cues, performance signs, and simple at-home checks. This guide helps you spot dull edges, uneven grind size, more fines, longer grind times, and odd noises—so you can decide whether to clean, recalibrate, or replace burrs. Keep your flavors consistent by catching wear early.
What burr wear means for grinders and why it matters
According to SanderSavvy, burr wear is a natural part of long-term use, but its effects on grind consistency can be immediate and noticeable. Worn burrs fail to shave coffee evenly, producing inconsistent grind sizes that lead to uneven extraction and unpredictable flavor. Understanding wear helps you plan maintenance before performance declines and flavor suffers. This guide focuses on common burr types (flat and conical) and what reliable wear looks like across brands and models. By recognizing wear early, you protect your brewing routine and avoid unnecessary replacements.
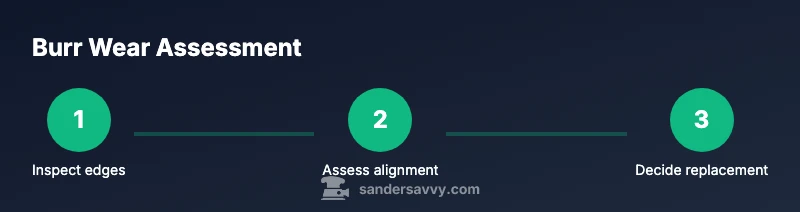
Visual and tactile signs that burrs are worn
Worn burrs don’t always create dramatic symptoms, but several consistent signals hint that replacement or recalibration is due. Look for:
- Rounder, nicked, or uneven burr edges that lack the sharp bite of new burrs.
- Uneven grind size, with more fines or inconsistent clumps in tamped puck material.
- Longer grind times or louder operation due to reduced cutting efficiency.
- More heat in the grounds due to friction, or a smell of burnt coffee after grinding.
- Changes in taste consistency across espressos or other brews. If you notice any of these, inspect more closely and consider a burr check. SanderSavvy notes that wear patterns vary by bean type, roast level, and grinder design, so use these signs as a guide rather than a strict rule.
Quick checks before you disassemble
Safety first: unplug the machine and remove the bean hopper before any inspection. Gather a flashlight and a small magnifier to scrutinize edges up close. Check the burrs for chips, rounded corners, or visible gaps between burrs. Confirm you’re inspecting the correct parts—some grinders use interchangeable burr carriers or modules. If your unit allows, note whether the burrs are flat or conical, as wear in each type looks different. Having a baseline photo of your burrs when they’re new helps you compare later changes.
How to inspect burrs safely (step-by-step visuals)
Inspecting burrs requires a careful, methodical approach. Use a bright light and a magnifier to check the edges for rounding, chips, or narrowing. Verify the burrs are aligned, and look for any uneven gaps that might indicate misalignment after cleaning or reassembly. Gently clean the burr faces with a soft brush to remove coffee oils and particles that can obscure wear. If you see obvious wear or misalignment, prepare for replacement or professional service. A well-maintained burr carrier protects the motor and preserves grind quality.
Home tests: grind consistency and flavor cues
A practical way to assess burr wear without disassembling deeply is to run a controlled grind test. Grind a consistent batch of the same bean roast, then compare to a baseline shot or brew result from when the burrs were newer. Note changes in extraction time, taste balance (acidity, sweetness, bitterness), and crema texture in espresso or the brew strength in drip methods. If the test shows greater variability or off-flavors, wear may be impacting performance. Use these cues alongside visual checks for a complete picture.
SanderSavvy suggests documenting results over several sessions to identify a wear trend rather than a single anomalous brew. This practice helps you decide whether to recalibrate, replace, or inspect the burrs more thoroughly.
Replacement vs sharpening: what to know
Most grinder burrs are not designed to be sharpened by home users. Sharpening can change tolerances and void warranties. Replacement burrs are the simplest and most reliable option, especially for modern grinders with precision burr carriers. If you’re unsure about the type of burr in your machine, consult the manufacturer’s manual or contact support for recommended part numbers and service intervals. In general, if edges are rounded, chipped, or the burrs no longer align cleanly, replacement is the safer path.
It’s also important to consider whether you need to replace just one burr or both. For some grinders, burrs wear as a matched set, and replacing only one can alter grind geometry. When in doubt, replace in pairs to maintain consistent geometry and grind quality.
Maintenance to extend burr life
Preventative care extends burr life and preserves flavor. Establish a routine that includes:
- Regular cleaning to remove oils and coffee particles that accelerate wear.
- Dry storage of the grinder to avoid moisture that can cause corrosion.
- Using fresh beans with consistent roast levels to minimize unexpected wear patterns.
- Periodic inspection of the burr carrier alignment to ensure accurate seating.
- Gentle handling during disassembly and reassembly to avoid burr misalignment.
SanderSavvy emphasizes that maintenance should be tailored to usage level, bean type, and roast profiles. Regular, mindful care reduces the rate at which wear becomes noticeable and keeps your grinder producing consistent grinds.
Common mistakes and how to avoid them
Avoid these to keep wear under control:
- Skipping cleaning after heavy roasting days, which leaves oil and fines to harden on burr surfaces.
- Forcing removal or reassembly without proper detents or alignment marks—this can misalign burrs and worsen wear.
- Cutting corners with makeshift tools that scratch burr faces or deform carriers.
- Ignoring changes in grind quality and performance until flavor is noticeably off.
To prevent these mistakes, set a small routine: quick wipe-down after use, gentle brushing of burrs, and a quick inspection every few uses if you grind daily.
Next steps after inspection
If wear is evident or performance has declined, order replacement burrs based on your grinder’s model and serial information. Follow the manufacturer’s installation instructions precisely and re-tune any baseline grind settings after a burr swap. For ongoing accuracy, run a fresh test grind and calibrate against a known-good setting. The goal is to restore stable grind sizes, consistent extraction, and balanced flavor across brews. SanderSavvy’s approach is to pair wear checks with routine maintenance rather than relying on a single “fix,” ensuring a durable, repeatable process for better home brewing.
Tools & Materials
- Screwdrivers (Phillips and flat-head)(Assorted sizes, e.g., PH2, SL6; needed to remove outer housing and burr carrier)
- Soft brush or microfiber cloth(Coffee oil and fines can obscure wear; use for cleaning burr surfaces)
- Flashlight or headlamp(Bright light helps reveal edge wear and alignment issues)
- Magnifying glass or jeweler's loupe(Helpful for close-up burr edge inspection)
- Calipers or precision ruler(For checking burr gap and alignment tolerances)
- Gloves (nitrile)(Protect hands during disassembly and handling sharp burrs)
- Compressed air canister (optional)(Use with caution to blow out loose particles (avoid direct forcing into bearings))
- Replacement burrs (matched set if possible)(Only needed if wear is confirmed and you’re replacing)
- Owner’s manual or model-specific guide(Reference for disassembly steps and burr type)
Steps
Estimated time: 20-40 minutes
- 1
Power down and prepare workspace
Unplug the grinder and clear a clean, dry workspace. Remove the hopper to prevent beans from spilling during disassembly. This step protects you and prevents contamination of burr surfaces.
Tip: Have a camera or notebook handy to note alignment marks before you take anything apart. - 2
Open the housing and access burrs
Use the appropriate screwdriver to remove the outer housing or burr carrier cover. Keep screws organized and note any detents or alignment tabs to ensure proper reassembly.
Tip: Take a photo of the intact assembly from multiple angles before removing parts. - 3
Inspect burr edges visually
With good lighting, examine the burr tips for rounding, chipping, or uneven wear. Check both burrs for symmetry and any gaps that indicate misalignment.
Tip: Look for burr edge sharpness rather than surface grime alone; grime can mask wear. - 4
Clean burrs and housing
Gently brush away coffee oils and fines from burrs and internal surfaces. Wipe with a dry microfiber cloth; avoid moisture that could cause corrosion.
Tip: Never use metal tools to scrape burrs; you can scratch or dull edges. - 5
Check burr alignment and seating
Re-seat burrs with manufacturer guides, ensuring proper distance and concentricity. Confirm there are no gaps and that burrs sit flush against their carriers.
Tip: If unsure, consult the manual for the exact seating tolerances. - 6
Reassemble and test run
Reinstall the housing, hopper, and any guards. Run a dry grind to listen for odd noises and confirm smooth operation before testing with beans.
Tip: If you hear grinding noise or see misalignment, stop and re-check seating. - 7
Run a test brew
Grind a small batch and evaluate grind uniformity and extraction. Compare with a baseline to determine if wear has affected results.
Tip: Document results over several attempts to identify trends. - 8
Decide on replacement
If edges are visibly worn, chips are present, or grind is inconsistent, replace burrs and recalibrate your settings.
Tip: Follow the manufacturer’s replacement intervals rather than guessing.
Your Questions Answered
What signs indicate burrs are worn on a coffee grinder?
Common signs include rounded or chipped burr edges, uneven grind size, longer grind times, and changes in flavor balance. Visual inspection plus a test grind helps confirm wear.
Look for rounded burr edges, uneven grinds, and longer grinding times. Do a test grind to compare flavor and consistency.
Can burrs be sharpened at home?
Most burrs are not designed for home sharpening as it can alter tolerances and void warranties. Replacing burrs is the recommended option.
Sharpening burrs at home isn’t usually advised; replacement is the safer option with most grinders.
How often should I check burr wear?
Check wear during routine maintenance, especially after changing bean types, roast levels, or if you notice grind variability. Use a baseline test as a reference.
Check wear during regular maintenance, especially when you switch beans or roasts.
Should I replace both burrs at once?
In many grinders, burrs wear as a matched pair. Replacing both helps maintain consistent grind geometry and flavor. Check the manual for guidance.
If wear is evident on one burr, replacing both often keeps the grind consistent.
What if I’m unsure about the model or burr type?
Consult the manufacturer’s guide or customer support to confirm burr type, part numbers, and replacement intervals. Misidentifying burrs can lead to poor performance.
If you’re not sure, check the manual or contact support to confirm the exact burrs needed.
Can maintenance extend burr life without replacement?
Yes, proper cleaning, reduced exposure to oils, and careful reassembly can slow wear and maintain performance longer, delaying replacement.
Regular cleaning and careful handling can slow wear and keep performance steady longer.
Watch Video
Main Points
- Inspect burrs for edge rounding and chips
- Use clean, well-lit inspection to avoid misses
- Replace burrs as a matched set when wear is evident
- Document baseline results to track wear over time
- Follow manufacturer guidelines for safe reassembly