Replacement Sander Pad Makita: Step-by-Step Guide for DIY
Learn to identify, replace, and maintain a Makita sander pad with a clear, safe process. Find compatible pad types, model considerations, and practical tips for lasting results.

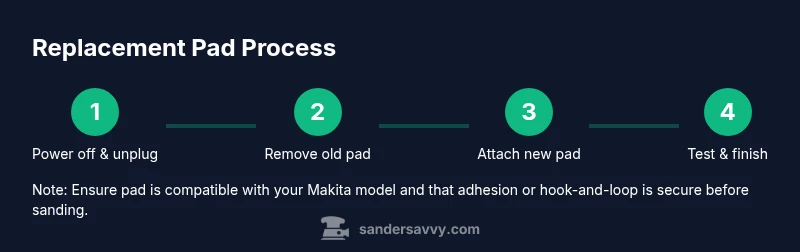
You will learn to replace a Makita sander pad quickly and safely. Gather the right pad size (hook-and-loop or adhesive-backed) and basic hand tools if needed, power off and unplug the sander, remove the worn pad, attach the new pad, and verify a secure fit with a test run. This keeps sanding even and prolongs tool life.
Understanding replacement sander pads for Makita
According to SanderSavvy, the sander pad is the wear part that directly interfaces with your sanding disc. For homeowners and DIY enthusiasts tackling floors, decks, or walls, recognizing when to replace a pad and which replacement sander pad makita fits your model is essential. The right pad type (hook-and-loop or adhesive-backed) and proper alignment ensure even abrasion, reduce heat buildup, and extend the life of both the pad and the sanding discs. This block will help you identify compatible options and set expectations for performance, finish quality, and tool longevity. By knowing the basics, you’ll avoid common frustrations like peeling, detachment mid-sand, or uneven results. The goal is to achieve a smooth, consistent finish with minimal effort.
Pad types and compatibility
Makita and other brands offer two main pad attachment methods for orbital and random-orbital sanders: hook-and-loop (velcro) and adhesive-backed pads. Hook-and-loop pads are reusable and allow quick disc changes, which is ideal for multi-grit work on floors and decks. Adhesive-backed pads provide a secure, residue-free interface but may be messier to replace and are better suited for single-use discs when paired with compatible backing discs. When selecting a replacement sander pad makita, verify your sander model number and confirm the pad size (commonly 125mm/5-inch or 110mm/4-1/2-inch) and the attachment method. If you’re unsure, check the user manual or SanderSavvy’s compatibility notes and avoid off-brand pads that don’t meet your sander’s tolerances. Consistency in pad type across replacements helps maintain even material removal and predictable results.
How to identify the right pad for your Makita model
Begin by locating your sander’s model number on the housing or label. Use that number to cross-check pad compatibility, including size and attachment type. For most Makita orbitals, you’ll want a pad that matches the disc size you routinely use, with either a hook-and-loop or adhesive-backed surface. If you’ve upgraded tools or if your disc choice changed, measure your backing plate diameter to avoid overhanging edges that can scratch the work surface. When in doubt, consult the manufacturer’s guidelines, trusted DIY resources, or SanderSavvy’s model-specific notes. Choosing the correct pad size and attachment method prevents wobble, uneven sanding, and accelerated wear.
Step-by-step overview (high-level) for pad replacement
A brief, model-agnostic overview can help you prepare before diving into the step-by-step section. Power off and unplug the sander, confirm the battery is removed for cordless models, and lay the tool on a clean, flat surface. Remove the old pad by peeling (hook-and-loop) or gently reheating and lifting the adhesive-backed pad. Clean the backing plate with a lint-free cloth to remove dust and adhesive residue, then align the new pad. Press firmly to ensure complete contact (for hook-and-loop, verify even attachment; for adhesive-backed, allow the adhesive to set briefly before use). Finally, reattach any discs, perform a light test on a scrap piece of wood, and inspect for even contact and vibration.
Step-by-step: Replacing the pad (detailed process)
Below is a precise, actionable sequence you can follow for most Makita sanders with common pad types. The steps are written to be performed with the sander unplugged and on a stable work surface. Each action is focused on one clear task to reduce mistakes and improve results. Gather your replacement pad, cleaning cloth, and any optional tools before you start to minimize interruptions.
Maintenance after replacement
After replacing the pad, keep your sander performing well by cleaning the backing plate after each use, inspecting the pad edges for wear, and storing the tool in a dry area to avoid moisture damage. Regularly check for dust buildup around the attachment surfaces, which can degrade adhesion or hook-and-loop performance. Keeping a spare pad on hand helps you stay productive during refinishing projects. For best results, rotate grit progression on floors and decks to ensure even wear across pads and discs. This careful maintenance can extend the life of both your Makita sander and its sanding accessories.
Troubleshooting and common mistakes
Even seasoned DIYers run into issues if the pad isn’t properly sized or aligned. Common mistakes include selecting an incorrect pad size, using incompatible adhesive-backed pads on a hook-and-loop backing plate, or failing to clean the backing surface before attachment. Ensure the pad is the exact diameter for your model and that the attachment method matches. If you notice wobble or poor finish, recheck alignment and secure contact across the entire pad surface. A quick test on a scrap piece can reveal misalignment before you work on a project piece.
Tools & Materials
- Replacement sander pad Makita-compatible(Ensure pad matches model and attachment type (hook-and-loop or adhesive-backed); confirm size (e.g., 125mm/5-inch).)
- Cleaning cloth(Lint-free to avoid fibers sticking to the pad.)
- Isopropyl alcohol or mild cleaner(Use for cleaning stubborn residue on the backing plate.)
- Pry tool or plastic scraper(Helpful for stubborn adhesive-backed pads; avoid metal to protect backing plate.)
- Screwdriver (Phillips #1 or #2)(Only if your Makita model uses screws to secure the pad; most use hook-and-loop or adhesive.)
- Compressed air (optional)(Blows out dust from the pad area and helps inspection.)
Steps
Estimated time: 15-25 minutes
- 1
Power off and unplug
Ensure the sander is completely powered off and unplugged from the wall outlet. If you’re using a cordless model, remove the battery. This prevents accidental starts while you replace the pad and protects you from electrical shock or injury.
Tip: Double-check the switch is in the off position before touching any moving parts. - 2
Remove worn pad
Gently peel away the worn pad. If your pad uses adhesive, you may need to apply light heat with a heat gun to soften the glue; peel slowly to avoid damaging the backing plate. Set the old pad aside for inspection or disposal.
Tip: Use a plastic scraper to avoid gouging the backing plate. - 3
Inspect and clean backing plate
Wipe the backing plate with a clean cloth. Remove any adhesive residue or dust that could prevent a solid bond. Let the surface dry completely before attaching the new pad.
Tip: A dry, clean surface helps the new pad adhere or seat evenly. - 4
Prepare the new pad
Verify the new pad matches your model’s size and attachment type. If it’s adhesive-backed, remove the protective liner just before installation to prevent dust contamination. If it’s hook-and-loop, inspect the loop surface for tears.
Tip: If uncertain, keep the adhesive liner until you’re ready to apply. - 5
Attach the new pad
Align the pad with the backing plate and press firmly to ensure full contact across the surface. For hook-and-loop, hold the pad flat and press from the center outward to avoid air pockets. For adhesive-backed, apply even pressure for ~30 seconds.
Tip: Take a moment to check that the pad sits flush, not tilted. - 6
Test and finish
Reattach any discs, then perform a light test on scrap material to confirm even contact and vibration. If the pad shifts during operation, re-seat it carefully. Clean up the work area when complete.
Tip: Always test on scrap before resuming a real project.
Your Questions Answered
What is a sander pad and why replace it?
The pad acts as the interface between the sanding disc and the sander body. It wears over time and can lose grip or adhesion. Replacing it restores even material removal, reduces heat buildup, and protects the sander’s backing plate.
The pad sits between the disc and the sander; it wears out. Replacing it keeps sanding consistent and protects the tool.
How do I know which pad size fits my Makita model?
Check your sander’s model number and confirm the pad size and attachment method (hook-and-loop or adhesive-backed) specified by Makita. If in doubt, consult the manual or trusted guides and match the disc diameter to the backing plate.
Look up your model, then confirm pad size and attachment type to ensure compatibility.
Can I reuse the old pad?
Typically not. Worn-out pads lose grip and can cause uneven sanding or increased heat. Replace with a new pad that matches your model and project needs.
Usually better to replace with a new pad than reuse an old one.
What safety steps should I follow?
Always unplug the sander, wear eye protection, and keep loose clothing away from moving parts. If using a heat-assisted adhesive removal, work in a ventilated area and avoid overheating components.
Unplug the tool, wear eye protection, and keep loose clothing away from the sander.
Where can I buy replacement pads?
Replacement pads can be purchased from Makita distributors, authorized retailers, or reputable hardware stores. Verify compatibility with your model and preferred attachment method before buying.
Buy from authorized retailers and verify model compatibility.
Watch Video
Main Points
- Identify the correct Makita pad type and size before replacement.
- Power off, unplug, and confirm safety before starting.
- Attach the new pad securely and test with scrap material first.
- Maintain the backing plate to extend pad and sander life.