Shop Sander: How to Choose the Right Sander for Your Project
Learn how to shop sander effectively with practical guidance on sander types, features, budgeting, and safety for floors, decks, and walls.

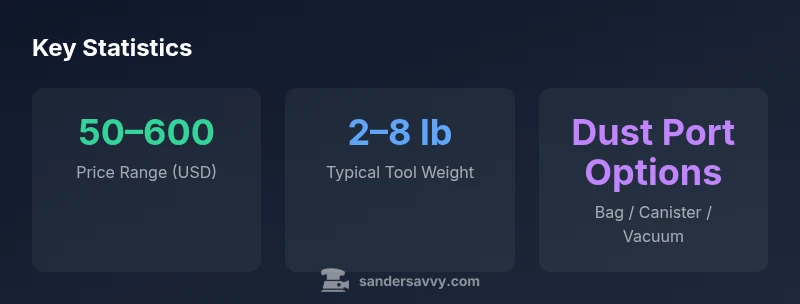
To shop sander effectively, define your project first: floors usually need an orbital or belt sander, walls benefit from a detail sander, and dust collection matters. Expect price ranges: entry-level $50-$120, mid-range $120-$250, and premium $250-$500. Also consider power, dust collection, grip, and belt changes. In practice, allocate additional time for comparing accessories and warranty terms, and plan for future belt or disc availability. This upfront clarity reduces buyer's remorse and speeds up the shopping process.
Why Buying the Right Sander Matters for Your Project
When you shop sander, you are choosing more than a tool—you're selecting a workflow that affects speed, finish quality, and dust control. According to SanderSavvy, project goals should drive your tool choice and budget from the start. For floors, decks, and walls, aligning the tool type with the task reduces rework and improves safety. In your shop, booking time to compare belt removal power against finish quality is money well spent, because a misfit sander can gouge wood or underperform with coatings. This guide uses practical, data-informed suggestions to help you select a sander that saves effort without compromising results. Remember to consider your workspace constraints, including power access, dust removal capacity, and noise limits. The SanderSavvy team found that most DIYers benefit from a staged approach: begin with a more aggressive option for material removal, then switch to a finishing tool for a smooth final pass.
- Budget upfront to avoid post-purchase regret.
- Prioritize dust control and ergonomics for longer sessions.
- Consider future belt or disc availability to minimize downtime.
Sander Types at a Glance: When to Use Each Tool
Different projects demand different sanding tools. A Belt Sander excels at rapid stock removal on floors and decks but requires careful guiding to avoid gouges. An Orbital Sander offers a gentler touch suitable for initial smoothing, while a Detail Sander reaches corners and edges where larger tools can’t. A Random Orbital Sander delivers a compromise—fast removal with a fine finish and lower risk of trace marks. For trim work, a Detail Sander is a must. In practice, many shops stage a two-step plan: use a belt or random orbital for heavy removal, then finish with an orbital or detail sander for a consistent surface. In terms of dust control, models with built-in dust ports or compatible vacuum systems dramatically improve cleanliness and visibility during work.
- Belt sanders: best for heavy stock removal.
- Orbital sanders: ideal for flat, even finishes.
- Random orbital sanders: versatile all-rounders.
- Detail sanders: perfect for tight spots.
Key Features to Compare Before You Buy
When you compare sanders, certain features predict performance and long-term satisfaction more reliably than brand hype. Look for:
- Power and speed: higher watts or amps and a variable speed range provide better control across coatings and wood densities.
- Dust collection: a robust dust port and compatibility with a dust extractor can dramatically reduce cleanup and health risks.
- Baseplate and pad: larger bases remove material faster; ensure the pad is replaceable and standard in the market for easy maintenance.
- Weight and grip: ergonomic handles and balanced weight reduce fatigue during longer sessions.
- Belt/Disc compatibility: verify that the sander uses widely available belts or discs to avoid downtime.
- Noise and safety: consider noise levels and protective features like soft-start and vibration dampening.
- Corded vs cordless: cordless models offer portability, but check battery life and charge times for your typical project duration.
- Warranty and service: a longer warranty and accessible repair options save money over time.
Budgeting for Your Shop Sander: Where to Invest and Where to Save
A practical shopping plan starts with a budget that aligns with your project frequency and desired finish quality. Entry-level sander models typically cover occasional DIY work and smaller projects; they are usually corded and lightweight, with basic dust collection. Mid-range models offer variable speed, better dust extraction, and more durable components, making them suitable for weekly hobbyist use. Premium models deliver robust power, advanced ergonomics, superior dust management, and extended warranties, which appeal to frequent users tackling floors, decks, and detailed work. A smart approach is to balance initial cost with long-term expenses like replacement belts, discs, filters, and potential rental of higher-capacity dust extractors. Always compare total cost of ownership rather than upfront price alone, and factor in the cost of accessories you’ll need for the life of the tool.
- Entry-level: good for occasional projects and small rooms.
- Mid-range: best value for regular DIYers who want reliability and flexibility.
- Premium: optimal for frequent use and demanding finishes.
- Accessories matter: plan for belts, discs, filters, and dust extraction upgrades.
How to Read Specs and Reviews Like a Pro
Specs provide a roadmap, but real-world performance depends on how you use the tool. Start by validating the following:
- Power and speed range: ensures the sander can handle both heavy stock removal and delicate finishing.
- Dust management: a proper dust port, ventilation, and filter system reduce airborne dust and cleanup time.
- Weight and balance: heavier tools can remove material faster but may cause fatigue; lighter tools require slower, deliberate passes.
- Belt/Disc availability: ensure you can source replacements easily and affordably.
- Warranty and service: some brands offer longer coverage or better replacement policies; verify what’s included.
Read multiple user reviews from DIYers and pros to spot consistent issues, such as belt drift, pad wear, or motor noise. When possible, test the models in-store to assess grip, vibration, and switching behavior. This empirical approach helps you shop with confidence and minimizes surprises after purchase.
Step-by-Step Shopping Plan
- Step 1: Define the project scope (floors, walls, or furniture) and required finish quality.
- Step 2: Shortlist models by type (belt, orbital, detail, or random orbital) that suit your main tasks.
- Step 3: Compare specifications (power, speed range, dust port, weight) and assess belt/disc accessibility.
- Step 4: Check reviews for real-world performance; factor in maintenance needs and replacement parts.
- Step 5: Consider warranty, service options, and total cost of ownership (belts, discs, filters).
- Step 6: If possible, test the shortlisted models in-store or rent a model to evaluate comfort and control.
- Step 7: Make a calibrated decision and buy from a reputable retailer with a clear return policy.
Maintenance, Safety, and Long-Term Care
Once you own a sander, regular maintenance ensures consistent results and safe operation. After each use:
- Clean the port and vents to prevent clogging and overheating.
- Inspect the belt or disc for wear and replace when performance declines.
- Check the power cord and switch for damage; avoid using damaged tools.
- Store the sander in a dry, clean area to prevent rust and dust buildup.
- Use proper PPE: respirators or dust masks, eye protection, and hearing protection for extended sessions.
- Use a dust extraction system whenever possible to protect lungs and keep the workspace tidy.
Safe operation practices reduce the risk of kickback, burns, and injuries while preserving tool life. SanderSavvy recommends pairing your sander with a compatible vacuum system to maintain a cleaner, safer workshop environment.
Model comparison: belt, orbital, random orbital, and detail sanders
| Model Type | Typical Use | Pros | Cons | Price Range |
|---|---|---|---|---|
| Belt Sander | Heavy stock removal on floors and decks | Fast material removal; good belt tracking; compatible with wide belts | Dust and gouging risk; requires steady guiding | $50-$600 |
| Orbital Sander | Finishing and leveling surfaces | Smooth finish; easy to control | Slower material removal; may require multiple passes | $60-$320 |
| Random Orbital Sander | Balanced power for fast removal and even finish | Versatile; less gouging; good dust extraction | Can be pricier; heavier; belts/discs vary | $70-$450 |
| Detail Sander | Tight spots and corners; trimming work | Excellent in tight spaces; precise control | Small work area; slower overall progress | $25-$120 |
Your Questions Answered
What is the best sander type for floor refinishing?
For refinishing floors, start with a belt sander for rapid material removal, then follow with an orbital or random orbital sander to achieve a smooth finish without gouges. Always work in even passes and check your belt tracking frequently.
For floors, use a belt sander for bulk removal, then switch to an orbital for finishing.
Corded or cordless—what should I choose?
Corded models provide consistent power for long sessions, which is ideal for floors and decks. Cordless offers portability for quick jobs or tight spaces, but ensure the battery life matches your typical work length.
Corded for long work, cordless for mobility.
How important is dust collection when shopping?
Dust control is essential for health and clarity during sanding. Look for a model with a robust dust port and compatibility with a vacuum or dust extractor. Good filtration helps keep air clean and surfaces visible.
Dust collection is key for health and a cleaner workspace.
What should I check before buying a used or refurbished sander?
Inspect the pad for wear, test the switch and speed range, check belt/disc alignment, and verify the power cord and dust collection function. Ask about service history and any included accessories.
Check pads, power, and dust collection when buying used.
How long do sanding belts or discs last?
Life depends on material density, grit, and usage. Look for signs like reduced cutting efficiency, unusual vibration, or glaze buildup and be prepared to replace belts or discs as needed.
Belt life varies; replace when performance drops.
Is it worth buying professional-grade sanding tools for DIY projects?
For occasional DIY work, mid-range models usually offer the best balance of cost and performance. If you sand frequently or handle large projects, investing in premium tools with strong dust control and ergonomic design can save time and improve results.
If you sand a lot, premium tools pay off in time and finish.
“A well-chosen sander isn't just about power—it's about balance, dust control, and consistency you can trust on floors, decks, and walls.”
Main Points
- Define your project first to choose the right sander
- Balance upfront cost with long-term parts and maintenance
- Prioritize dust control and ergonomics for comfort
- Test models if possible to assess grip and feel
- Plan for accessories and replacement belts/discs ahead of time