When to Use a Planer vs Sander: A Practical Guide
Learn when to use a planer vs sander for wood stock, from thicknessing and flattening to finishing touches. Practical tips, safety, and workflow from SanderSavvy.

TL;DR: Use a planer to remove material and flatten stock, then finish with a sander for a smooth, even surface. Planing is ideal for thicknessing and trueing boards; sanding handles texture, scratch pattern, and final finish. In short, start with planing for stock preparation, then switch to sanding to achieve the final appearance.
Core roles: Planer and Sander in woodworking
Understanding what each tool does is the first step in a smart workflow. When to use a planer vs sander depends on board stock, desired thickness, and final finish. The planer is designed to remove material from the face of a board, creating a flat, even surface and uniform thickness. The sander, by comparison, gradually wears away the surface to achieve smoothness and a refined finish. For homeowners tackling floors, decks, or furniture, mapping out when to use a planer vs sander early in the project helps avoid wasted effort and material. According to SanderSavvy, the most common missteps come from using a planer as a finish tool or treating a sander as a stock-removal device. The SanderSavvy team found that proper sequencing—planing first to bring boards to a near-flat thickness, then sanding for surface quality—delivers predictable results and reduces tear-out. In practice, you should plan for both tools as part of a two-stage workflow, starting with removal and flattening, then finishing with blot-free, even surfaces. The keyword that guides this decision is clear: when to use a planer vs sander is tied to stock quality, project goals, and finish requirements. Keep in mind that planers can produce planed edges that need trimming; sanders can blend corners and joints for a polished look. For most projects, starting with a planer to achieve uniform thickness, followed by a dedicated sander for the final finish, offers the best balance of efficiency and quality. This approach aligns with SanderSavvy’s guidance and the practical realities homeowners face. By keeping the core goal in focus, you ensure you select the right tool at the right time, which reduces waste and shortens the project timeline.
Key Differences in Cut Type and Finish
The planer and the sander operate at different ends of the wood processing spectrum. A planer removes a fixed amount of material from the board’s face with a flush-cutting cut, producing a uniform thickness and a flat surface on the board face. A sander, on the other hand, removes material gradually, finishing with a smooth surface and a finer feel to the touch. When to use a planer vs sander hinges on the stage of the project: planing is ideal for stock preparation, removing cup, warp, or twist, while sanding excels at removing planer marks, evening joint lines, and achieving the desired level of gloss or matte finish. In practice, you’ll see planners leave a surface that is flat but often coarse; sanding afterward gives you control over grain direction, scratch depth, and surface texture. Because planers cut across the grain in a shallow, consistent way, tear-out can occur on figured or very hard woods; a careful approach, paired with sanding afterward, helps mitigate these issues. The trade-off is speed versus finesse: planers can remove material quickly but may require trimming edges and jointing; sanders are slower but essential for a refined finish. In the end, the decision of when to use a planer vs sander should align with your project’s finish requirements and your tolerance for waste. Sander choices—random-orbital, belt, or palm—also affect the final look by controlling how aggressively you remove material and how uniform the texture will be as you progress toward the final coat.
How to Evaluate Your Project Before Picking Tools
Before turning on either tool, do a quick assessment: what is the stock condition, what thickness do you need, and how fine a finish do you expect? The first question is thickness. If you need to remove substantial material to achieve a target thickness, and the boards are fairly straight and true, a planer can be the best initial choice. If the boards are cupped, twisted, or have uneven edges, you’ll likely need additional stock work that may require edge planning or jointing; you should decide if planing will sufficiently flatten the face, or if you need to reserve some material for flattening via sanding later. The second factor is the finish. If your goal is a smooth, paint-ready surface or a glossy polyurethane finish, a dependable sanding sequence is essential, and you should favor planing for stock removal but reserve the final pass for sanding. The third factor is grain and species; for figured woods or soft woods with a tendency toward tear-out, plan to use a sacrificing pass or technique that minimizes tear-out, followed by sanding to refine the texture. Finally, assess the workspace and tool availability. A well-ventilated area, clean dust collection, and the right grit range help ensure that the work proceeds smoothly. Understanding these criteria will help you answer the core question: when to use a planer vs sander for this project? In most cases, you’ll favor planing first to bring boards to a uniform thickness, then switch to sanding to achieve your final finish.
Common Scenarios and Practical Guidelines
Scenario A: Rough stock for a living room floor. You receive long boards with cupping and twist. Start with a planer to achieve a near-flat, uniform thickness; trim edges as needed. Then use a belt or random-orbit sander to smooth the surface and remove planer marks. Scenario B: Rehabilitating old cabinetry faces. If the goal is to flatten and thickness-match components, planing can reduce waste by removing glue lines and irregularities; finish with a careful sanding sequence for a uniform surface. Scenario C: Building a workbench top or a tabletop. Planing is essential to bring mismatched boards into alignment and thickness, followed by progressive sanding to achieve a consistent surface texture. For any scenario, remember that the order matters: plan first, sand second. If you’re unsure whether a given board should be planed, start with a light cut and inspect the results; if the surface remains warped or cupped, consider jointing or more aggressive planing before continuing. A practical trick is to run boards through the planer with the grain orientation consistent across boards; this reduces tear-out and yields a consistent baseline for sanding.
Step-by-Step Workflow: Planer Then Sander
Step 1: Inspect and prepare the boards. Remove nails, check for knots, and decide on a target thickness. Step 2: Set up the planer with proper depth adjustment and a clean outfeed to prevent snipe. Step 3: Run boards through the planer in a single direction with consistent feed rate, taking shallow passes to minimize tear-out. Step 4: Joint the edges as needed, and inspect the flatness again. Step 5: Choose grit progression for sanding. Start with a lower grit to remove any remaining tear-out, then move to higher grits to refine the surface. Step 6: Use masking and clamping to control the board during sanding, and apply finish as soon as the surface is smooth and even. Throughout this process, refer back to the core question of when to use a planer vs sander; the optimal workflow uses planing for stock removal, then sanding for finish. For beginners, practice on scrap stock first to learn how your specific planer’s mouth and cutter head behave vis-a-vis your chosen wood species.
Safety, Dust Management, and Best Practices
Safety first: wear eye protection, hearing protection, and a dust mask or respirator when working with planers and sanders. Planers throw long ribbons of wood chips that can break down quickly, so keep a clean, high-draft workspace and use a vac system or a dust collection bag. Sanding creates fine dust; use masks to avoid inhaling fine particles, especially with hardwoods and finishes. Control dust by sealing the work area, using a shop vac with a cyclone or a dedicated dust extractor, and ensure your sanding surfaces are flat and clean to avoid clogging paper. Always check the tool’s power switch and hold-downs before starting, and never attempt to reach into the cutting area while the machine is running. When you’re ready to switch from planing to sanding, turn off the tool, unplug, and allow the cutter head to come to a complete stop. The habit of clearing shavings and cleaning the worktable between steps reduces the risk of foreign objects causing misfeeds or kickback. Because the finish you aim for depends on the correct sequence, dust control is not optional; it is part of the final quality outcome.
Maintenance, Longevity, and Tool Care
Regular maintenance extends the life of planers and sanders. Wipe down the castings after each use, replace worn cutter heads or sanding belts as needed, and calibrate the depth dial on the planer to avoid over-cutting. Keep blades sharp; dull blades cause burn marks and tear-out that undermine the finish you hope to achieve. For sanding, replace worn belts or discs, check for glazing and clogging, and maintain consistent tension to avoid belt or disc slippage. Periodically check the dust collection system and hoses for leaks; a clean system increases efficiency and reduces dust exposure. Follow the manufacturer’s recommendations for lubrication, belt changes, and blade replacement intervals. Store tools in a dry place to prevent rust and corrosion. Practice good maintenance to ensure you’re ready for future projects with the same level of accuracy and care. A final tip: keep a scrap stock handy that mirrors your project wood so you can test planing depth and sanding progression before applying the workflow to your actual boards.
Common pitfalls and troubleshooting in planer vs sander workflows
Even experienced woodworkers encounter tricky scenarios. If planing leaves heavy tear-out on figured wood, switch to a lighter cut or use a sacrificial pass with a rough surface to reduce tear-out before repeating. If you notice snipe at the ends of boards, adjust infeed and outfeed tables, ensure proper support, and use roller stands to minimize shifts. When finish quality seems inconsistent, verify that your sanding sequence uses appropriate grits and finishing methods; for example, starting with a medium grit on a smooth, flat surface often yields better results than jumping straight to a high grit. If dust collection seems inadequate, reconfigure ducting and check the vacuum’s airflow; better dust control improves both health and the final finish. Finally, remember that the decision about when to use a planer vs sander depends on board condition and project demands, not on habit. With disciplined practice and careful inspection, you can avoid most common missteps and produce consistent, high-quality results.
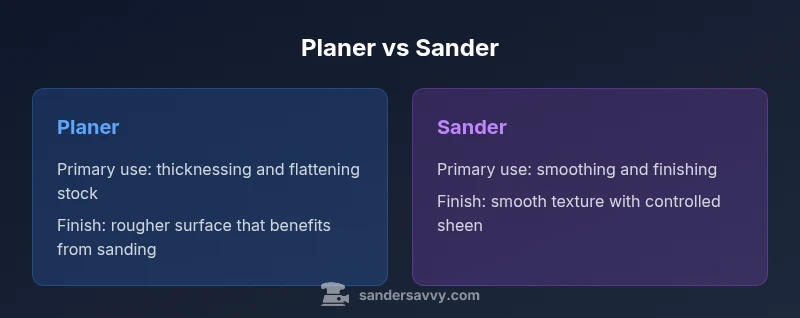
Comparison
| Feature | Planer | Sander |
|---|---|---|
| Primary purpose | Stock removal and flattening to uniform thickness | Final smoothing and finishing texture |
| Finish characteristics | Leaves cutter marks; requires sanding for finish | Produces smoother surface with controlled finish |
| Typical material removal approach | Aggressive removal per pass on flat stock | Gradual removal with emphasis on texture and gloss |
| Ideal scenarios | Stock preparation, flattening boards, thicknessing | Final smoothing, edge finishing, finishing coats |
| Limitations | Tear-out on figured woods; edges may require trimming | Less effective for drastic thickness reduction; relies on finish steps |
| Best practice workflow | Planing before sanding for most projects | Sanding after planing for the final look |
| Cost considerations | Lower upfront cost for entry-level planers | Moderate to higher cost for power sanders depending on type |
What's Good
- Delivers a clear, efficient stock-prep workflow
- Enables precise thickness control and flat faces
- Sanding after planing yields a refined finish
- Both tools work well in tandem for most projects
Weaknesses
- Requires setup and alignment between steps
- Planing can waste material if misused or overused
- Sanding requires correct grit progression and technique
Planer-first with sanding for finish delivers best balance
A two-stage workflow—planing for stock removal and flattening, then sanding for final finish—consistently yields flat, smooth, and predictable results. This approach minimizes waste and tear-out while maximizing finish quality.
Your Questions Answered
Can a planer remove cupping or warps effectively, or is sanding required first?
A planer can reduce cupping by removing high spots, but extreme warp or twist may require jointing or clamping to flatten before planing. After initial planing, follow with sanding to smooth remaining irregularities and achieve a uniform surface.
A planer can knock down high spots to flatten stock, but for warped boards you may still need sanding to finish the surface evenly.
Should I sand before using a planer?
In most cases, planers work best first to establish thickness and flatten surfaces. Sanding before planing can obscure true thickness and complicate subsequent stock removal. Reserve sanding for after planing to achieve the final smooth finish.
Usually you plan first, then sand for the final finish.
What are signs I should switch from planing to sanding mid-project?
Switch when you notice planed surfaces still show tear-out, chatter marks, or inconsistent texture. If you reach target thickness but still need a fine finish, transition to sanding. For most projects, planing sets the stage and sanding delivers the final feel.
Switch when the surface needs refinement beyond thicknessing.
Is one tool safer for beginners than the other?
Both tools require respect and proper technique. Beginners often start with a light planing pass to learn feed control, then practice sanding with a guide to maintain flatness. Always use PPE and dust control.
Both tools demand caution; start with lighter cuts and proper safety gear.
How do I choose grit progression for sanding after planing?
Begin with a medium grit to remove planer marks, then progress to finer grits to refine the surface. Finish with the grit appropriate for your finish (e.g., 120-220 for polyurethane). Test on scrap stock first.
Start medium, then move to fine grits for a smooth finish.
Can I rent tools to test this approach before buying?
Yes. Renting a planner and a few sanding options lets you evaluate how the workflow works on your stock and helps you decide what to purchase long-term. This is especially useful for owners new to stock flattening and finishing.
Rent tools to test the workflow before investing in gear.
Main Points
- Plan first, sand second to optimize stock prep
- Choose planer for thicknessing and flattening; sanders for finish
- Sequence and technique matter to reduce tear-out
- Dust control and safety are integral to quality results