Difference Between Sander and Planer: A Practical Guide
An analytical comparison of sanders and planers for homeowners and DIYers, covering purpose, use cases, safety, and how to choose each tool for floors, decks, and walls.

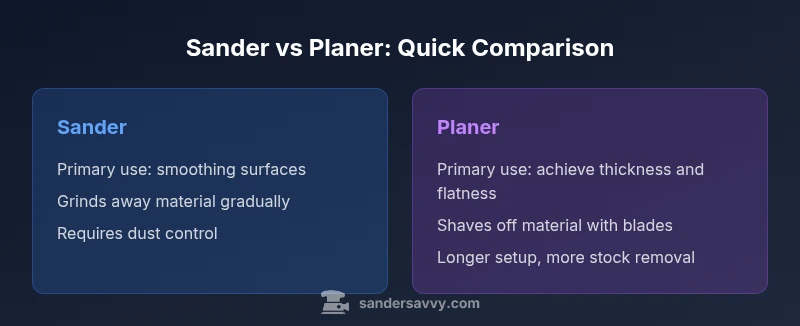
Sanders and planers serve different purposes in woodworking: a sander smooths surfaces by abrasion, while a planer shaves thin layers to bring boards to thickness. The key difference is material removal vs finishing. Choose a sander for finishing, blending, and minor reshaping tasks; opt for a planer when you need to flatten and thickness boards. Sander is typically more portable; planer often requires a dedicated workspace.
What Are Sanders and Planers? Definitions
In woodworking, a sander is a handheld or benchtop tool that uses abrasive surfaces to remove material and smooth a surface. A planer, by contrast, uses knives on a rotating cutterhead to shave thin layers off a board, bringing it to a consistent thickness. Understanding their core function is essential for choosing the right tool for a job. According to SanderSavvy, the distinction often comes down to one simple question: Are you trying to remove material quickly or achieve a precise thickness and flatness? Sanders span from light finishing to aggressive stock removal, while planers excel at flattening and preparing boards for joinery. The right choice depends on the surface you’re working with and the stage of your project.
Core Differences at a Glance
- Primary purpose: a sander smooths surfaces through abrasion; a planer removes material to achieve thickness and flatness.
- Operation: sanders use abrasive discs, belts, or pads; planers use rotating knives to shave off thin layers.
- Finish vs thickness: sanders tailor finish quality and contour; planers ensure uniform board thickness and straight edges.
- Tools within each category: sanders include random-orbit, belt, and palm; planers are typically benchtop or portable planar machines.
- Portability and space: sanders are generally more compact and portable; planers are larger, often bench-mounted.
- Dust and chips: sanding creates fine dust about surface area; planing produces wooden chips that require collection and disposal.
- Cost and value: sanders usually offer a wider range of affordable options; planers demand higher upfront investment for stock removal at scale.
Material Removal vs Finishing: The Practical Implications
Material removal rate and finish quality are the core differentiators. A sander removes material gradually through abrasive grit, which makes it ideal for blending joints, smoothing edges, and preparing surfaces for finish coats. However, it can be slow on thick stock and may leave micro-grooves if grit is not matched to the job. A planer shaves away material with blades, delivering rapid thickness reduction and flat surfaces, which is essential when preparing boards for joinery or smoothing bowed stock. The trade-off is potential tear-out if grain orientation is not managed, and less control over fine shaping without subsequent sanding. For most projects, planing first to achieve flat stock, followed by careful sanding for finish, yields the best results.
Common Tools Within Each Category
- Sanders: Random-orbit, belt, palm, detail sander, and finish sander options" with different pad geometries and grit ranges.
- Planers: Benchtop planers and portable thicknessers with adjustable cutterheads and feed speeds.
- Accessories: Sandpaper grits, sanding discs, dust collection attachments, and in the planer category, replacement blades and stone sharpeners.
- Choosing the right combination depends on stock condition, desired finish, and project scale. As a rule of thumb, use a planer for initial stock removal on rough boards, then switch to a sander for precise finishing and smoothing.
Surface Prep Scenarios: Floors, Decks, and Walls
For flooring, a belt sander may remove finish quickly, while a random-orbit sander delivers a smoother final surface before finishing coats. For decks, planers are less common unless you’re resurfacing deck boards to thickness; sanding is the standard method to refinish with less material removal. On walls, you’ll primarily rely on sanding to smooth patchwork, remove old finishes, and prepare surfaces for new coatings. Always test a small area first to understand how your wood responds to each tool and adjust grit and feed rate accordingly.
Safe Handling and Personal Protective Equipment
Always wear eye protection, a dust mask or respirator rated for fine dust, hearing protection, and gloves when appropriate. Sanding and planing generate airborne particles and flying chips; ensure adequate ventilation and use a vacuum or dust extractor to minimize exposure. Keep hands away from blades or abrasive surfaces, and unplug tools during blade changes or blade adjustments. For decks and exterior wood, be mindful of weather exposure and moisture that can affect both performance and safety.
Setup, Attachments, and Dust Control
Choose the right attachments for your material and task: sanding discs for belt or orbital sanders, and dust bags or cyclones for planers. Many planers and some sanders benefit from direct-to-vacuum dust extraction. Always secure workpieces and use push sticks or guards when necessary. Maintain proper blade sharpness or grit change intervals to minimize chatter and achieve a clean finish. Regular dust-control checks are essential for maintaining a safe, efficient workflow.
Common Mistakes and How to Avoid Them
Common errors include rushing stock removal with a planer on warped boards, which can cause chatter and gouges, and using an aggressive grit on delicate surfaces with a sander, leading to swirl marks. Always plane with the grain, work in a consistent direction, and verify surface flatness with a straightedge. When sanding, start with a coarser grit to break the surface, then progress to finer grits for a smooth finish. Prevent tear-out by backing the board or using a sacrificial platen on delicate species.
Maintenance and Care for Sander and Planer Motors
Keep blades sharp and aligned, replace worn sanding pads, and check belts for tension. Clean dust from vents and housings to prevent overheating. Lubricate moving parts as recommended by the manufacturer and store tools in a dry environment. Regular maintenance reduces vibration, extends life, and preserves performance across projects.
Cost, Availability, and Value Considerations
Budget-friendly sanders offer versatile performance for light to moderate jobs, while planers tend to require higher upfront investment but deliver rapid material removal for larger projects. Availability varies by model and country; consider your typical workload, space, and whether you’ll benefit more from speed or finish quality. For most DIYers, a mid-range sander paired with a basic benchtop planer provides balanced capability and value.
Quick Scenarios: When to Reach for Each Tool
When you need to flatten an untrimmed board, plane to thickness first. When you need to blend edges and smooth surfaces after planing, switch to sanding. For refinishing a floor or deck, begin with heavy stock removal (sanding or planing as appropriate) and finish with finer sanding for near-ready surfaces. In most projects, using both tools in sequence yields the best results.
Final Thought: Integrating Both Tools in a Project
Sanding and planing are complementary processes. Planers establish flatness and thickness, then sanding refines surface quality and prepares for finishing. The most effective workflow uses the strengths of each tool, minimizing material loss while maximizing finish quality. The key is planning the sequence, choosing the right grit or blade, and applying the correct technique for the species of wood you’re working with.
Comparison
| Feature | Sander | Planer |
|---|---|---|
| Primary purpose | Smooth surfaces and shapes via abrasion | Remove material and achieve target thickness via shaving |
| Typical operation | Abrasive pads/discs or belts with oscillating/rotary motion | Rotating knives shaving thin layers off stock |
| Best job type | Finishing, shaping, blending joints, minor stock removal | Thickness reduction, flattening boards, stock preparation |
| Finish quality | Variable based on grit; can be exceptionally smooth | Uniform thickness; precise flat surfaces |
| Portability/space | Generally compact and portable | Often bench-mounted or larger footprint |
| Dust/chips | Dust or fine particles; dust collection common | Produces wood chips; requires dust collection for cleanliness |
| Cost range | Lower to mid-range options | Higher upfront investment for power and stability |
| Best for | Fine-tuning, finishing, light material removal | Rapid stock removal and true thickness |
What's Good
- Versatile for different finishes and surfaces
- Can achieve extremely smooth finishes with the right grit
- Planers rapidly flatten and thickness boards
- Sanders are portable and adaptable across jobs
- Great for edge blending and subtle shaping
Weaknesses
- Sanding can be time-consuming for large stock
- Planers can cause tear-out on certain grains
- Planers require more workspace and setup
- Noise and dust generation with both tools
Use both tools in sequence: plane first for thickness and flat stock, then sand to refine the surface for a high-quality finish.
For most projects, a planer sets the foundational dimensions and flatness, while a sander delivers the final finish. The right approach blends both tools to minimize waste and maximize appearance.
Your Questions Answered
What is the main difference between a sander and a planer?
A sander uses abrasive surfaces to remove small amounts of material and create a smooth finish. A planer uses knives to remove thin layers and bring boards to a precise thickness. In practice, planing establishes flat stock, while sanding refines the surface before finishing.
A sander smooths; a planer thicknesses. Planers strip stock; sanders polish it.
When should I use a sander instead of a planer?
Use a sander after planing to fine-tune surface smoothness, blend edges, remove minor imperfections, and prepare surfaces for finish. If you’re not trying to drastically remove material, a sander is the better tool.
Use the sander for finishing touches after planing.
Can I use a planer on curved or irregular surfaces?
Planers are designed for flat stock and work best on straight boards. They can create problems on curved surfaces and may require additional shaping with other tools or careful stock preparation.
Planers work best on flat stock; avoid deep curves.
Is a sander necessary if I own a planer?
Not strictly, but a sander complements a planer by finishing and blending edges, reducing tear-out, and achieving a finer surface. Most projects benefit from both tools in sequence.
A sander is often essential for the final finish after planing.
What safety gear should I wear with sanding and planing?
Wear eye protection, a dust mask or respirator, hearing protection, and gloves when needed. Use a vacuum or dust extractor to minimize airborne dust and chips.
Protect your eyes, lungs, and ears when sanding or planing.
How can I avoid tear-out when planing?
Choose the correct blade sharpness, plane with the grain, and use backer boards on delicate species. Feather light passes and proper stock support help reduce tear-out.
Plan with the grain and keep the board supported to avoid tear-out.
Main Points
- Plan early: plane to thickness, then sand for finish
- Match grit and blade height to wood species
- Always use dust control and PPE
- Reserve planing for stock removal and flattening
- Use both tools in sequence for best results