Does Sanding Get Rid of Rust? A Practical How-To Guide
Explore whether sanding removes rust, when it’s appropriate, and how to finish and protect metal surfaces. Includes step-by-step methods, safety tips, and prevention strategies for DIYers.

Sanding can remove surface rust and smooth the metal, but it does not cure the underlying corrosion or stop future rust. For mild surface rust on tools, a light grit (60–120) can reveal clean metal; deep pitting requires rust converters, rust removal chemicals, or restoration. Always wear protection and test a small area.
Does sanding get rid of rust?
According to SanderSavvy, does sanding get rid of rust is a common question for homeowners and DIYers. Sanding can remove surface rust and improve the appearance of metal, but it does not reverse the chemical process of oxidation or stop future rust on its own. The life of a metal project hinges on what comes after cleaning: sealing, coating, and proper maintenance. This section outlines how sanding interacts with rust, where it helps, and where it falls short. You’ll learn how rust starts, why surface rust is easier to treat, and how to judge whether sanding alone will meet your goals.
Understanding rust types: surface rust vs deep rust
Rust is more than a color on metal; it’s a chemical reaction that weakens the surface when left unchecked. Surface rust sits on top and can often be removed with time and the right abrasive. Deep rust penetrates into pores and may cause pitting, flaking, or hollow areas where sanding alone won’t restore strength. When you identify the rust type early, you can choose a method that preserves the integrity of the metal and minimizes material loss. Remember: sanding is a cosmetic fix if the substrate is intact, but it won’t recreate metal that’s been eaten away by corrosion.
Grit progression and sanding techniques for rust
Start with a coarse grit to remove the loose rust and scale, then progressively move to finer grits for a smooth finish. Common sequences begin with 60–80 grit, move to 120–180 grit for rust removal, and finish with 220–320 grit for a clean, paint-ready surface. Keep steady, even strokes, and avoid staying in one spot too long to prevent gouging. For curved or tight areas, a detail sander or a wire wheel can help pre‑selective metal areas before final smoothing.
Tools, safety, prep, and surface cleaning
Preparation is just as important as the sanding itself. Put on safety glasses, gloves, and a dust mask or respirator to protect against rust dust and metal particles. Work in a well‑ventilated area or outdoors with a dust extraction system. Clean the surface with a degreaser or mineral spirits to remove oil or residues that could hinder adhesion of coatings. A tack cloth or clean microfiber helps remove sanding dust before moving to the next grit. This step reduces the chance of trapping debris under a topcoat.
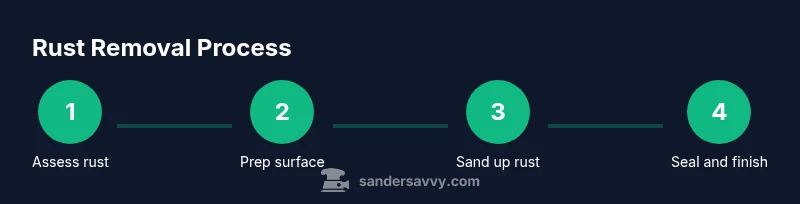
Step-by-step approach for light surface rust
- Protect your work area and put on PPE. 2) Use a wire brush to loosen loose rust and debris. 3) Begin sanding with 60–80 grit along the grain or in circular motions for flat surfaces. 4) Wipe the area clean with a degreaser and tack cloth, then inspect for remaining rust. 5) Move to 120–180 grit to smooth and blend edges. 6) Finish with 220–320 grit to prepare for primer. 7) Clean again and apply a rust-preventive coating. 8) Allow adequate curing time before use or exposure to moisture.
Alternatives when rust is deeper: rust converters, chemical removers, and resurfacing
If rust has penetrated the metal or caused significant pitting, sanding alone may not be enough. Rust converters chemically neutralize iron oxide and convert it to a more stable compound that can be painted over. Commercial rust removers can dissolve rust from the surface but should be used with care to avoid damage to underlying metal. For heavily corroded parts, you may need to replace the affected area or consult a metal specialist to assess structural integrity.
Preventing future rust after sanding: sealing and maintenance
After removing rust, the key step is to seal and protect the metal. Apply a rust-inhibiting primer, followed by your chosen paint or clear coating. For outdoor metal, consider a primer with corrosion inhibitors and a topcoat designed for exposure. Regular maintenance—cleaning, drying, and touching up chips—extends the life of the finish. Store or use metal items in dry environments to minimize moisture exposure, and address any moisture source promptly.
AUTHORITY SOURCES
- OSHA safety guidelines for working with rust and metal sanding: https://www.osha.gov
- Extension service guidance on metal preservation and rust prevention: https://extension.psu.edu/does-rust-removal
- NIST resources on materials corrosion and protection: https://www.nist.gov
How to decide between sanding and other methods
Sanding is best for small, surface-only rust on non-load-bearing parts or decorative metal that requires cosmetic improvement. If the rust has caused deep pits, structural weakening, or if you need a long-term protective finish in a high-moisture environment, rust converters, primers, or professional refinishing methods may be a better choice. Always test a small area first and evaluate the substrate after rust removal to determine whether to proceed with coating or replacement.
Tools & Materials
- Orbital or detail sander(Mid-range power preferred for consistent results; use dust collection if possible)
- Grit sandpapers (60, 120, 180, 220)(Sequence: heavy rust removal to smoothing)
- Wire brush or wire wheel attachment(Loosen heavy rust and scale before sanding)
- Safety gear: safety glasses, gloves, dust mask or respirator(Protect eyes, skin, and lungs from dust and particles)
- Vacuum or dust extractor(Keep dust under control and improve visibility)
- Rust converter or rust remover chemical (optional)(Use only if rust persists after sanding or for preservation)
- Solvent or degreaser for surface cleaning(Degrease before sanding for better coating adhesion)
- Clean rags and tack cloth(Wipe between grits to prevent grit embedding)
Steps
Estimated time: 1-2 hours (depending on rust extent and surface area)
- 1
Set up workspace and safety gear
Clear the area and put on PPE. Ensure good ventilation or work outdoors. This protects you from dust exposure and potential chemical fumes from rust converters.
Tip: Use a dust collection system to capture fine rust particles at the source. - 2
Loosen loose rust with a brush
Use a wire brush or wheel to knock off flaky rust and scale. Do not press too hard; the goal is to expose clean metal beneath.
Tip: Brush at a slight angle to avoid gouging the surface. - 3
Start sanding with coarse grit
Begin with 60–80 grit to remove remaining rust quickly. Use even strokes, moving along the grain on flat surfaces or in circular motions on curved parts.
Tip: Keep the sander moving to prevent heat buildup and heat discoloration. - 4
Progress to medium grit and inspect
Switch to 120–180 grit, wipe with a degreaser, and inspect for pits or remaining rust. If you see deep pits, you may need more aggressive treatment or replacement.
Tip: Check a small test patch under lighting to assess depth. - 5
Finish with fine grit
Move to 220–320 grit to create a smooth, paint-ready surface. This reduces texture and ensures better coating adhesion.
Tip: A tack cloth removes fine dust for a flawless finish. - 6
Clean, test, and apply protection
Wipe the surface clean and allow it to dry completely. Apply primer with rust inhibitors, then topcoat or seal as desired.
Tip: Allow full cure time before exposure to moisture or heavy use.
Your Questions Answered
Does sanding remove rust completely?
Sanding can remove surface rust, but it may not eliminate deep corrosion or structural damage. In cases of extensive rust, additional treatments or replacement may be required.
Sanding removes surface rust but may not fix deep rust; deeper problems may require additional treatment.
What grit should I start with for rust?
Begin with a coarse grit like 60–80 for heavy rust removal, then move to 120–180 for smoothing, and finish with 220–320 for a paint-ready finish.
Start with a coarse grit and progressively move to finer grits for a smooth finish.
Is sanding safe on all metal surfaces?
Sanding is generally safe on intact metal surfaces, but avoid sanding thin or structurally compromised parts. Test in a hidden area first and stop if you see thinning or dulling of the metal.
Yes, but be cautious with thin or weak metal and test first.
Should I use rust converters after sanding?
Rust converters can stabilize residual rust and improve coating adhesion. Use according to product directions, especially when rust remains after sanding.
Converters can help stabilize remaining rust after sanding.
Can sanding create dangerous dust?
Yes. Rust dust can irritate eyes and lungs. Use PPE and a dust collection system or vacuum to minimize exposure.
Rust dust is a health hazard; wear PPE and collect dust.
What about rust on exterior metal parts?
Exterior metal benefits from rust-inhibiting primers and outdoor-grade topcoats. Ensure the surface is clean and dry before applying any coating.
Exterior rust needs durable coatings after prep.
Watch Video
Main Points
- Sanding removes surface rust but not deep corrosion.
- Progress from coarse to fine grits for best results.
- Always finish with protective coatings to prevent recurrence.
- Use dust control and PPE to stay safe.
- Evaluate substrate integrity before choosing a redo or replacement.