What to Do If Your Grinder Isn’t Working
SanderSavvy's fast, safe troubleshooting guide helps homeowners diagnose a grinder that won't start, with practical checks, fixes, and safety tips tailored for DIYers.

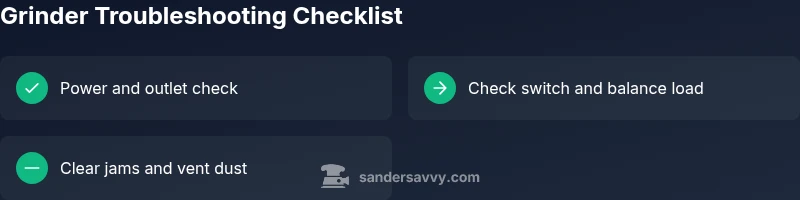
Start with the simplest checks: unplug the grinder, inspect the power cord and outlet, and reset any tripped breakers. If power is fine, test the switch and trigger, then look for a clogged vent or jammed wheel. If it still won’t start, let the tool cool and consult the manual or a pro.
Why grinders stop working and what to do about it
According to SanderSavvy, a non-start on an angle grinder usually signals a simple electrical fault or a mechanical jam, not a burned-out motor. This quick assessment helps homeowners decide whether to unplug, inspect, or call a pro. In this guide, we unpack a safe, thorough troubleshooting flow tailored for DIYers, with clear steps and safety reminders. By following the steps below, you can often restore function without expensive repairs or downtime. We’ll cover power checks, switch health, bearing and brush wear, and how to handle jams safely. Always start with the lowest-risk checks and proceed methodically so you don’t miss a simple fix. If you encounter sparks, unusual smells, or damaged cords, stop immediately and seek professional help. This approach aligns with practical safety principles that keep you and your workspace protected while you diagnose the issue.
Immediate safety and power checks
Safety is the first step when a grinder won’t start. Always unplug the tool before any inspection. Check the power outlet with another device to confirm the circuit is live, and inspect the power cord for cuts or exposed wiring. If you use an extension cord, ensure it is rated for the grinder’s amperage and that connections are secure. Look for a tripped circuit breaker or a GFCI outlet; reset as needed. If the outlet or breaker seems unreliable, move the grinder to a known-good outlet. These power checks are often the simplest and most effective way to rule out a common failure mode, and they avoid unnecessary disassembly. For safety, wear eye protection and gloves during inspections, and keep metal jewelry away from moving parts.
Electrical and switch diagnostics
If power checks pass, the problem may lie in the switch or trigger mechanism. Inspect the on/off switch for any looseness, chattering, or visible wear. If you can, disconnect the switch housing and look for burnt smell or melted insulation. Some grinders use capacitors to provide a surge when starting; if the switch feels loose or the trigger sticks, the starting circuit could be failing. Do not attempt to repair high-voltage components unless you are qualified. If the switch feels degraded, replace the switch or have a pro diagnose further. Always unplug before handling electrical components, and test the unit after any switch replacement.
Mechanical checks and jam clearance
Mechanical issues are a frequent reason grinders fail to start. Clear any jammed material around the guard, wheel, and spindle. Remove the wheel or disc and inspect for cracks or misalignment; ensure the mounting nut is tight but not over-torqued. Debris in the cooling vents can cause overheating; use a soft brush to remove dust. Check the cooling fan if accessible—unusual resistance or grinding noises can indicate a bearing issue. If the wheel binds or rubs against the guard, realign or replace the disc. Handle with care—grinders can store energy in a spinning rotor, so never work with a loose wheel or damaged guard. This mechanical check often resolves issues without motor repair.
Symptom-based diagnosis and action plan
Different symptoms point to different root causes. No power or dead outlet usually means a power/cord issue or a tripped breaker. A hum with no spin often indicates a jam, overload, or worn brushes. Overheating that triggers a thermal cut-out points to a clogged vent or excessive load. If you notice sparking or a burning smell, discontinue use and unplug the grinder immediately. Use a basic flow: power check → switch test → jam removal → cooling period → test spin. When symptoms persist after basic checks, consider professional service to avoid safety risks. This section emphasizes a methodical approach to isolate the cause and choose the right fix without guessing.
When to call a professional and next steps
If you encounter damaged cords, burnt components, smoking, or you cannot locate the fault after following basic checks, it’s time to call a professional. A qualified technician can assess bearing wear, brush condition, or internal capacitors and switches that require specialized tools. You should also contact a pro if the grinder is under warranty and you’re unsure how to perform legitimate repairs. While DIY fixes cover most common causes, some scenarios demand professional attention to avoid injury or further damage. After a professional service, ensure you follow a maintenance schedule to prevent recurrence.
Steps
Estimated time: Estimated total time: 30-45 minutes
- 1
Unplug and inspect power source
Unplug the grinder from the outlet and visually inspect the plug and cord for cuts or exposed conductors. Wiggle the plug to ensure the connection is solid. If you find damage, replace the cord before retrying connection to power.
Tip: Damaged cords are a major shock risk—avoid using a damaged cord. - 2
Test outlet and circuit
Plug another device into the same outlet to confirm it’s delivering power. If the outlet is dead, reset the breaker and test again. If the breaker trips again, stop and consider a professional inspection for overloads or wiring faults.
Tip: Use a non-contact voltage tester to verify live wiring safely. - 3
Inspect and test the switch
With the grinder unplugged, inspect the switch for visible wear or scorch marks. If you can access the terminals safely, reseat the connector or replace the switch if loose. Reassemble and test at low load to verify operation.
Tip: Do not force a stiff switch; replacement is often the safer option. - 4
Check for jams and overheating
Remove the wheel and clear any debris from the spindle and guard area. Check cooling vents for dust buildup and clean them. If the motor tripped on thermal protection, allow cooling before testing again.
Tip: Never run a grinder with clogged vents; overheating damages bearings. - 5
Inspect bearings and brushes
If accessible, check brushes for wear; replace if length is shorter than manufacturer's minimum. Listen for grinding noises that indicate worn bearings. If you’re not sure how to replace brushes, consult the manual or a pro.
Tip: Keep a small spare brush kit on hand for common grinder models. - 6
Reassemble and test under light load
Reinstall the wheel, guard, and cover. Plug in and test at low speed and light load to ensure smooth operation. Gradually apply more load while monitoring for heat or unusual noises.
Tip: Always wear eye protection and gloves during testing. - 7
Document and decide
Record what you tested and the outcome. If the grinder runs under light load but stalls under heavy load, you may have a motor issue or brush wear needing professional service. If the issue persists after all steps, seek professional help.
Tip: A maintenance log helps track wear and plan future replacements.
Diagnosis: Grinder won't start or stops unexpectedly
Possible Causes
- highPower issue (outlet, cord, breaker)
- highOverload or thermal cut-off triggered
- mediumFaulty switch or trigger mechanism
- lowWorn brushes or motor components
Fixes
- easyTest outlet with another device; inspect power cord; reset breaker or GFCI
- easyAllow grinder to cool; clear jams; verify vent cleanliness; replace brushes if applicable
- mediumReplace faulty switch or cord; consult the service manual or a pro
Your Questions Answered
Why won’t my grinder start even though the outlet works?
If the outlet is live, the issue may lie with the switch, cord damage, or a jam. Start by inspecting the switch and power cord for wear, then check for debris or a trapped wheel. If the switch is fine, test the trigger consistency and look for a motor overload indicator.
Check the switch and cord first; if those are fine, inspect for jams and cooling issues before testing the motor.
What does it mean if the grinder hums but won’t spin?
A humming grinder usually signals a jam, overload, or worn brushes. Remove the wheel and clear obstructions, then test the motor with light load. If it still won’t spin, inspect brushes and bearings or consult a professional if you’re unsure.
If it hums, there’s likely a mechanical jam or worn brushes; clear obstructions and check bearings.
Is it safe to use the grinder after overheating?
No. If the grinder overheats or trips on thermal protection, let it cool completely and inspect for dust buildup or overload. After cooling, test carefully under light load. If overheating recurs, professional service may be required.
Let it cool, check for dust buildup, and test under light load. If overheating comes back, get professional help.
When should I replace brushes in a grinder?
Brush wear depends on usage, but if you see sparking, a reduced performance, or the motor won’t start despite power, brushes may be worn. Replace with the correct kit for your model and verify gap settings per the manual.
If you see sparking or poor starting, brushes might be worn and may need replacement.
Can I repair a grinder myself if I’m not experienced?
Basic checks are okay for DIYers with caution and proper PPE. For electrical components, bearings, or motor work, consult the manual or a professional. Avoid opening sealed motors or capacitors unless you’re trained.
Basic checks are fine, but avoid complex electrical repairs if you’re not trained.
How can I prevent grinder downtime in the future?
Regular cleaning, proper dust control, and periodic inspection of cords, switches, and guards help prevent downtime. Store spare parts like brushes and discs, and follow a routine maintenance schedule per the manual.
Keep it clean, maintain parts, and follow the manual for a longer-lasting grinder.
Watch Video
Main Points
- Unplug before any inspection and wear safety gear
- Rule out power/outlet problems before disassembly
- Clear jams and clean vents to prevent overheating
- Test switches and bearings with care, replacing parts as needed
- If unresolved, seek professional service