Grinder Not Working: Urgent Troubleshooting Guide
If your grinder won’t start, this practical, urgent guide walks you through power, safety, and component checks to get back to work safely.

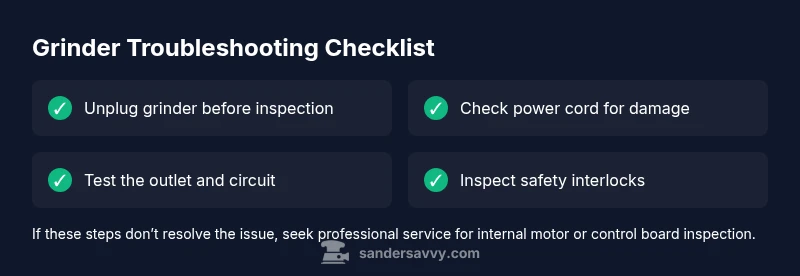
Power issues and safety interlocks are the most common reasons a grinder won’t start. Check that the outlet and circuit aren’t tripped, unplug and inspect the cord for damage, and verify the grinder’s safety lock or trigger is fully engaged. If it still won’t run, follow the diagnostic flow to identify whether a component or service is needed.
Quick diagnostics: is it power or safety?
When a grinder won’t start, the quickest path to a fix is ruling out power and safety causes first. According to SanderSavvy, most grinder not working scenarios begin with a simple power issue or a stuck safety mechanism rather than a failed motor. If you’re staring at a stubborn tool, begin with these rapid checks: unplug the grinder before touching anything; test the outlet with another device to confirm it’s live; reset the circuit breaker if the outlet is on a shared circuit. Next, confirm the safety lock or deadman switch is fully engaged and that the trigger is free to operate. If there’s no response after these steps, document the symptoms (no spin, slow grind, or intermittent operation) and move to the diagnostic flow. This approach protects you from shock and avoids unnecessary disassembly. Remember: never force a tool that won’t start; always check connections first, then proceed.
These early checks set the foundation for a safe, effective troubleshoot-and-fix process. The goal is to isolate whether the issue is external power, a safety mechanism, or something deeper inside the grinder. If you discover a dead outlet or a tripped breaker, resolve that first—your grinder’s reliability depends on a stable power source.
Check the power supply: outlet, cord, and circuit
Power issues account for a large share of grinder malfunctions. Start by inspecting the outlet and circuit: confirm the outlet is delivering power, test with another tool, and check your circuit breaker or fuse. If you’re using an extension cord, inspect its length and condition—a damaged or overly long cord can cause voltage drop that prevents the grinder from starting or running smoothly. If the outlet or circuit seems weak, reset breakers and swap to a known-good outlet. Replace any suspect extension cords. While testing, ensure the grinder is unplugged when you switch between checks. If the grinder still won’t start after confirming power, move to the next check in the diagnostic flow. Consistency here prevents wasting time on internal components that are still fine.
Inspect the power cord and plug for damage
A scratched, nicked, or frayed cord is a common culprit for a grinder not working. Inspect the entire length of the cord, including the strain relief near the plug, for cuts, exposed conductors, or burn marks. If you spot any damage, discontinue use and replace the cord or have it professionally repaired. Also check the plug prongs for bending or scorching, which can indicate poor contact or a short. If the cord is compromised, do not attempt temporary fixes; supply a replacement cord that matches the grinder’s amperage rating. At this stage, you should have ruled out external power issues and be closer to identifying a potentially internal fault or safety-related cause.
Safety interlocks and trigger mechanisms
Most grinders incorporate safety interlocks or deadman switches that require a deliberate action to operate. If the trigger is sticky, intermittently engaging, or the interlock is stuck, the grinder will not start or will cut out. Test the trigger with the power unplugged, then re-seat the switch with the cord plugged in to confirm it actuates smoothly. If you notice signs of wear, corrosion, or a damaged switch assembly, replacement is often the safer and more durable path. Do not bypass safety features; if the interlock fails, your risk of injury increases dramatically. When in doubt, replace the faulty switch or have a professional service it.
Overload protection and cooling
Many grinders include thermal protection that shuts the motor off if it overheats. If you recently used the tool for an extended period or blocked dust extraction, it may have overheated and will require cooling before reuse. Allow the grinder to rest for 15–30 minutes in a dry, ventilated area, then try again with lighter loads and proper ventilation. If it starts but overheats quickly again, inspect the cooling vents for dust buildup and clean as needed. Repeated overheating can indicate a more serious issue like worn brushes or rotor binding, which may require professional service or replacement.
During this phase, maintain a safe distance from the abrasive wheel, ensure the wheel is properly clamped, and keep the work area free of flammable dust. Overheating is a common cause of intermittent operation and power shutdowns; addressing it early saves both time and money.
Brush and motor health
If the grinder still won’t run after power and safety checks, the issue could be the motor itself or worn carbon brushes. Carbon brushes transfer current to the motor; when they wear down, you’ll see weak performance, sparking, or a dead motor. Inspect accessible brushes through the side cover or service manual, and replace them if they’re worn down to the length specified by the manufacturer. If you’re not comfortable inspecting motor components, consider a professional assessment. Worn brushes or motor windings are not typically safe for DIY repairs and could void warranties. In many cases, replacing the motor or the entire tool is more cost-effective than an internal repair.
Drive system, gears, and belt checks
A grinder with a belt drive or gear system can fail to start if the belt is slipped, jammed, or the gear teeth are worn. Listen for unusual grinding noises when attempting to start, and inspect the belt for cracks or glazing. If the belt is loose or misaligned, adjust tension according to the manual or replace it. For gear-driven grinders, examine for gear wear or misalignment. A seized or binding drive system often prevents start-up and can cause safety shut-off triggers to engage. When diagnosing drive issues, ensure the tool is unplugged and the work area is clear of debris. Replacing worn drive components restores smooth operation and prolongs tool life.
Repair vs replacement: when to call a pro
If you’ve completed the basic checks, the spark of doubt remains whether this grinder is worth fixing. For older units or models with complex internals (brushless motor, sealed bearings, or custom control boards), professional service or a replacement may be the safer option. Always compare the repair cost and time with the price of a new tool, particularly when warranty coverage has expired or is limited. SanderSavvy recommends weighing safety, warranty status, and the cost of parts against the convenience of a new unit. A pro can confirm electrical safety, inspect hidden damage, and ensure you’re up to current standards. If you notice burning smells, smoke, or melted components, stop using the tool immediately and seek professional service.
By following these steps, you’ll identify whether the issue is a simple power or safety problem, or a more serious internal fault that requires professional intervention. Remember, the goal is safe, reliable operation with minimal downtime.
Summary and next steps
When diagnosing grinder not working, start with power and safety checks, proceed to cord and interlock tests, then assess thermal protection and internal drive components. If you reach the end of the diagnostic flow without a fix, don’t push it—safety should come first. Document symptoms, parts examined, and actions taken to aid any future troubleshooting or professional service. With careful checks and proper safety, you’ll minimize downtime and extend the life of your grinder.
Steps
Estimated time: 45-60 minutes
- 1
Unplug the grinder
Before any inspection, unplug the grinder from the power source to avoid shock. This is the crucial first step before you touch any internal parts.
Tip: Always unplug and discharge residual energy before handling any power tool. - 2
Inspect the power cord
Look for cuts, nicks, or exposed wires along the length of the cord and at the plug. If you find damage, replace the cord with an OEM or compatible part.
Tip: Damaged cords are a leading cause of electric shock and tool failure. - 3
Test the outlet and circuit
Plug another device into the same outlet or circuit to confirm power. If the outlet is dead or the circuit trips, resolve that first before retesting the grinder.
Tip: Avoid using multiple high-draw tools on the same circuit. - 4
Check safety interlocks and switch
Engage and release the trigger several times to feel for a sticky or inoperative switch. If the interlock feels loose or won’t reset, replacement may be required.
Tip: Safety features are non-negotiable; do not bypass them. - 5
Let it cool if overheated
If the tool became hot during use, turn it off and allow it to cool in a ventilated area for 15–30 minutes before trying again. Dirty vents can cause overheating.
Tip: Clean dust from vents during cool-down to prevent future overheating. - 6
Inspect brushes and drive train
If accessible, inspect carbon brushes for wear and check belt or gears for binding. Replace worn parts per manufacturer specs.
Tip: Worn brushes can cause low power and intermittent operation. - 7
Decide on repair vs replace
If major internals are damaged or the cost of repair approaches or exceeds a new tool, replacement is the safer choice.
Tip: Consider warranty status and safety certifications when deciding.
Diagnosis: Grinder won’t start or stalls during operation
Possible Causes
- highPower outlet or circuit issue
- mediumSafety interlock or trigger not engaged
- highDamaged power cord or plug
- lowThermal overload or cooling needed
- lowWorn brushes or motor fault
Fixes
- easyTest outlet with another device and reset circuit breaker if needed
- easyEnsure safety lock/deadman switch is properly engaged and responsive
- easyReplace damaged cord or plug; use manufacturer-specified replacement
- easyAllow cooling; check for dust buildup and ventilation, then re-test
- mediumConsult a pro to inspect brushes, windings, or control board
Your Questions Answered
What should I check first when a grinder won't start?
Start with power and safety: test the outlet, reset the circuit, and ensure the safety lock is engaged. If there’s no response, continue with the diagnostic flow.
First check the outlet, circuit breaker, and safety lock, then proceed with the diagnostic flow if it still won’t start.
Can a damaged power cord cause this issue?
Yes. A damaged cord can interrupt current flow or trigger safety mechanisms. Replace the cord with an OEM-compatible part before testing again.
Yes. A damaged cord can stop the grinder from working. Replace it and test again.
Is it safe to open the grinder housing to inspect internals?
Only after unplugging and following manufacturer guidance. Internal inspection requires expertise; if you’re unsure, stop and seek a professional.
Only if unplugged and you know what you’re doing. If unsure, call a pro.
What if the grinder overheats and stops?
Let it cool in a dry, ventilated area. Check for dust in vents and ensure adequate airflow before attempting to use again.
Let it cool, clean the vents, and try again with proper airflow.
When should I replace brush or motor components?
If brushes are worn beyond spec or the motor shows sparking, replacement is often needed. Consider professional service for motor issues.
Replace worn brushes or service motor if sparking or performance drops.
How do I decide between repair and replacement?
Compare repair cost, downtime, and warranty with the price and safety benefits of a new unit. If safety is questionable, replacement is wise.
Weigh repair costs and downtime against buying a new unit and warranty.
Watch Video
Main Points
- Unplug before any inspection.
- Rule out power and safety issues first.
- Don’t bypass safety features.
- Cooling and ventilation matter for thermal protection.
- Decide repair vs replacement based on safety and cost.