Grinder Not Working on Breville: Step-by-Step Troubleshooting
Urgent guide to diagnose and fix a Breville grinder that won’t start or grind. Step-by-step checks, safety tips, and maintenance to prevent future jams.

If your grinder not working on Breville, start with the basics: power, switch, and burr jams. The most common causes are a dead outlet, a tripped overload switch, or a jam in the burrs. Begin by plugging into a known-good outlet, then press the power switch firmly. If it still won't run, continue with the detailed steps below.
Quick diagnostics overview
According to SanderSavvy, electrical issues top the list of reasons a Breville grinder stalls, followed by burr jams and faulty switches. Start with the simplest checks to avoid unnecessary disassembly. In this section, you’ll learn how to reproduce the problem safely and gather clues for the diagnosis. This approach aligns with our expert guidance at SanderSavvy, where we emphasize safe, methodical troubleshooting to protect both you and your equipment. The initial impressions you gain here will help you decide whether you can proceed with hands-on inspection or if professional service is truly required. Remember: a calm, systematic method reduces the risk of causing further damage and speeds up resolution.
Common causes for a Breville grinder not starting
- Power issues: a dead outlet, damaged cord, or a tripped circuit breaker can stop the motor before it begins. - Switch faults: a faulty power switch or miswired safety switch can prevent power delivery even when the grinder is plugged in. - Burr/jam problems: bean debris, stuck burrs, or a blocked hopper can immobilize the grinding mechanism. - Overheating: repeated use without breaks can trigger thermal protection. The goal is to verify each cause in a controlled way, documenting symptoms as they appear so you can notify Breville support accurately if needed.
Safety first: unplug, wait, and inspect
Always unplug before any inspection. Let the motor cool if it has recently overheated. Wear safety glasses when inspecting burrs and use a small brush to avoid pushing debris further into the chamber. Keep hands clear of moving parts and never bypass safety features. If you smell burning or notice melted plastic, stop immediately and seek professional service.
Basic checks you can perform in minutes
Test the power outlet with a known-working device, inspect the power cord for cuts, and ensure the plug is seated firmly. Re-seat the hopper after cleaning, and verify the grind size dial isn’t stuck. If the unit has a reset function, perform a clean reset per the manual. Track any error indicators or beeps and correlate them with the Breville model’s guide to determine the likely fault.
How to inspect the power switch, cord, and hopper
Remove the hopper and access the power switch. Feel for a solid, tactile click when you press it. Inspect the cord for any bends or exposed conductors. If the switch feels loose or intermittently cuts power, it’s a warning sign that it needs replacement by a technician. Check the contact points at the plug for corrosion or burn marks, which can indicate a failing connection.
Cleaning and maintenance to clear jams and improve reliability
Disassemble the burr carrier according to the Breville model’s manual and remove any trapped beans or dust. Use a dry brush or compressed air to clean burrs, but avoid lubricants or liquids that can damage the grinding surfaces. After cleaning, reassemble carefully and verify all components sit properly. Regular maintenance reduces the chance of recurrence and extends the life of your grinder.
What to do if the overload protection trips
If the grinder shuts down with a noticeable click or beep, it may have overheated or detected a fault. Let it cool for at least 20-30 minutes before attempting to power on again. If it continues to trip after cooling, professional service is recommended to inspect internal safety switches and wiring. Do not bypass protection as this can cause further damage or risk.
When to contact Breville support or a technician
If you’ve ruled out outlets, switches, and burr jams and the grinder still won’t run, contact Breville support or a qualified technician. Have your model number, purchase date, and a short description of symptoms ready for faster service. Don’t attempt internal repairs beyond the manual’s guidance. Keeping a record of the symptoms helps the technician diagnose more quickly and accurately.
Steps
Estimated time: 60-90 minutes
- 1
Power down and unplug
Disconnect from power, remove the hopper, and wipe any loose debris. This prevents accidental activation during inspection. Keep the area dry and clear.
Tip: Never work with live electricity; a dry workspace reduces shock risk. - 2
Check the outlet and cord
Test the outlet with a known-working device to confirm power. Inspect the cord for cuts or nicks. If the cord or plug shows damage, do not reuse.
Tip: Use a grounded outlet to get an accurate test. - 3
Inspect the power switch
Access the switch and feel for a crisp, consistent click. If it feels loose or intermittently cuts power, the switch may be failing and require replacement.
Tip: Take photos of wiring before disconnecting any leads. - 4
Open burr housing and inspect burrs
Carefully remove burr carrier and hopper. Look for bean fragments or metal shards that can impede rotation. Do not force stubborn burrs—gentle tapping and brushing helps.
Tip: Use a soft brush; avoid metal tools that could scratch burrs. - 5
Clean and reassemble
Clean all parts with a dry brush. Reassemble in the reverse order, ensuring tight but not over-tight connections.
Tip: Check alignment marks to ensure correct seating. - 6
Test operation without beans
Plug back in and run the grinder empty to confirm the motor runs without resistance. Listen for smooth operation and absence of grinding noise that signals jams.
Tip: If it stalls now, there is likely an internal fault. - 7
Test with beans and adjust
Add a small amount of beans and test at a coarse setting, then fine-tune. If grinding is inconsistent or slows, the burrs may require professional servicing.
Tip: Do not force the motor at high resistance. - 8
Decide on next steps
If the unit still won’t operate after these steps, contact Breville support or a qualified technician for diagnosis and potential repair.
Tip: Keep your warranty information handy.
Diagnosis: Breville grinder won't start or grind
Possible Causes
- highPower issue (dead outlet, damaged cord, unplugged)
- mediumOverload or faulty on/off switch
- lowJam or obstruction in burrs/hopper
Fixes
- easyTest outlet with another device and try a different outlet; inspect cord for damage
- easyReset the unit by unplugging for 60 seconds, then plug back and power on; check the switch feel
- easyClean burrs and inspect for debris; remove hopper if safe following the manual
- mediumIf the switch or safety circuit is defective, seek professional service
Your Questions Answered
Why won't my Breville grinder start even after plugging in?
Most often the issue is power, switch, or a burr jam. Verify outlet power, reset the switch, and inspect burrs for obstruction. If the problem persists, proceed with the diagnostic flow.
Check power and switch first; then inspect burrs for jams. If needed, follow the full troubleshooting steps.
Can a jam in the burrs cause the grinder to stall?
Yes. A bean fragment or sticky grind can lock the burrs. Remove the hopper and burr carrier, clean thoroughly, and re-test.
A burr jam can stall the grinder; clean the burrs and try again.
Is it safe to operate the grinder with the hopper removed?
Operating with the hopper off is not recommended; only do this if you’re inspecting burrs and follow the manual’s safety steps.
Not recommended; keep the hopper in place unless inspecting burrs per the manual.
When should I replace the burrs or switch?
If wear affects grind consistency and the switch or thermal sensor shows wear, contact Breville support for replacement parts.
If wear affects performance, contact support for parts replacement.
What if the problem persists after all steps?
Escalate to Breville support or a technician with model number and symptom details. Warranty may cover repairs.
If it still won’t run, contact Breville support.
Watch Video
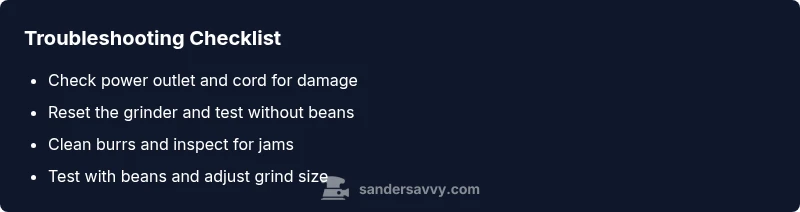
Main Points
- Unplug before inspection to avoid shock.
- Check power, switch, and burrs in order.
- Clean burrs and hopper to prevent jams.
- Consult Breville support if issues persist.