What to do if grinder is stuck: Quick Troubleshooting Guide
Learn fast, safe steps to free a stuck grinder, avoid damage, and prevent future jams with practical troubleshooting tips from SanderSavvy. Includes quick checks, common culprits, safety reminders, and when to call a professional.

If your grinder is stuck, the safest first move is to unplug it, remove the disc, and inspect for a jam or debris. Clear any obstruction with non-metal tools, then check the guard and spindle for damage. Avoid forcing the tool; if the issue persists, consult the manual or a pro.
Immediate safety first
Working with grinders demands respect for electricity and rotating parts. If the grinder is stuck, stop immediately and unplug the power cord before touching anything. Do not force the disc or attempt to twist the spindle while the tool is powered. Wear PPE: safety glasses, gloves, and hearing protection. If the outlet is shared, ensure the power is truly off by testing with a non-contact voltage tester. After unplugging, wait for any spinning parts to come to a complete stop.
Common causes of a stuck grinder
Several factors can lock a grinder: debris or resin buildup between the disc and spindle; a seized bearing or worn brushes; an overheating condition that caused protective features to engage; or a damaged guard that binds the wheel. In many cases, jam occurs when the tool is loaded with material without proper feed control. Understanding these causes helps you target the fix safely without unnecessary disassembly.
Visual inspection safely
With the tool unplugged, remove the guard and the disc if necessary, and inspect the spindle hole for obstruction. Look for foreign material wedged between the disc and the spindle. Check the brushes if you know how; dull or burnt brushes can make the motor stall. Inspect for cracks in the guard or loose mounting screws. If anything looks damaged, stop and plan replacement parts.
Step-by-step jam clearing technique
- Unplug the grinder and remove the disc. 2) Gently clear debris from the spindle and inside the guard with a wooden or plastic tool. 3) Reinstall the disc only after the area is clean and the spindle spins freely by hand. 4) Reattach guard and perform a low-speed test without load. 5) If the disc won’t move, inspect the motor brushes or seek professional help.
Aftercare: testing and maintenance
Once the jam is cleared, reassemble all protective components, then test the grinder under no-load conditions at a slow speed. Listen for unusual noises and feel for smooth rotation. Clean any dust from vents and consider a brief lubrication if the manufacturer allows it. Regularly inspect the power cord, plug, and switch for wear, and replace worn parts before they fail under load.
Model-specific notes and parts to check
Always consult your grinder's manual for model-specific jam reasons and recommended fixes. Some models require you to remove the brush housing to inspect bearings, while others have sealed bearings that should be checked only by a professional. Do not replace parts based on guesswork; use genuine components or equivalents from the manufacturer.
Prevention tips to avoid future jams
To minimize future jams, idle the tool between passes and avoid forcing the disc through material. Use appropriate grit and feed rate, keep the guard in place, and perform regular maintenance like brushing and air-blowing dust from cooling vents. Store the tool in a clean, dry area and inspect for damaged cords before each use.
When to seek professional service
If the grinder still refuses to spin after clearing obvious jams, or you notice unusual heat, burning smells, sparks, or damaged bearings, unplug the tool and seek professional service. Do not continue to test or operate a tool with potential internal damage. Warranty terms may require authorized service for safety concerns.
Steps
Estimated time: 30-45 minutes
- 1
Power down and unplug
Ensure the tool is unplugged and the trigger is not active. Wait for any residual motion to stop before touching parts.
Tip: Use a lockout device if available to ensure the tool cannot be powered during work. - 2
Remove disc and guard
Carefully detach the guard and then the disc so you can access the spindle. Do not force parts apart.
Tip: Keep track of screws and springs; a small tray helps prevent loss. - 3
Inspect for jams
Look for material wedged between the disc and spindle, or any debris around the bearing area. Do not pry with metal tools.
Tip: A wooden or plastic pry tool minimizes the risk of damage. - 4
Clear and test rotation by hand
Gently remove debris, then try to rotate the spindle by hand to confirm it moves freely.
Tip: If it doesn't move by hand, stop and reassess; forcing can cause damage. - 5
Reassemble and perform a light test
Reattach the guard and disc, plug in, and run at a very low speed with no load to check for smooth operation.
Tip: Listen for grinding or binding noises; stop immediately if heard. - 6
Evaluate for wear or seek help
If binding returns, inspect brushes and bearings; replace if necessary or consult a professional.
Tip: Document symptoms and parts inspected if you plan to seek professional service.
Diagnosis: Grinder won't spin or is locked when powered on
Possible Causes
- highJam between disc and spindle due to debris or resin buildup
- mediumSeized bearings or worn brushes
- lowPower issue (outlet, cord, switch)
Fixes
- easyUnplug, remove the disc, and clear debris from the spindle area
- mediumCheck brushes and replace if worn; inspect bearings if symptoms persist
- easyTest the power supply, outlet, and switch; replace damaged cord or outlet as needed
Your Questions Answered
Can I reuse the grinder after clearing the jam?
Yes, if there is no damage to the guard, disc, or motor. Inspect parts and operate at no-load first to confirm a safe return to service.
Yes, if there is no damage after clearing the jam. Test at no-load first.
Is it safe to use water to clear a jam?
No. Water can cause electric shock and damage internal components. Keep the grinder dry and use dry tools for cleaning.
No. Water and electricity together are dangerous.
What should I do if the grinder won’t start after clearing the jam?
Check the power source, switch, and fuse. Inspect the brushes and bearings; replace if worn. If unresolved, seek professional service.
Check power and components; replace worn parts or seek service if needed.
How often should you replace grinder brushes?
Follow the manufacturer’s schedule or replace when you notice reduced performance or persistent sparking. Routine checks help prevent jams.
Follow your manual; replace brushes when performance drops or sparking occurs.
When should I hire a professional for a stuck grinder?
If the jam recurs after cleaning, if fumes or heat are present, or if you’re unsure about internal components, stop and consult a pro.
If in doubt or the problem returns, get a professional check.
Watch Video
Main Points
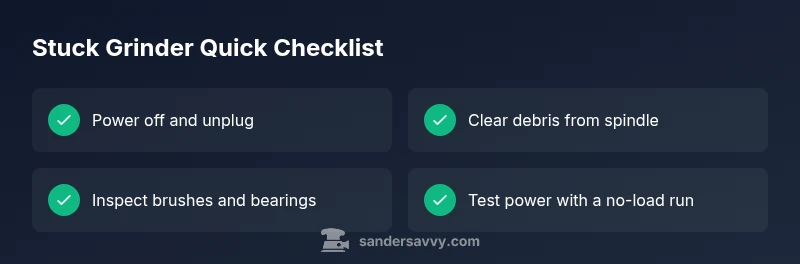
- Unplug before inspection and removal.
- Clear jams with non-metal tools only.
- Test at low speed after reassembly.
- Call a pro if binding recurs or smells/pains arise.