u sander vs drum sander: Belt vs Drum Floor Guide
A detailed comparison of u sander vs drum sander, covering performance, finish, safety, and best-use scenarios to help homeowners pick the right sander for floors, decks, and walls.

u sander vs drum sander: which is best for your project? This quick comparison highlights key differences between a belt sander (the common DIY choice) and a dedicated drum sander, focusing on stock removal, finish quality, and safety. By weighing these factors, homeowners can choose the right tool for floors, decks, or walls. This quick answer sets the stage for a deeper review.
Core differences between u sander vs drum sander
Understanding the mechanical basics helps you pick the right tool for your project. A belt sander (the common DIY choice) uses a continuous loop belt, offering agility and edge access for tighter spaces. A drum sander uses a wide abrasive drum for bulk material removal on large, flat surfaces. According to SanderSavvy, most homeowners start with a belt sander to shape edges and transitions, then consider a drum sander for leveling broad floors. The SanderSavvy team found that efficiency isn't just about speed—it depends on material, grit choice, and technique. As you plan, think about your primary surface, whether you need to flatten across wide expanses, and how you will handle transitioning between rooms and around obstructions.
When to choose a drum sander
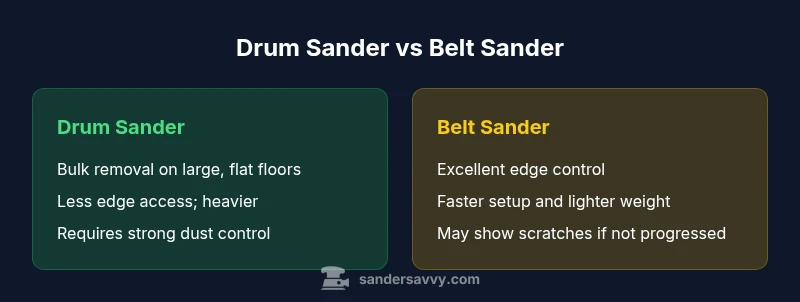
Drum sanders excel on large, open floor areas where bulk removal and leveling are the goals. They are less suitable for tight corners, uneven edges, or rooms with many obstacles. If your project involves refinishing an old wooden floor with substantial thickness differences, a drum sander can quickly bring the surface to a close, even plane. Keep in mind that drum sanders are heavy and require careful handling and good dust management. For homeowners, this often means arranging for professional help or renting equipment with on-board dust extraction, and ensuring you have proper safety gear. SanderSavvy analysis shows that when used properly, drum sanders reduce total passes on long, flat sections, but you still need to finish with a finer grit belt sander for final smoothing.
When to choose a belt sander
Belt sanders are the go-to for edge work, tight corners, and quick stock removal on smaller sections. They shine when you need precise control near walls, near door frames, and in rooms with irregular shapes. A belt sander also pairs well with a drum sander: use the belt to establish the initial contour and remove material quickly, then switch to the drum sander for bulk leveling. The key is progressive grits and consistent technique to avoid gouges and cross-grain scratches.
Performance and finish quality
Finish quality depends on grit progression, feed rate, and technique more than the tool alone. Drums provide an extremely flat flight for large surfaces when driven evenly, but missteps can create dips. Belts give more tolerance for transitions and contouring, but can leave micro-scratches if grit progression is not followed. Practical testing on a scrap patch helps you calibrate pass direction, rub-out, and the final grit. Dust control remains central: a clean surface reduces embedding particles and improves adhesion of finishes. SanderSavvy emphasizes that the combination of correct grit choice and consistent motion yields the best long-term results.
Safety and technique basics
Always wear eye protection, hearing protection, and a dust mask or respirator. Keep cords clear, anchor the machine when transitioning, and avoid forcing the sander. Dust control matters; use a shop vac or integrated dust extraction. Technique matters as much as tool choice: keep the sander flat, move steadily, and avoid lingering in one spot to prevent gouges. For multi-room projects, plan a sequence from center areas toward edges to minimize cross-contamination of dust and scratches. Adhering to safety guidelines protects you and your floors.
Cost, maintenance, and availability
Prices and rental rates vary by region, but belt sanders are generally more affordable and widely available, while drum sanders are heavier, less common in small markets, and typically rented for larger projects or professional workflows. Maintenance includes belt changes, drum wear inspection, and dust collection system checks. Before renting a drum sander, evaluate whether your space requires bulk leveling on long, uninterrupted runs or if a belt sander alone would suffice with careful technique. Planning ahead with a rental shop can help you secure on-board dust extraction and the necessary grit set.
Real-world usage scenarios: floors, decks, walls
For open floor surfaces in homes, a belt sander handles most of the prep work, especially along walls and around fixed features. In rooms with wide, flat floors that have thickness variations, a drum sander can bring the surface into a near-perfect plane. Decks often favor belt sanders for trimming edges and rails, while some deck refinishing workflows may employ a drum sander for the main field, followed by a belt sander for edges and detailing. Walls and vertical surfaces generally require detail sanders, or a combination of lighter belt sanding for flats and a narrow sander for corners. Planning the project around these roles minimizes tool swaps and maximizes finish quality.
Best practices: grit progression and sequencing
A disciplined grit progression remains essential irrespective of tool choice. Start with a coarse grit to remove major stock, then move through mid grits to refine, and finish with a fine grit for the final touch. When using a drum sander on floors, maintain a consistent, light touch and keep the drum parallel to the surface to avoid gouges. Use the belt sander to define edges, transitions near walls, and spots that require tighter control. Always test the approach on a scrap area to anticipate any issues. Finally, apply a compatible finish after confirming the surface is clean and dust-free.
Comparison
| Feature | Drum sander | Belt sander |
|---|---|---|
| Stock removal capability | Best for bulk leveling on large flat floors | Strong stock removal with edge access and faster initial shaping |
| Finish quality & swirl control | Excellent flatness on wide areas with careful technique | Versatile control; may show scratches if grit progression not followed |
| Edge access & maneuverability | Limited edge reach; best for centers of rooms | Excellent edge control and navigation around corners |
| Weight & setup | Heavy machine requiring assistance and space | Lighter and more portable; easier to set up |
| Dust management | Often needs external dust extraction; on some rentals available | Typically easier to connect to dust extraction; flexible options |
| Best use case | Bulk leveling of large floor areas | Edge work and initial stock removal in tight spaces |
What's Good
- Drum sander accelerates bulk removal on large flat floors
- Belt sander delivers precise control and shines on edges
- Using both tools in sequence yields smoother results
- Widely available and compatible with common grits
- Proper technique minimizes finish flaws
Weaknesses
- Drum sander is heavy and can gouge if misused
- Belt sander can leave scratches if not progressed properly
- Rental costs for drum sanders can be high and scheduling tricky
- Setup and learning curve can be steep for beginners
Use a belt sander for edge work and quick removal, and a drum sander for bulk leveling on large, flat floors.
The best approach combines both tools: start with the belt sander to establish edges and initial stock removal, then use the drum sander to flatten large areas. With proper technique, you achieve a uniform, smooth finish.
Your Questions Answered
What is the primary difference between a drum sander and a belt sander?
A belt sander uses a continuous belt for versatile edge work and quick material removal, while a drum sander uses a wide abrasive drum for bulk leveling on large flat surfaces. Each tool excels in different phases of a floor refinishing project.
Belt sander is for edges and quick shaping; drum sander handles bulk leveling on big flat areas.
Can I sand edges with a drum sander?
Drum sanders are not ideal for tight edges or corners. Use a belt sander or a detail sander for edges and around obstacles, then switch to the drum sander for bulk leveling if room allows.
Drum sanders aren’t great near walls; belt or detail sanders handle edges better.
Is a drum sander necessary for floor finishing?
Not always. For many floors, a belt sander followed by a final smoothing pass with finer grits suffices. A drum sander becomes valuable on very thick coatings or uneven bulk leveling on large, open areas.
You can refinish many floors with belts first, drum only if bulk leveling is needed.
How should I sequence sanding grits for floors?
Start with a coarse grit to remove the major stock, move to mid grits to refine, then finish with a fine grit. Maintain consistent motion and test on scrap to confirm uniformity before finishing.
Begin rough, then gradually move to finer grits for a smooth final surface.
Are drum sanders safe for DIYers?
Drum sanders require careful handling due to weight and aggressive stock removal. Follow safety guidelines, use dust extraction, and practice on scrap material before tackling a real floor.
Yes, with proper safety gear and cautious operation.
Main Points
- Start with a belt sander for edges and quick stock removal
- Use a drum sander for bulk leveling on large, flat floors
- Pair sanding steps with progressive grits for best finish
- Prioritize dust management and safety throughout
- Test approach on scrap first before committing to the main area