Can You Use a Drum Sander Instead of a Planer? A Practical Comparison
Explore whether a drum sander can replace a planer for floors, decks, and walls. This analytical comparison covers use cases, risks, and best practices to help homeowners decide which tool to choose.

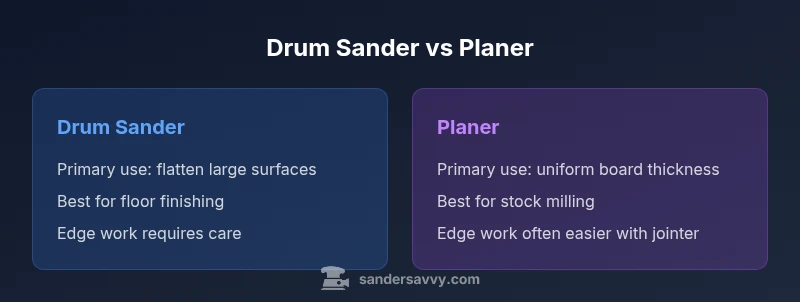
Generally, a drum sander cannot fully replace a planer because they perform different tasks. A drum sander excels at flattening large floor areas and removing high spots, but it struggles with precise thickness control and edge work. Use a planer for uniform board thickness and dimensional accuracy; reserve the drum sander for floor flattening and finish work.
Can You Use a Drum Sander Instead of a Planer? Context and Scope
Can you use a drum sander instead of a planer? This question comes up often when homeowners tackle floors and large panels. According to SanderSavvy, DIYers frequently weigh the substitution to simplify tools on hand. The short answer is: not always. A drum sander can level and smooth surfaces, especially on expansive floor areas, but a planer is designed to achieve precise thickness and controlled stock removal. In practice, the decision hinges on the job’s requirements: whether you need surface flattening, thickness accuracy, or both. This article, drawing on SanderSavvy analysis, compares the two tools across use cases, technique, safety, and workflow to help you decide which tool belongs in your shop for can you use a drum sander instead of a planer and related tasks.
What Each Tool Really Does
A drum sander is a belt-sanding machine mounted on a rotating drum. Its core strength is rapid material removal over large, flat areas such as wood floors or tabletops. It excels at evening out humps, filling in uneven grains, and preparing surfaces for finishing. A planer (thickness planer) removes material from the face of boards to achieve uniform thickness and square dimensions. It’s the go-to tool for milling stock to a target thickness and ensuring consistent planed surface across boards. The two machines approach material removal from different angles: the drum sander ablates the surface, while the planer reduces thickness with precision. This distinction is crucial when deciding whether substitution is viable for your project.
When Substitution Might Be Acceptable
There are scenarios where substituting a drum sander for a planer can make sense, primarily in surface-focused projects. If your goal is to flatten a hardwood floor or to bring a stubbornly uneven surface down to a consistent plane, a drum sander can be effective, provided you accept variability in thickness and edge work. If the boards are already milled to thickness and your objective is to level a surface rather than create uniform thickness, the drum sander may be a practical choice. However, for any project requiring precise board thickness, edge jointing, or milling new stock, a planer remains essential. In these cases, you may use the drum sander after planing to dial in flatness and remove residual high spots, but not as a direct substitute for thickness planning.
The Risk of Gouging and Unevenness
Gouging is a real risk when using a drum sander on uneven floors. The drum’s aggressive contact can bite into high spots and leave swirl marks or dips if passes are not carefully planned. Edges and transitions demand extra attention; without a deliberate approach, you can remove more material than intended near walls or corners. A planer offers more predictable stock removal for boards, reducing the chance of uneven thickness. The key to mitigation is to test a small area first, maintain consistent passes, and keep the sander flat and level. If you must work near joints or edges, consider using a shorter wheelbase belt sander or a hand-held sander for finish work.
Dust Control, Safety, and Prep
Dust control is a critical factor with any drum sander job. Floors generate a lot of fine dust, and without proper containment, you risk fine dust infiltration into lungs and machinery. Always connect a robust dust collection system, wear a respirator or P100 dust mask, and seal off the work area when possible. Safety gear should include eye protection, hearing protection, and sturdy footwear. Before starting, remove nails and screws, check for loose boards, and test your chosen grit on a small area. Proper prep reduces gouging risk and improves the final level of flatness. The drum sander’s aggressive removal means you’ll want to clean and recheck the surface frequently to maintain control over the material removal process.
Practical Techniques: Using a Drum Sander for Floors
When using a drum sander for floors, begin with a test patch in a discreet area to gauge how aggressively the machine removes material. Start with a coarse grit (roughly 36–40) to address high spots and hollows, then move to mid-range (60–80) for leveling and final passes. Keep the machine moving steadily to avoid creating ridges. Work with the grain direction where appropriate and avoid staying in one spot too long. Maintain a light touch near walls and transitions, using a panel sander or edging sander for tight areas. After the main passes, switch to a finer grit to refine the finish, and plan additional passes as needed for flatness. Remember, the goal is to achieve a smooth, flat surface suitable for finishing, not to achieve precise thickness.
Alternatives and Best Practices
In most projects, a planer is the tool of choice for obtaining precise thickness control and uniform stock. A drum sander can complement planing by flattening surfaces and removing surface-level irregularities. A practical workflow often involves planing to the desired thickness, followed by progressive sanding with a drum sander to flatten and even out the surface before finishing. Where edges are involved, use a dedicated edge sander or hand sanding to avoid gouging. Consider renting equipment if you don’t sand floors frequently; this option can save money and space while still delivering reliable results.
Cost, Availability, and Maintenance
Tool selection often hinges on cost, availability, and maintenance considerations. Drums sanders tend to be heavy and bulky, with higher wear on sanding belts and more frequent belt changes. Planers are typically more compact and widely available, with a broader market for replacement blades and accessories. Both tools require maintenance: keep belts or blades sharp, replace worn parts, and clean dust extraction paths regularly. For DIY projects, renting a drum sander for a weekend can be a cost-effective approach, while a planer may be a long-term investment if you plan to mill a lot of stock over time. Always factor in dust collection needs and storage space in your decision.
Case Studies: DIY Projects
Case Study A: A homeowner refinishes a 600-square-foot maple floor with minimal edge work. They planed the boards first to achieve uniform thickness, then used a drum sander to flatten the surface and bring it to a consistent finish. The result was a smooth floor with a consistent surface ready for stain and sealant. Case Study B: A workshop repurposes reclaimed flooring boards with varying thickness. The team uses a drum sander to flatten the bulk surface and then supplements with a hand sander along the edges to avoid gouging, followed by a final pass with a finish sander. Both cases demonstrate how substitution decisions depend on project goals and tolerance for thickness variance.
Common Mistakes and How to Avoid Them
- Skipping test patches on new floors and edges. Always test a small area first to gauge removal rate. - Rushing passes near walls; maintain consistent distance and use edge tools. - Over-removing material; set stopping criteria and check surface flatness with straightedge. - Ignoring dust control; always hook up a dust collection system and wear protective gear. - Neglecting edge cases; edges require careful planning or alternative sanding methods. - Underestimating the importance of finishing passes; finalize with finer grits for a quality surface.
Final Thoughts: Deciding Between Drum Sander and Planer
The decision to substitute a drum sander for a planer depends on the job’s priorities: flatness versus thickness accuracy, edge work, and the available time and equipment. For large flat surfaces like floors, a drum sander can be a practical tool to achieve a smooth, level surface, but it cannot reliably replace a planer for precise stock removal. SanderSavvy’s analysis suggests a hybrid approach—planing for thickness, followed by drum sanding for flattening—often yields the best balance of efficiency and accuracy. The choice should be guided by the project’s goals, the desired finish, and the the homeowner’s tolerance for variance.
Comparison
| Feature | Drum Sander | Planer |
|---|---|---|
| Primary purpose | Flatten/level large surfaces (floors) and remove high spots | Create uniform board thickness and plane boards |
| Surface finish control | Less precise thickness control; potential gouges if misused | High precision thickness with consistent removal |
| Material removal consistency | Fast on wide, flat areas; variable near edges | Consistent thickness across boards when set correctly |
| Best uses | Floor flattening, large panels, surface preparation | Stock thicknessing, edge milling, and jointing |
| Dust control | Requires robust dust collection; heavy dust production | Dust production exists; easier to capture with standard systems |
| Cost/availability | Heavy tool; rental options common; space required | Widely available; often lower upfront cost than large floor machines |
| Skill required | High risk for gouges; precise technique needed | Moderate; straightforward for beginners with supervision |
| Best for | Large flat floors and decks | Board milling and final thickness to tolerance |
What's Good
- Drum sander can quickly level large flat floors
- Useful as a finishing step after planing
- Good for smoothing surfaces and removing minor imperfections
- Rentals make it accessible for DIYers
Weaknesses
- Not suitable for precise thickness control
- High risk of gouging near edges or transitions
- Requires strong dust collection and safety practices
- Bulky equipment with limited maneuverability
Drum sander is a strong companion for floor flattening, not a universal substitute for planers
For exact board thickness and edge milling, use a planer. Employ a drum sander for flattening and finishing surfaces, ideally in a hybrid workflow when appropriate.
Your Questions Answered
Can a drum sander achieve perfectly flat surfaces like a planer over time?
A drum sander can flatten floor surfaces, but it may not achieve uniform thickness across boards. Planers are better for consistent stock removal. Use testing and a hybrid approach for best results.
A drum sander can flatten surfaces but may not give uniform board thickness like a planer. Consider planing first, then sanding for flatness.
Is a drum sander a suitable substitute for thicknessing boards?
No. A drum sander is not designed for precision thicknessing. Planers provide controlled removal to target thickness. You can use a drum sander after planing to flatten, but not as a direct substitute.
No—drum sanders aren’t built for precise thickness. Planers are for that; use sanding after planing if needed.
Can I use a drum sander on hardwood floors safely?
Yes, with caution. Hardwood floors can be sanded with a drum sander, but you must manage grit progression, keep the machine moving, and guard against gouging. Dust control is essential.
Yes, but be careful. Use gradual grits and maintain control to avoid gouges.
What grit progression works best when using a drum sander on floors?
Start with a coarse grit for high spots, then move to mid and fine grits for finishing. Typical ranges are coarse around 36–40, mid around 60–80, and finish around 100+.
Begin with a coarse grit, then gradually move to finer grits for a smooth finish.
Can I rent a drum sander instead of buying one?
Yes. Renting is common for DIY projects and short-term jobs. It reduces upfront costs and storage needs, but ensure you have access to proper dust collection and a plan for returning the machine.
Yes, renting is a practical option for occasional use.
How do I transition from drum sanding to planing or finishing since they aren’t interchangeable?
Plan to thickness first with a planer, then use a drum sander to flatten and even the surface before finishing. Edge work may require separate tools. Follow safety guidelines for dust and tool handling.
Plan first for thickness, then sand for flatness and finish.
Main Points
- Prioritize thickness control with a planer when precise stock is needed
- Use a drum sander for flattening large surfaces and finishing
- Test patches and maintain proper dust control for safety
- Consider a hybrid workflow: plane first, then sand for flatness
- Rent or invest based on project frequency and space