How to Tell If a Grinder Pump Is Bad: Quick Troubleshoot Guide
Identify warning signs, perform practical safety checks, and follow a step-by-step diagnostic to decide if your grinder pump is bad. Learn when to DIY and when to call a pro to prevent backups and costly damage.

Most grinder pump failures come from a clogged intake, a stuck float, a tripped breaker, or a seized motor. Start with basic power checks, then inspect the float switch and alarms. If power is present but the unit won’t run, shut off power and call a licensed pro—ignoring it can lead to backups and costly damage.
how to tell if grinder pump is bad
Grinder pumps are reliable allies for home wastewater management, but they can fail suddenly. If you’re asking how to tell if grinder pump is bad, start with what normal operation looks like and how failure tends to show up. Typical signs include unusual grinding noises, hums or rattles, odors near the pump pit, frequent cycling, a pump that won’t start, or an alarm light. When a problem is suspected, focus on safety and basic checks first. With a little systematic testing, you can separate simple issues from more serious failures and decide whether you can DIY or need a pro. Remember, the goal is to prevent backups and avoid health hazards while protecting your plumbing system. This section covers the most telling indicators and how they map to likely faults, so you can act quickly rather than guess at the cause.
Symptoms and what they mean
Grinder pump symptoms are your road map to diagnosis. Noisy operation—grinding, buzzing, or rattling—usually points to a jammed impeller or a motor bearing issue. Frequent cycling, especially after heavy use, can indicate a stuck float switch or a failing relay. An alarm, fault code, or flashing light is your clearest signal that safety interlocks or power issues are active. A sluggish discharge or sewage backups in the basement or yard is a strong sign the pump can’t move waste away from the pit. Finally, water pooling around the pit or a damp sump around the unit can suggest seal wear or line leaks. By noting when each symptom occurs, you’ll be better prepared to pursue the correct fix path.
Safe, at-home checks you can perform
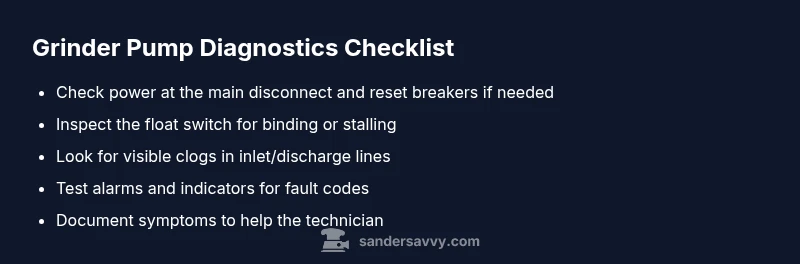
Before you call a pro, run simple checks that don’t require disassembly. First, verify the main electrical supply and reset any tripped breakers or fuses. Use a non-contact tester to confirm there is no live voltage at the disconnect after resetting. Check the float switch by gently lifting it—if the pump starts briefly, the float or wiring may be the culprit. Inspect accessible lines for obvious blockages, such as objects or excessive toilet paper, and clear them if safe to do so. Never enter the pit or remove the pump housing; wastewater pits pose biohazard risks. If you smell gas or see pooling of wastewater, back away and call a professional immediately.
Diagnostic flow: symptom to likely cause to solution
Start with the symptom you observed, then map to the most likely cause and a practical fix you can try safely. If the pump won’t start, the likely causes are power issues or a stuck float switch. The quick fixes are to reset the breaker, verify power at the outlet, and test the float. If the unit still won’t run, suspect a failed motor or impeller wear and plan the next step accordingly. If the alarm flashes, examine control wiring and sensor connections for loose or damaged components. Always progress from the simplest fixes to the more involved checks.
Step-by-step fixes for the most common causes
Step 1: Power down the system at the main disconnect and secure the area. Step 2: Reset the breaker and re-check the outlet with a tester to confirm power is restored. Step 3: Inspect the float switch for binding; manually move it to verify it travels freely and triggers the pump. Step 4: Clear any simple clogs in the inlet and discharge paths—do not force parts or use harsh chemicals. Step 5: Inspect accessible electrical connections for corrosion or loose wires; reseat and tighten as needed. Step 6: With power restored, gently lift the float to see if the pump starts and water discharges through the line. Step 7: If the pump still fails to operate or the alarm persists, schedule professional service and provide the model, serial, and recent alarms. Tip: document what you tested and when to help the technician.
Maintenance and prevention to extend pump life
Proactive maintenance minimizes surprise failures. Keep the pump pit area clear and accessible for service, and secure the lid to prevent debris from entering the pit. Avoid flushing non-biodegradable items or harsh chemicals that can damage mechanical seals and the impeller. Schedule regular inspections with a licensed pro and replace worn float switches or wiring before they fail. Monitor alarms and codes, and address them promptly to avoid backflow or wastewater backups. These preventive steps help keep your grinder pump reliable and reduce costly emergency calls.
When to call a professional and what to expect
If alarms continue after completing basic checks or you notice sewage backing up or persistent odors, contact a licensed septic or plumbing professional. A pro will perform pressure and flow tests, inspect the float and wiring, and assess the impeller and motor for wear. Be prepared to provide the pump’s make, model, serial number, and a quick log of symptoms and alarm codes. Expect a staged service plan that may include repair or replacement of components, plus guidance on future maintenance and warranties.
Steps
Estimated time: 60-90 minutes
- 1
Power down and secure the area
Shut off the main disconnect to the grinder pump and lock out the switch if possible. Verify there is no live voltage with a non-contact tester before touching any components. This protects you from electrical shock and makes the subsequent checks safer.
Tip: Always notify others before working on a utility circuit and keep children away from the pit. - 2
Check breaker and supply
Inspect the home’s main panel for a tripped breaker and reset it. After resetting, test the outlet or dedicated circuit to confirm power is restored to the grinder pump. If the breaker trips again, there is a deeper electrical issue.
Tip: If the breaker trips repeatedly, do not keep resetting—this is a sign to call a pro. - 3
Inspect the float switch for jam
Gently raise and lower the float to see if the pump responds. A stuck float can prevent starting or cause erratic cycling. If the pump starts when you lift the float, the float mechanism or wiring may be the culprit.
Tip: Do not force the float beyond its travel range. - 4
Clear simple line clogs
Check accessible sections of the inlet and discharge lines for visible debris. Remove safe blockages with a gloved hand or appropriate tool, avoiding harsh chemicals. Do not attempt to clear concealed clogs that require pit entry without proper equipment.
Tip: Use a sewer-safe plunger or a flexible auger designed for wastewater lines. - 5
Inspect electrical connections
Look for corrosion, loose terminals, or damaged insulation in accessible wiring. Disconnect power before touching wires, reseat connectors, and secure any loose pigtails. Take photos before disassembly to aid reassembly.
Tip: Keep a spare set of basic tools and a flashlight handy in the pit. - 6
Test pump operation with float
With power restored, manually lift the float to trigger the pump and observe discharge flow. Listen for the motor and check for consistent operation. If there’s no response, the motor or impeller may be failing.
Tip: If you hear grinding or unusual noises, stop and evaluate deeper repairs. - 7
Plan professional service if unresolved
If the pump does not start after these checks or alarms persist, schedule a professional service visit. Provide the model, serial, and a log of symptoms and tests to help the technician diagnose quickly.
Tip: Ask about warranty coverage and seasonal maintenance options.
Diagnosis: Grinder pump shows signs of failure (unusual noises, odors, pump won’t start, or persistent alarm)
Possible Causes
- highClogged intake or discharge lines
- mediumFaulty float switch or control wiring
- highTripped breaker or power supply issue
- lowDamaged impeller or motor bearings
Fixes
- easyReset the breaker and restore power, then test the pump
- mediumClear clogs in the inlet or discharge path and re-test flow
- mediumTest and replace faulty float switch or wiring
- hardInspect for impeller damage and replace the pump if needed; call pro for motor repair
Your Questions Answered
What are the most common signs of a failing grinder pump?
Common signs include unusual noises, frequent cycling, alarms, and sewage backing up. These symptoms point to possible float switch issues, clogs, or motor wear. Address them promptly to avoid backups and property damage.
Look for loud noises, alarms, and backups to spot common grinder pump problems early.
Can I restart a grinder pump after a power outage?
You can, but only after restoring power safely and checking for any tripped breakers. If the pump doesn’t restart or alarms appear, do not force it; seek professional help.
If power returns but the pump won’t start or alarms stay on, call a pro.
Is DIY repair safe for grinder pumps?
DIY repairs are limited to very basic checks like power, wiring tightness, and simple unclogging. Any work involving electrical components or direct access to the pump pit should be done by a licensed professional.
Only do basic checks yourself; call a professional for electrical work or inside-pit tasks.
How often should I service a grinder pump?
Regular service should be scheduled based on the manufacturer’s guidance and local conditions. A professional inspection can identify worn components and prevent failures before they occur.
Have a pro inspect it on a regular basis to catch worn parts early.
What could cause a pump to run but not discharge?
This often points to a clogged impeller, a stuck float, or a discharge blockage. Check for blockages and test the float before deciding on a replacement.
If it runs but doesn’t discharge, inspect the impeller and float first.
Are replacement costs predictable for grinder pumps?
Costs vary based on model, installation, and region. It’s best to obtain multiple quotes and factor in potential line work and disposal of old parts.
Costs vary; get several quotes and consider installation work.
Watch Video
Main Points
- Check power before anything else.
- Alarms indicate specific faults—you’ll map them to causes.
- Float switch issues are common culprits.
- DIY only for simple fixes; escalate when in doubt.
- Regular maintenance prevents costly failures.