How to Tell If Your Grinder Pump Is Working
Urgent, practical guide to determine if your grinder pump is working, with quick checks, diagnostic flow, step-by-step fixes, and essential safety tips to prevent sewer backups.

Is your grinder pump working? Start by listening for the motor and checking for steady discharge. Look for a normal hum, active flow from the discharge line, and a responsive float switch. If the motor doesn’t start, noises are abnormal, or the float doesn’t move, follow the diagnostic flow for safer, step-by-step fixes.
How grinder pumps work (at a glance)
Grinder pumps are compact wastewater systems designed for homes where gravity-based sewer access is limited. They macerate solids and push effluent through a discharge line to the main sewer or septic system. A float switch detects water level and triggers the motor, while an integrated control panel manages start/stop cycles. According to SanderSavvy, understanding this basic operation helps homeowners interpret symptoms and distinguish between simple power issues and clogged lines. When you know the fundamentals, it’s easier to identify whether a problem is electrical, mechanical, or a plumbing obstruction. This section lays the groundwork for the hands-on checks that follow, so you can act quickly and safely when backups loom.
Common symptoms that indicate possible issues
Most grinder-pump problems fall into a few telling signs. Listen for the motor; if it’s silent when you expect it to run, that’s a red flag. Look for weak or no discharge, unusual grinding noises, or a surge in the unit’s cycling. Backups, odors, or water pooling near the pump pit can indicate a clogged inlet, a stuck float, or a failed impeller. Minor quirks—slower pumping, intermittent operation, or abnormal vibration—may point to a developing issue rather than a full failure. Recognizing these symptoms early can prevent costly damage and emergency calls. SanderSavvy notes that early detection hinges on consistent observations of how the pump behaves during typical use.
Immediate checks you can perform safely
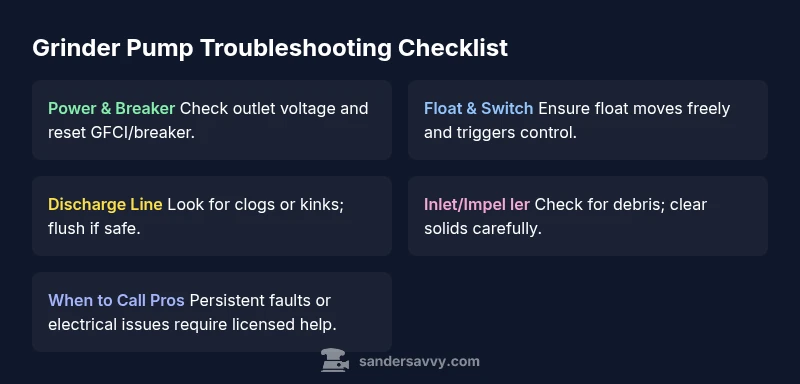
Begin with non-invasive, low-risk checks you can do without turning off utilities. Verify power at the outlet and ensure the GFCI or breaker protecting the pump hasn’t tripped. Listen for the motor’s normal hum during a test discharge. Inspect the discharge line for obvious clogs or kinks and check the check valve for backups. Finally, observe the float switch: if you can access it safely, gently move the float and listen for the controller to react. If you notice no motor activity, a tripped breaker, or no change when the float is moved, stop and proceed with the diagnostic flow. Always prioritize safety and, when in doubt, contact a licensed professional.
Diagnostic flow: symptoms to diagnosis to fixes
A structured approach helps avoid guesswork. Start with the symptom you observe, then map to the most likely causes and practical fixes. For example, a pump that won’t start is often a power or control issue, while intermittent pumping can be a float or clog problem. Use this flow to stay organized and reduce downtime. The following diagnostic framework guides you from symptom to action without skipping the basics.
Step-by-step fixes for the most common cause
Below is a concise, actionable sequence you can follow in most households. Use it as a checklist to restore function safely. If any step reveals a more complex fault (like a seized impeller or persistent electrical fault), stop and call a pro.
- Verify power: confirm the outlet is live, reset GFCI, and check for any obvious power interruptions. Tip: use a different known-good outlet to verify power.
- Reset the circuit: switch the pump’s breaker off and on again, then attempt a controlled discharge. Tip: wait 60 seconds after reset to re-test.
- Inspect the float switch: ensure it moves freely and isn’t blocked by debris. Tip: unplug power before handling the float, and clean any visible buildup.
- Check the discharge line and check valve: look for clogs or blockages; flush if needed. Tip: never hammer or force a line; use a safe plumbing snake if accessible.
- Re-test under load: run a small discharge task and observe flow. Tip: document results so you can compare against baseline later.
- If issues persist, call a licensed professional: electrical faults or a seized motor require expert service. Tip: have your pump model and service history ready.
Safety reminders and when to call a pro
Working on grinder pumps involves electricity, water, and waste. Always shut off power before touching the unit, use PPE (gloves, eye protection), and avoid forced disassembly. If you smell burning, hear grinding that isn’t normal, or see smoke, evacuate the area and contact emergency services if needed. When in doubt about wiring, seals, or the impeller, professional service is the safest choice.
Preventive maintenance to avoid future issues
Proactive care can extend the life of a grinder pump. Schedule annual inspections, keep solids out of the system, and avoid flushing grease, wipes, or diapers. Periodically inspect the float and check valves, and listen for changes in noise or performance. Maintain a simple log of tests, reset dates, and any service notes to help you catch issues early and prevent backups. Regular maintenance also helps you interpret symptoms more accurately when they occur.
Steps
Estimated time: 45-60 minutes
- 1
Check power supply
Confirm the outlet is live using a voltage tester. If the GFCI has tripped, reset it and re-test the pump. A simple power issue is the most common cause of a non-starting grinder pump.
Tip: Keep a spare GFCI tester on hand for quick verification. - 2
Reset circuit and inspect breakers
Turn the main breaker off, wait 30 seconds, and switch back on. Check for any tripped breakers in the panel and reset as needed. This step often resolves intermittent failures.
Tip: If the breaker trips repeatedly, there may be an overload or wiring fault that requires a professional. - 3
Assess the float switch
Access the float switch and ensure it moves freely without obstruction. If it stalls, clear debris and gently test its travel while powered off. A stuck float is a frequent explanation for non-starts.
Tip: Avoid forcing the float; small obstructions can usually be cleared with a soft brush. - 4
Inspect the discharge line and valve
Check for visible blockages, kinks, or a failed check valve. Clear any debris from the inlet and flush the line if safe to do so. A clogged line causes weak or no discharge.
Tip: Do not use harsh chemicals; flushing with clean water is safer for the system. - 5
Test under load
Run a controlled discharge task and observe flow and pressure. Listen for normal motor sound and ensure wastewater moves toward the main line. Document results for future reference.
Tip: If flow is inconsistent, note the conditions (time of day, usage) to identify patterns. - 6
Call a professional if unresolved
If the pump still won’t start, discharge remains weak, or you hear abnormal grinding, schedule professional service. Electrical faults and mechanical failures often require specialized tools.
Tip: Have your model, serial number, and service history ready to speed up diagnostics.
Diagnosis: Pump won't start or discharge is weak
Possible Causes
- highPower issue
- highTripped circuit breaker or GFCI
- mediumFaulty float switch
- mediumClogged discharge line or blocked inlet
- lowSeized impeller or motor
Fixes
- easyTest outlet voltage with a multimeter, reset GFCI, and reset the breaker
- easyInspect wiring and control panel for damage or loose connections; replace if needed
- easyMove the float gently to ensure it travels freely and triggers the switch
- mediumCheck for clogs in the inlet or discharge line and clear debris or flush as appropriate
- hardIf the motor or impeller is seized or electrical fault persists, contact a licensed service
Your Questions Answered
What are the first signs that my grinder pump is failing?
Early signs include no motor sound, weak or no discharge, unusual grinding noises, or odor and backups. These cues help you distinguish between electrical and mechanical problems. Address issues promptly to prevent backups.
Early signs are no motor sound, weak discharge, odd grinding noises, or backups. Address them quickly to avoid bigger problems.
Can I diagnose grinder pump issues myself?
Yes, you can perform basic checks such as power verification, breaker inspection, float movement, and line clearance. However, complex electrical faults or a seized motor require a licensed professional.
You can do basic checks yourself, but leave complex electrical issues to a professional.
Is it dangerous to work on a grinder pump?
Yes. Wastewater systems involve electricity and hazardous materials. Always shut off power, wear protective gear, and avoid aggressive disassembly. If you’re unsure, stop and call a pro.
Yes—it's hazardous. Shut off power, wear protection, and call a pro if unsure.
When should I call a professional?
Call a professional if the pump won’t start after basic checks, if you hear abnormal grinding, or if you notice persistent leaks or a flooded pit. A licensed technician can diagnose electrical or mechanical failures safely.
Call a professional if basic checks don’t restore function or you hear grinding. Experts handle electrical and mechanical issues safely.
How often should I service a grinder pump?
Most homes benefit from an annual or semi-annual inspection, especially in areas with heavy wastewater use. Regular service helps prevent backups and extends pump life.
Annual or semi-annual inspections are recommended to prevent backups and extend life.
Watch Video
Main Points
- Verify power and reset breakers before anything else
- Float switch and discharge line are common failure points
- Document tests and outcomes to spot patterns
- Call a pro for electrical or seizing issues