Milwaukee Sheet Sander vs Orbital Sander: A Practical Comparison for DIYers
An analytical comparison of Milwaukee sheet sanders and orbital sanders, highlighting differences in motion, surface suitability, finish quality, dust control, maintenance, and practical buying guidance for DIY floors, decks, and walls.

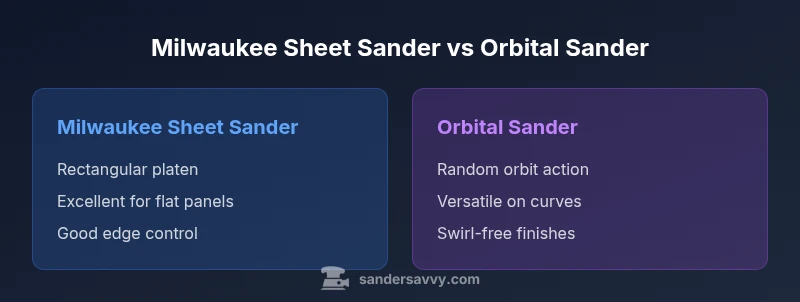
Choosing between a Milwaukee sheet sander and an orbital sander boils down to surface shape and finish goals. The sheet sander shines on flat, wide surfaces and tight corners, delivering clean edges with consistent sheet coverage. The orbital sander offers faster material removal and versatile control for curved profiles. Both require dust control and correct grit selection for best results. This guide clarifies when to pick each.
Key differences at a glance
In this guide comparing the Milwaukee sheet sander vs orbital sander, the main differences come down to surface geometry, motion, and finish goals. The Milwaukee sheet sander is designed for flat, wide surfaces using replaceable sheets, delivering steady edges along long panels. The orbital sander uses a circular pad with random orbit action, offering more versatility on curved profiles and finer control for finishes. Both require proper grit selection and dust management for best results. This quick overview helps you map your project to the right tool before you begin.
How a Milwaukee sheet sander works
A Milwaukee sheet sander relies on a rectangular platen that accepts standard sanding sheets. The flat platen makes it ideal for true flats like doors, tabletops, and wide floor sections. Sanding sheets are fastened by clamps or adhesive, providing a stable, uniform surface. Because the contact area is fixed, you can maintain consistent pressure and avoid gouging on straight edges when you tilt or maneuver slowly. Dust pickup varies by model and vacuum compatibility, but you’ll often get decent dust control with a dust bag or port. For flat surface work, the sheet sander is a reliable workhorse.
How an orbital sander works
An orbital sander uses a round pad that vibrates in a random orbit, creating a swirling finish that minimizes visible scratch patterns on finished wood. Because the pad is circular and moves in irregular paths, it can produce smoother results on contoured surfaces and curved edges. It’s generally easier to control for beginners and allows faster material removal when paired with an appropriate grit. Dust collection is highly dependent on the dust port and vacuum setup, with many models offering better suction with a compatible shop vacuum. For finish work, orbital sanders are often preferred for their forgiving, even texture.
When to choose a Milwaukee sheet sander
Choose the Milwaukee sheet sander when your project features large flat areas with tight corners where a rectangular pad can reach every angle. It’s particularly effective for flattening panels, doors, stair treads, and cabinets with broad faces. If you’re refinishing wide floor sections, using the sheet sander with fine grit can yield a straighter, more uniform surface for staining or sealing. Keep in mind that sheet sanders excel at flat geometry; they’re less forgiving on curves or deeply contoured profiles. For homeowners focused on area coverage and edge control, the sheet sander remains a top pick.
When to choose an orbital sander
Opt for an orbital sander when the work includes curves, radii, or delicate edges where a flat sheet would leave visible flat spots. Random orbit action helps minimize cross-scratches, and the lack of a fixed platen allows easier maneuvering around irregular shapes. It’s well-suited for finishing coats, smoothing edges, and removing small amounts of material quickly. As with any sander, ensure you’re using the correct grit, and wear a dust mask or respirator during use. If you anticipate varied surface geometry, the orbital sander provides better overall versatility.
Dust control and safety considerations
Dust is a cornerstone concern in sanding projects. Both tools can generate fine wood dust that irritates eyes, nose, and lungs; use a vacuum with a tight-fitting hose and a HEPA-rated filter if possible. Wear a suitable respirator, eye protection, and hearing protection, especially during longer sessions. For hardwoods, reduce dust with efficient collection and seal off adjacent rooms to limit dispersion. The best approach is to attach the tool to a dust extractor and keep sanding belts or sheets clean for maximum efficiency. Clean workspace habits pay off both in health and finish quality.
Ergonomics, weight, and vibration
Weight and grip influence long sessions. A Milwaukee sheet sander tends to be heavier on the hand due to the rectangular platen and the need to maintain even pressure, which can lead to fatigue on tall or awkward pieces. An orbital sander is often lighter and easier to maneuver across irregular surfaces, though it can generate more vibration during aggressive materials removal. If you have wrist or shoulder issues, test both tools in-store or borrow a demo unit to compare comfort levels before purchase. Ergonomics play a critical role in end results.
Maintenance and accessories
Sheet sanders rely on replacement sanding sheets; keep an assortment of grits ready and replace worn sheets promptly to maintain consistent finish. Orbital sanders use replaceable sanding discs; verify the disc size and type to fit your model. Either tool benefits from a dust collection bag or vacuum attachment for cleaner work. Regularly check power cords, switches, and any vacuum connections for signs of wear. Stock up on extra sheets or discs and keep a small stash of spare clamps if using sheet sanders.
Cost considerations and value for DIY projects
Cost is a practical consideration. Sheet sanders and orbital sanders typically fit into a broad price spectrum based on power, vacuum compatibility, and build quality. For DIY floors, decks, or walls, consider your project size and frequency: if you frequently work on flat surfaces, a sheet sander can be cost-effective over time due to sheet efficiency; if you tackle varied shapes often, an orbital sander offers more flexibility and faster edge work. Budget for good quality sandpaper/discs and a dust extractor to maximize value.
Step-by-step approach to a project using the chosen tool
- Assess the surface geometry to decide between flat-sheet reach or curved-area maneuverability. 2) Select grit progression: start coarse for material removal, move to medium and finish with fine grits. 3) Secure the workpiece, ensure dust extraction is active, and test a small area to calibrate pressure. 4) Sand with steady, even strokes (or circular motions for orbital), lifting the tool at the edge to avoid gouges. 5) Inspect for consistency, re-sand as needed, then move to sealant or finish per project plan. 6) Clean the workspace and store tools properly.
Common mistakes and how to avoid them
Avoid applying excessive pressure, which causes gouges and uneven material removal. Do not rush the grit progression; skipping steps leaves visible scratches. Neglecting dust extraction results in airborne dust and clogged filters. For decks, avoid too much moisture exposure during sanding; moisture can raise wood fibers and create rough finishes. Finally, always test on scrap material before touching your actual piece.
Quick-start decision framework
If your work is predominantly flat and wide with tight corners, start with a sheet sander and use fine-to-medium grits for a smooth finish. If your work includes curved surfaces, radii, or varied contours, pick an orbital sander for versatility and smoother final textures. Real-world projects demand a combination approach at times, so plan accordingly and invest in compatible dust extraction and quality discs or sheets.
Authoritative sources
To ground this guide in safety and best practices, consult reputable sources such as OSHA on workplace dust and safety guidelines, and CDC/NIOSH resources on woodworking dust exposure. University extension publications also offer practical, field-tested sanding advice that aligns with DIY workflows. These references help ensure that hand and machine sanding stay safe and effective across projects.
Comparison
| Feature | Milwaukee sheet sander | Orbital sander |
|---|---|---|
| Motion type | rectangular/platen-based | random orbital |
| Sanding surface | flat panel edges and corners | contoured curves and edges |
| Dust collection | dust bag/port, vacuum optional | dust port with vacuum compatibility |
| Finish quality (flat) | excellent flat-surface control with consistent sheet coverage | swirl-free finish on many woods with random orbit |
| Weight | medium-heavy | medium |
| Power source | corded or cordless depending on model | usually corded, cordless options exist |
| Best for | flat panels, wide faces, corners | general purpose, curves, edges |
| Price range | $40-$120 | $40-$140 |
What's Good
- Excellent for flat surfaces and large panels
- Rectangular platen provides edge-to-edge coverage
- Abundant sanding sheet options and lower per-sheet cost
- Good option for tight corners when aligned carefully
- Predictable finishing performance on true flats
Weaknesses
- Less effective on curves and contoured profiles
- Requires careful pressure and technique to avoid gouges
- Dust collection can be less robust without a strong vacuum
- Sheets add ongoing consumable cost compared to discs
Milwaukee sheet sander wins for flat, edge-heavy work; orbital sander wins for versatility and curved surfaces.
For straight, wide surfaces like doors or cabinet faces, the sheet sander delivers consistent, flat finishes with reliable edge control. For varied shapes and faster material removal, the orbital sander offers more flexibility and smoother textures on curves. The best choice depends on surface geometry and finish goals, and many DIY projects benefit from using both tools at different stages, with dust extraction supporting both.
Your Questions Answered
What is the main difference between a Milwaukee sheet sander and an orbital sander?
The Milwaukee sheet sander uses a rectangular platen for flat surfaces and edges, while an orbital sander uses a round pad with random orbit motion for versatile shaping and finishing on curves. Your choice depends on surface geometry and finish goals.
The sheet sander is best for flat areas and edges; the orbital sander handles curves and finishing with less visible scratch marks.
Which is better for hardwood floors?
For broad, flat floor sections, a sheet sander can produce very flat, uniform panels with proper technique. An orbital sander is also used on floors for finishing and smoothing, especially when curves or irregularities exist.
For large flat floor areas, a sheet sander works well; for curves or finishing touches, an orbital sander is often preferable.
Can I use a sheet sander on walls?
Yes, sheet sanders can work on walls that are flat or lightly textured, but they require careful handling to avoid gouging corners and trim. Consider using narrower sheets or adapters for tight spaces.
You can, but be mindful of edges and corners to prevent gouges.
Is dust collection essential when sanding?
Dust control is essential for health and finish quality. Use a vacuum with a filtration system and wear a respirator. The better the dust collection, the cleaner your work area and the better the finish.
Yes—dust collection keeps the air safer and helps you maintain a cleaner finish.
Are cordless versions of these sanders available?
Yes, many manufacturers offer cordless variants, especially for sheet sanders and mid-range orbital sanders. Consider battery life, voltage, and the impact on weight when choosing cordless models.
There are cordless options, but check battery life and weight before buying.
How often should I replace sanding sheets or discs?
Replace sheets or discs when they wear unevenly, clog frequently, or lose adhesion. Regularly inspect for glaze buildup and change grit as you move from material removal to finishing.
Replace when worn or clogged; switch grit as you progress from rough to fine.
Main Points
- Assess surface geometry before choosing a tool
- Use correct grit progression for best results
- Invest in reliable dust extraction for both tools
- Sheet sanders excel on flat surfaces; orbital sanders handle curves
- Budget for accessories and maintenance