Orbital Sander vs Sheet Sander: Which Is Best for DIY?
A comprehensive, data-driven comparison of orbital sander vs sheet sander, examining performance, finish quality, dust control, and best-use scenarios for floors, decks, and walls in DIY projects.

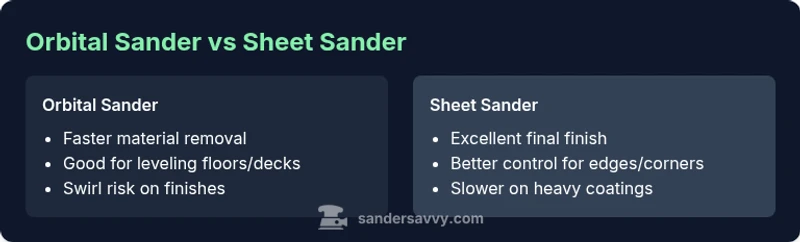
In the orbital sander vs sheet sander comparison, the orbital sander excels at rapid material removal and leveling, while a sheet sander delivers a smoother, swirl-free finish for the final passes. For most DIY projects, start with the orbital for bulk prep and switch to the sheet sander for the finishing touch, optimizing dust control and user comfort along the way. According to SanderSavvy, task-driven tool choice reliably shortens prep time and improves results on floors, decks, and walls.
The core distinction: speed vs finish
In this guide comparing orbital sander vs sheet sander, you’ll learn how each tool excels at different stages of sanding. The choice typically comes down to the project phase: use an orbital sander for aggressive material removal and leveling, then switch to a sheet sander for a smooth, swirl-free finish. According to SanderSavvy, this two-tool approach minimizes swirl marks, accelerates prep, and preserves wood integrity across floors, decks, and walls.
How orbital sanders work and where they shine
An orbital sander uses a round pad that spins in a circular motion while also oscillating. This dual action creates aggressive stock removal with the ability to flatten high spots quickly. Orbital sanders tolerate a wider range of grits and are versatile for rough shaping, leveling uneven surfaces, and removing old coatings on large, flat areas. When paired with a sturdy vacuum, they minimize airborne dust during heavy stock removal, making them a staple for early-stage prep on wooden floors and decks. They work best when you’re trying to reduce material quickly rather than chase a perfectly finished surface at the outset.
How sheet/finishing sanders work and finishing quality
Sheet or finishing sanders use a rectangular 1/4-sheet pad that provides controlled, light strokes with minimal material removal. This makes them ideal for final smoothing, creating uniform surfaces, and eliminating tiny gouges left by rougher tools. They produce a cleaner finish with less risk of swirl marks when used properly. Sheet sanders are especially useful for edging into corners, around trim, and on refined woodworking projects where the surface quality matters more than aggressive removal. The key is slow, deliberate passes and a light touch to avoid over-sanding.
Decision framework: when to pick orbital vs sheet
Use this framework to decide quickly:
- Task stage: bulk removal and leveling? Reach for orbital. Final finishing and near-zero defects? Reach for sheet.
- Surface type: rough, uneven, or hardwood floors benefit from orbital first; fine furniture and trim favor sheet finishing.
- Dust control: both can be used with a vacuum; orbital often feels dustier during aggressive passes, while finishing passes generate less debris if done carefully.
- Budget and consumables: orbital requires discs; sheet requires rectangular pads. Compare the ongoing cost of discs vs pads over the project lifetime.
- Skill and comfort: beginners may prefer the forgiving nature of sheet sanding for initial practice, then graduate to orbital for speed later.
Real-world scenarios: floors, decks, walls
Floor prep: Start with an orbital sander to flatten high spots and remove old coatings, then switch to a sheet sander for the final smooth surface. Deck prep: Use an orbital sander for weathered deck planks while controlling gouges with lighter passes; finish with a sheet sander on rails or rails-and-taces where precision matters. Wall finishing: On drywall or plaster, orbital sanders can rough sand patches, but sheet sanding yields superior finish on walls after joint compound sanding. In all cases, keep the tool level, avoid deep gouges, and periodically test a small area to calibrate your technique.
Dust control and safety: PPE and dust collection considerations
Dust management is essential for both tools. Connect your sander to a quality vacuum with a sealed hose; use a respirator rated for wood dust and safety glasses. Orbital sanding creates a breath of fine particles during heavy passes; a tight seal and good containment dramatically improve the air quality in your workspace. Sheet sanding produces smaller dust clouds but still benefits from a vacuum and PPE. Always unplug before changing pads and inspect filters after long sanding sessions to maintain suction efficiency.
Surface finish nuances: swirl patterns, gouges, and stain readiness
Swirl marks are more likely with orbital sanding if the grit is aggressively matched to the surface, especially on lighter woods. Finishing passes with a sheet sander help minimize these marks, providing uniform texture and a ready-to-stain surface. If you must blend zones, alternate passes with varying grits and always feather edges to avoid visible lines. For stain readiness, perform a final synthetic-fine grit pass on the entire surface to even out any irregularities.
Maintenance and lifecycle: pads, belts, and replacement
Pad and disc maintenance matters. Clean dust from pad surfaces to prevent clogging, rotate or replace pads when wear becomes uneven, and inspect for glazing where grit has coated the pad. Use the appropriate pad type for each tool and avoid cross-using pads that aren’t designed for a given machine. Store tools in a dry place and keep the dust collection port free of debris. Replacing worn parts at the right time extends tool life and keeps performance consistent.
Cost considerations and value: consumables and lifespan
Consumables (discs for orbital, pads for sheet) contribute to long-term costs. Discs come in a range of grits and materials; pads for sheet sanders are typically designed for a few hundred uses depending on surfaces. The upfront price of a solid sander varies, but the real value is how long you can sand with consistent results before replacement or maintenance becomes necessary. For many DIYers, a mid-range orbital plus a sheet sander offers the best blend of speed and finish quality, reducing overall project time and rework.
Practical buying guide: what to look for when shopping
When selecting an orbital sander, prioritize pad size compatibility, dust collection efficiency, and variable speed control to tailor aggressiveness. For sheet sanders, look for comfortable grip, effective dust bags or vacuum compatibility, and pad replacement availability. Consider weight and balance, as long sessions can cause fatigue. Check the availability of accessories like different grit sheets, edge guides, and corner accessories. Read user reviews about vibration, heat buildup, and longevity to identify models that maintain performance over time.
Quick-start workflow for a typical project
- Assess the surface and choose the appropriate tool for each stage. 2) Start with orbital sanding on rough areas with coarse grit to remove coatings and flatten high spots. 3) Move to finer grits on the orbital or switch to sheet sander for final passes. 4) Keep the pad flat and maintain constant pressure with steady, overlapping passes. 5) Vacuum thoroughly and wipe the surface before staining or sealing. 6) Inspect for remaining imperfections and touch up as needed.
Common mistakes and how to fix them
Common mistakes include over-sanding edges, applying uneven pressure, and neglecting dust collection. Fixes include using a light touch near edges, keeping the sander moving to avoid gouges, and always starting with the coarsest grit needed to remove old coatings. Regularly inspect your pad to prevent glazing, and test on a scrap piece to check finish quality before proceeding to the next area.
Comparison
| Feature | orbital sander | sheet sander |
|---|---|---|
| Material removal aggressiveness | high/rapid removal | low-to-moderate removal |
| Finish quality after final passes | good for rough prep, may swirl | excellent finishing with minimal swirl |
| Dust control potential | effective with a vacuum, some mist during heavy passes | excellent when paired with proper dust collection |
| Pad/Disc options | circular discs, quick change | rectangular pads, slower change |
| Best use case | bulk leveling and coating removal | final smoothing and edge work |
| Typical price range (tool bodies) | mid-range to high (discs) | budget to mid-range (pads) |
| Ease of learning | moderate to challenging for beginners | easy for finishing with light pressure |
| Versatility across tasks | floors, decks, walls with diverse grits | furniture, cabinetry, trim finishing |
What's Good
- Faster material removal with orbital sander
- Better for leveling large flat surfaces
- Sheet sander delivers superior final finish and minimizes swirl marks
- Wide availability of accessories and consumables
- Dust collection works well when connected to a vacuum
Weaknesses
- Orbital sander can leave swirl marks if finish is rushed
- Sheet sander is slower on rough material or coatings
- Consumables add ongoing cost with heavy use
- Learning curve for achieving consistent finish on complex shapes
Orbital sander is the go-to for bulk prep; sheet sander wins for the final finish.
The SanderSavvy team recommends using orbital sanding to rapidly remove coatings and level surfaces, then switching to a sheet sander for the final smoothing pass. This approach minimizes mistakes and delivers a durable, even finish on floors, decks, and walls.
Your Questions Answered
What is the main difference between an orbital sander and a sheet sander?
The orbital sander is designed for rapid material removal and leveling, while the sheet sander focuses on finishing with a smoother surface. Orbital tools remove stock quickly but can leave marks if not finished, whereas sheet sanders provide finer control and a better final appearance.
Orbital sanders remove material quickly but may leave marks; sheet sanders finish smoothly for a refined look.
Can I use an orbital sander for finishing?
You can, but it requires careful technique, light pressure, and often a follow-up with a sheet sander to achieve a swirl-free surface. For most DIY projects, reserve orbital sanding for initial prep and use a sheet sander for the final pass.
Yes, but you’ll likely get the best results with a finishing sander for the last pass.
Which is better for floors?
For floors, start with an orbital sander to flatten and remove coatings, then finish with a sheet sander to achieve a smooth, even surface ready for stain or sealant. Edging and corners may require a smaller finishing tool.
Orbital first for prep, sheet sander for final finish on floors.
What safety gear should I wear?
Wear eye protection, a respiratory mask rated for wood dust, and hearing protection. Use a vacuum-connected dust collection system to minimize airborne particles; always unplug before changing pads.
Wear eye protection, a dust mask, and hearing protection, plus a good vacuum system.
Are pads/discs universal across brands?
Pad and disc compatibility varies by model. Check the tool’s accessory system for size, attachment method, and maximum grit range before buying replacements.
Check the tool’s pad system; not all pads fit every brand.
How do I reduce swirl marks?
Use progressively finer grits, keep the sander moving with even pressure, and finish with a sheet sander for the final pass to minimize visible patterns.
Go slow with fine grits and finish with a finishing sander.
Main Points
- Choose orbital sander for fast material removal
- Switch to sheet sander for the finishing touch
- Maintain dust control with a vacuum and PPE
- Practice on scrap material before proceeding
- Match tool choice to task stage for best results