Rotex Sander vs Orbital Sander: Which Tool Wins for DIY Sanding
A detailed, objective comparison of Rotex sander versus orbital sander for floors, decks, and walls. Learn which tool suits stock removal, finishing quality, dust control, and project scope.

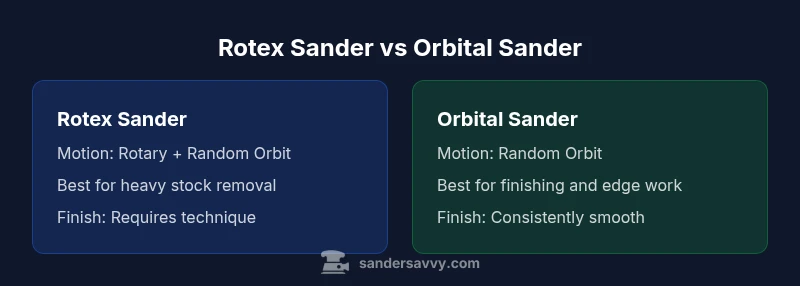
In the rotex sander vs orbital sander comparison, you get a two-in-one tool that blends rotary and random-orbit actions for versatile stock removal and finishing. For most DIY homeowners working on floors, decks, and walls, the Rotex excels at heavy stock removal and leveling, while the orbital sander shines when a smooth, consistent finish is the priority. The best choice depends on your project type, tolerance for noise and weight, and how you balance speed with control.
What Is a Rotex Sander?
A Rotex sander is a two-in-one sanding tool that combines a traditional rotary (rotating) motion with a random orbital (orbiting) motion. This dual-action design allows it to aggressively flatten high spots and remove material quickly, while still delivering a reasonably smooth finish on a variety of woods, including hardwoods and softwoods. The rotary portion provides rapid stock removal, which makes Rotex models well-suited for prep work on floors and decks where uneven surfaces demand fast, decisive grinding. The random-orbit portion helps generate a decent surface texture and reduces visible swirl marks after the final pass. For DIYers, this blend means you can tackle rough prep and finish work with a single tool, reducing tool clutter and tool-switching time. Keep in mind that mastering the balance between the two actions is essential to avoid gouging or leaving uneven patches, especially on soft woods or delicate veneers.
From a practical standpoint, Rotex grinders require careful grip and stance because the aggressive rotary phase can bite if you push too hard. They generally deliver strong dust reduction when paired with a capable dust extraction system, though some models rely on shop vacs rather than integrated ports. When used correctly, Rotex sanding can save hours during floor prep or large deck projects, particularly where the work involves leveling, high spots, or removing old finishes. For homeowners, the main appeal is versatility: you can do rough stock removal, leveling, and final smoothing with the same tool, provided you invest time in learning the tool’s two-speed or dual-action logic.
Brand context and product variety matter here. The SanderSavvy team notes that Rotex-style tools are designed to handle a broader range of tasks than a standard orbital sander, which translates into real-world time savings on multi-step jobs. In this guide, we’ll explore how to leverage a Rotex sander effectively while recognizing its trade-offs for beginners and budget-minded homeowners.
What Is an Orbital Sander?
An orbital sander (often called a random-orbit sander in some markets) uses a circular pad that moves in a random pattern to abrade wood with less risk of creating visible swirl marks. The motion is typically less aggressive than a rotary stage, which makes the orbital sander ideal for finishing work and light stock removal on flat surfaces such as hardwood floors, veneered panels, or furniture. Orbital sanders are renowned for their ease of use, lightweight design, and predictable results. They excel in the final smoothing stages after heavier prep has been completed by another tool or by hand. For DIYers, orbital sanders offer a gentle, controllable approach to achieving a uniform surface, particularly on soft woods or delicate surfaces where aggressive stock removal could cause gouges.
In practice, orbital sanders are often preferred for edge work and refinishing where a consistent, fine finish is the primary goal. They typically feature good dust collection compatibility, a moderate price point, and a comfortable grip suitable for longer sessions. For homeowners focused on finishing tasks—where the material removal rate is less critical—the orbital sander is the go-to choice. The key limitation is that orbital sanders may require more passes and potentially a separate heavy-duty tool if substantial leveling is needed on rough stock.
SanderSavvy’s assessment confirms that orbital sanders deliver predictability and ease of control, making them a staple in most DIY toolkits. However, they usually cannot match Rotex-style tools for aggressive stock removal, which means you may need to switch tools for challenging prep work on floors or decks. As you evaluate rotex sander vs orbital sander, consider the balance between speed, finish quality, and the willingness to learn a more complex two-action setup.
Core Differences: Motion, Finish, and Stock Removal
The central distinction between a Rotex sander and a standard orbital sander lies in their motion profile and the consequences for finish quality and stock removal. A Rotex sander operates with a rotary action plus a random orbit, enabling it to aggressively flatten and level high spots while still offering decent finishing when used with the right technique and grit. The dual-action design translates into higher material removal on tough surfaces such as rough floorboards or deck planks, especially when you need to bring a surface to a consistent plane before finishing. However, finishing with Rotex requires practice: the rotary component can leave more pronounced tracks if the pressure is excessive or the operator doesn’t blend motions correctly. The random-orbit portion helps mitigate those issues, but you still need to manage feed rate and grip.
An orbital sander delivers a more predictable finish with less aggressive stock removal. The pad’s circular motion covers the surface but avoids aggressive gouging, making it easier for beginners to achieve a smooth, uniform texture. Orbital sanders are excellent for final finishing passes and edge work where you want minimal swirl marks and consistent scratch patterns. The downside is that more material often requires extra passes, and heavy stock removal typically needs a more robust tool or alternative setup. The two tools serve overlapping roles, but the Rotex’s dual-action capability gives it an edge for multi-step projects that include both rough leveling and final finishing.
From a dust management perspective, both tools benefit from an efficient dust collection system and proper PPE. The Rotex’s higher dust volume during aggressive passes can overwhelm small dust bags, while orbital sanders commonly pair well with standard shop vacs or built-in dust ports depending on the model. Noise and vibration levels also differ: rotary components generate more abrupt forces, which can be tiring over long sessions, while the orbital motion tends to produce steadier, more manageable vibration. For a homeowner evaluating rotex sander vs orbital sander, these operational differences translate into real-world comfort, project duration, and finish quality across a range of materials.
Practical Use Cases: When to Reach for Each Tool
Choosing the right tool often comes down to the job at hand. For rough surface prep on floorboards, a Rotex sander shines. It can quickly remove old finishes, flatten irregularities, and bring a floor to a consistent plane, reducing the number of passes required compared with an orbital sander. Deck boards with uneven profiles or raised grain respond well to the Rotex’s aggressive material removal, provided you keep the motion controlled and avoid over-sanding any single area. This tool is particularly advantageous when you need to level a surface before applying a finish or stain since a smooth, uniform base is critical for even absorption. DIYers who want to minimize tool-switching appreciate the efficiency of having both stock removal and finishing capabilities in one device.
However, when the priority is finishing—a pristine, swirl-free surface on hardwood or softwood—an orbital sander is often the better choice. After you’ve achieved the rough level with a Rotex or by hand, the orbital sander can deliver a consistent scratch pattern and a glass-smooth finish with the right grit sequence. Edge work, windows, and corners also benefit from the orbital sander’s maneuverability and lighter weight, making it easier to reach tight spaces without risking gouges. For small projects, furniture refinishing, or delicate veneer work, the orbital sander’s simplicity and gentler approach can save time and frustration. In practice, many DIYers will reach for Rotex for initial stock removal and deck prep, then switch to orbital sanding for final smoothing and finishing touches.
Dust, Safety, and Workflow Efficiency
No sanding session is safe without appropriate PPE and a well-planned workflow. Dust exposure is a concern with both tools, particularly when removing older finishes or sanding hard woods. A robust dust extraction setup paired with a quality respirator, eye protection, and hearing protection is essential. For Rotex use, ensure you have a dust port that aligns with your vacuum system, and consider using lower speeds during delicate passes to reduce airborne dust and keep control. When using an orbital sander, dust collection may feel more manageable due to the tool’s lighter weight and smoother operation, but it’s still crucial to connect to a dedicated dust extractor whenever possible. Work in a well-ventilated area and consider a two-pass system: first rough grind with Rotex (or by hand) to level, then finishing with orbital for a clean finish.
A practical workflow example: begin with Rotex to flatten high spots and remove finish quickly, then switch to orbital for final passes along the grain. Keep the sander moving to avoid creating dips and maintain constant contact with the surface. Test on a scrap piece to dial in your pressure and speed before tackling your main project. Over time, you’ll notice a pattern: Rotex reduces prep time on rough surfaces, while orbital sanders deliver the finest finishes with less risk of gouging delicate stock. This balanced approach minimizes rework and yields a more consistent result across wood types.
Maintenance, Longevity, and Common Pitfalls
Maintaining either tool helps ensure consistent performance and longer life. Regularly inspect the sanding pad, replace worn hooks and loops on sanding discs, and keep the dust extraction port clean to preserve suction. For Rotex devices, check the dual-action mechanism periodically for any abnormal vibration or binding, and ensure the tool is powered with clean, dry air or electricity to avoid misalignment. Lubrication and proper storage prevent rust and internal wear, especially if you switch frequently between heavy stock removal and fine finishing tasks. Orbital sanders benefit from a clean pad surface to maximize adherence of discs and to minimize heat buildup during extended sessions. If you notice a disc not seating properly, verify the pad’s flatness and the disc’s attachment system.
A common pitfall is using the wrong grit sequence for the job. Rushing through coarse grits on a Rotex while aiming for a final smooth finish can leave deep scratch patterns that are hard to remove in subsequent passes. Similarly, starting with a grit that is too fine on rough stock can mall the surface, creating additional passes and heat. Plan your grit progression in advance and test on a scrap area to confirm you’re achieving the desired texture. With careful maintenance and thoughtful grit selection, both Rotex and orbital sanders can deliver excellent results across a wide range of projects.
How to Choose for Your Project: A Quick Decision Guide
To decide between rotex sander vs orbital sander, start with your project scope. If you face heavy stock removal, leveling, or prep on rough floorboards or decks, prioritizeRotex. If the job focuses on finishing, edge work, or delicate surfaces where control is critical, choose an orbital sander. Consider your tolerance for weight and precision; Rotex models are heavier and require more technique, while orbital sanders are lighter and generally easier for beginners. Budget matters as well: Rotex tools are typically pricier, but you gain versatility that might reduce overall tool purchases. Finally, assess your dust-management setup. An effective vacuum system can dramatically improve cleanliness and health on larger projects.
Decision flow:
- Is stock removal the primary need? If yes, rotate toward Rotex or parallel-use strategy.
- Will you value exceptional finish quality and ease of use for delicate surfaces? Choose orbital.
- Do you want one tool for multiple steps? Consider Rotex plus orbital for a hybrid workflow.
- Is budget a constraining factor? Orbital is often more affordable, but the right Rotex model may fit the budget if it replaces several tools.
In the end, the best approach is a blended workflow that uses Rotex for heavy prep and orbital for final smoothing, which yields efficient results without sacrificing finish quality. The SanderSavvy team suggests aligning tool choice with project goals and practice to optimize both speed and quality.
Comparison
| Feature | Rotex Sander | Orbital Sander |
|---|---|---|
| Motion and versatility | Dual-action (rotary + random orbit) for stock removal and finishing | Random orbit only; finishing-focused and easier to control |
| Best for heavy stock removal | Excellent; aggressive leveling and flattening capability | Moderate; good for light stock removal and finishing |
| Finish quality on finishing passes | Can require technique to avoid gouging; great finishes with proper use | Consistently smooth finishes with less risk of swirl marks |
| Dust collection compatibility | Depends on model; works well with capable dust extractors | Generally strong dust collection with compatible ports |
| Weight and fatigue | Heavier; more effort in long sessions | Lighter; comfortable for extended use |
| Price range | Higher upfront cost | Lower upfront cost |
| Best for | Floor prep, decks, and mixed tasks | Finishing, edge work, and small projects |
What's Good
- One tool can handle stock removal and finishing tasks
- Versatility reduces tool clutter and saves time
- Rotex accelerates heavy prep, improving project timelines
- Orbital is beginner-friendly and typically more affordable
- Better control for delicate surfaces with orbital for final passes
Weaknesses
- Rotex can be heavier and more complex to master
- Orbital may require additional tools for heavy stock removal
- Higher price for Rotex models
- Dust management varies by model and setup
Rotex generally excels as the all-around workhorse; orbital is best for finishing and light-duty tasks.
If your projects mix heavy prep with finishing, Rotex is the better long-term choice. For straightforward finishing and budget-friendly tasks, an orbital sander remains the practical option.
Your Questions Answered
What is a Rotex sander and how does it differ from an orbital sander?
A Rotex sander combines rotary and random-orbit motion, enabling both aggressive stock removal and finishing. An orbital sander uses only random-orbit motion, which favors finishing and control. The Rotex is more versatile but requires more technique, while the orbital is simpler and beginner-friendly.
A Rotex sander mixes two sanding motions for removal and finishing, while an orbital sander sticks to finishing. If you want versatility, choose Rotex; if you want simplicity, choose orbital.
Is Rotex suitable for floor sanding on hardwood?
Yes, Rotex can be effective for floor preparation due to its aggressive stock removal. Use it carefully to avoid gouging and follow with an orbital or fine-grit passes for finishing to achieve a smooth surface.
Rotex works for floor prep, but you’ll want to finish with a finer pass to avoid gouges.
Can I get a fine finish with a Rotex sander?
You can achieve a good finish with Rotex, but it requires technique: balanced pressure, appropriate grit progression, and blending motions to prevent swirls. For the finest finish, follow up with an orbital sander.
Yes, with proper technique and after finishing passes with an orbital sander if needed.
Which tool is cheaper for a DIYer?
Orbital sanders generally have a lower upfront cost and are widely available. Rotex models cost more, but they replace the need for multiple tools in some workflows.
Orbital sanders are usually more affordable upfront.
Are there safety concerns with Rotex sanding?
All sanding requires PPE: eye protection, hearing protection, and a proper dust mask or respirator. The Rotex’s dual-action can feel more aggressive, so control and stance matter.
Always wear PPE, and keep a firm grip to manage the tool’s action.
What grit progression works best for these tools?
Begin with a coarse grit for heavy stock removal if needed, then move to medium and fine grits for finishing. Save the finest grits for the final passes to minimize swirl marks.
Start coarse, then move to finer grits for a smooth finish.
Should I rent or buy a Rotex / orbital sander?
For infrequent projects, renting can be cost-effective. If you sand regularly, investing in a reliable model may be worth it, especially if it fulfills multiple tasks in your workflow.
Rent if you sand occasionally; buy if you sand often.
How important is dust collection with these tools?
Dust collection is important for health and finish quality. Use a capable vacuum setup and consider models with solid dust ports and compatible bags or canisters.
A good dust collection setup improves health and results.
Main Points
- Assess stock removal needs before choosing tools
- Use Rotex for heavy prep and leveling; orbital for finishing
- Invest in good dust extraction and PPE for any sanding work
- Practice technique to maximize finish quality with Rotex