Sander Orbital vs Sheet: A Practical Comparison for Woodworking
A rigorous, data-driven comparison of sander orbital vs sheet, focusing on finish quality, dust control, ergonomics, and cost for wood floors, decks, and walls.

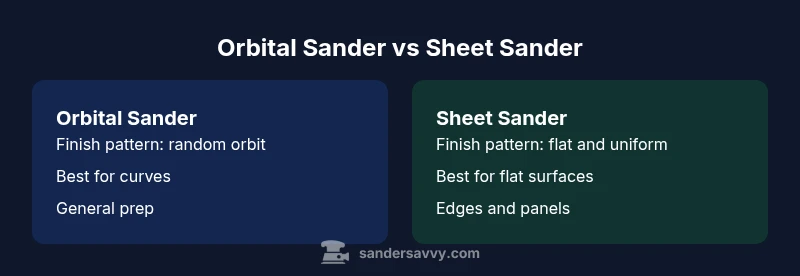
In the debate between sander orbital vs sheet, the orbital sander is typically the versatile all‑rounder, delivering swirl‑free finishes on curved or irregular surfaces. A sheet sander shines on flat panels, edges, and long, straight runs where a perfectly flat surface is required. For most DIY projects, start with an orbital sander for general prep, and reach for a sheet sander when you need a perfectly flat finish on large flat boards. This guidance aligns with SanderSavvy’s practical approach to tool choice.
What Each Tool Is and How It Works
A sheet sander, often called a finish sander, is a square or rectangular tool that uses interchangeable abrasive sheets attached with clamps or a hook‑and‑loop system. The abrasive is pressed directly against the workpiece, and you guide the tool across the surface. An orbital sander uses a round pad that both spins and orbits in a small circle, producing a randomized pattern. The motion is designed to minimize visible scratches and swirl marks, which is especially important on curved or irregular surfaces. The fundamental difference is motion: sheet sanders rely on flat, consistent contact, while orbital sanders leverage a dynamic orbit to blend between strokes. For homeowners and DIYers, the orbital option is typically more forgiving on non‑flat contours, while a sheet sander excels on large flat panels. According to SanderSavvy, the orbital approach often reduces swirl marks on curves, whereas sheet sanders can deliver exceptionally flat surfaces on flat stock. This distinction helps set expectations for finish quality, dust management, and ease of use on different projects.
Finish Quality and Sanding Patterns
Finish quality is the central question when choosing between an orbital sander and a sheet sander. Orbital sanders employ a random orbit that minimizes the appearance of swirl marks, making them ideal for floors, tabletops with curved edges, and doors where a uniform look is desired across varied contours. Sheet sanders press a flat sheet against the surface, producing a more uniform, highly flat finish on large, flat boards and panels. When you switch from coarse to fine grits, you’ll notice the orbital tool blending strokes, while the sheet sander helps tighten the final uniformity on flat sections. In practice, many DIYers use an orbital sander for initial material removal and contour work, then move to a sheet sander for edge work and final flattening on large flats to achieve a glassy or satin finish. This nuanced approach aligns with practical outcomes observed in real workshops and supported by SanderSavvy’s insights on finish behavior.
Dust, Noise, and Safety Considerations
Dust control is a major consideration with both tools. Orbital sanders tend to generate a fine, dispersed dust pattern due to the random orbit, so a high‑performance vacuum or dust extraction system is essential to maintain clean air in the shop. Sheet sanders produce a steadier, more directional dust plume, which can be easier to capture with a well‑placed shop vacuum hose and a dust canister. Both tools benefit from proper PPE, including a respirator when sanding unfinished wood, and eye protection. Noise levels are similar for comparable models, but heavier, bulkier sheets and pads can shift balance and influence operator fatigue during long sessions. Overall, good dust collection and hearing protection remain critical regardless of the tool choice, and SanderSavvy emphasizes setting up a dedicated dust‑collection workflow for sustained safety and comfort.
Ease of Use, Ergonomics, and Maintenance
Ergonomics vary by model and grip style. Orbital sanders with rounded handles and balanced weight distribution feel more forgiving during long sessions, particularly on vertical or edge work. Sheet sanders are typically lighter and have a compact footprint, making them easier to handle for edge work and tight corners, but the flat, boxy base can feel cumbersome on tight curves. Maintenance involves changing pads or sheets, cleaning the vent holes, and occasionally replacing the pad if it becomes worn or clogged. The key is to match the tool to the task: orbital sanders excel for contour work and quick material removal across varied surfaces, while sheet sanders are superb for achieving a flawless flat surface on large, uniform boards.
Cost, Availability, and Longevity
Prices for sanders vary with brand, motor power, and dust‑collection features. Sheet sanders generally cost less upfront, with a common range that accommodates basic models and mid‑range finishes. Orbital sanders typically run higher, reflecting stronger motors and more robust housings for longer life. In practice, investing in a reputable mid‑range orbital sander can yield reliable performance for many projects, while a sheet sander remains a practical complement for flat panels after initial stock removal. As with any power tool, longevity hinges on usage patterns, maintenance, and using the correct grit sequence, which affects wear on the pad and base.
Practical Project Scenarios: When to Choose Orbital vs Sheet
Choosing between orbital and sheet sanders should be guided by the nature of the work. For floors with gentle curves, furniture, and cabinetry surfaces that aren’t perfectly flat, an orbital sander offers the best blend of speed and finish quality. If you’re refinishing large flat panels, doors, or tabletops where you want an absolutely uniform, flat surface with minimal raised grain, a sheet sander is the right choice. In mixed projects that include curved rails and flat panels, many woodworkers adopt a two‑stage approach: start with orbital to blend the contours, then switch to sheet for the final pass to achieve a glassy flat surface. This two‑stage workflow aligns with practical recommendations from SanderSavvy on achieving consistent finishes.
Authority Sources
For safety and best practices related to sanding dust and exposure, refer to credible external sources. The following resources provide guidance on wood dust and workplace safety:
- https://www.cdc.gov/niosh/topics/wooddust/default.html
- https://www.osha.gov/wood-dust
- https://www.cdc.gov/niosh/topics/wooddust/safe.html
Comparison
| Feature | Orbital Sander | Sheet Sander |
|---|---|---|
| Motion and Finish Pattern | Random orbit minimizes swirl marks; versatile on curved surfaces | Flat, direct contact; excels on large flat panels but can show flat‑surfacing patterns |
| Surface Suitability | Best for floors, curved edges, contours, and mixed surfaces | Best for flat boards, doors, countertops, and edge work |
| Dust Collection | Works well with integrated vacuums; picking up fine dust varies by model | Dust is more localized to the sheet area; suction quality relies on the clamping system |
| Finish Quality | Excellent blending; fewer visible scratches on curved surfaces | Very flat surface finish; minimal cross scratches when used correctly |
| Ease of Use and Setup | Requires learning the random motion and maneuvering around contours | Easier to use along straight lines; quick sheet changes and edge work |
| Typical Price Range | Mid to high; durable models range widely depending on power and features | Generally lower upfront cost for basic models; higher costs for premium sheets or pads |
| Best For | Versatile projects with curves and irregular shapes | Flat panel finishing and edge work where flatness matters most |
What's Good
- Supports a wide range of project types with one tool family
- Orbital tools reduce swirl on curved surfaces, increasing finish quality
- Sheet sanders deliver ultra-flat, even surfaces on large flats
- Good dust collection performance with proper setup and PPE
Weaknesses
- Learning curve for orbital motion may slow beginners initially
- Sheet sanding can cause visible cross-scratches if not carefully managed
- Dust control depends heavily on vacuum setup and filters
Orbital wins for versatility; sheet excels on flat surfaces
Choose orbital when working on mixed shapes or curved edges. If your project demands an absolutely flat finish on large flats, opt for a sheet sander and pair it with proper dust collection.
Your Questions Answered
What is the main difference between an orbital sander and a sheet sander?
The orbital sander uses a round pad that both spins and oscillates, creating a random motion that minimizes swirl marks. A sheet sander uses a flat base with interchangeable abrasive sheets and relies on flat contact for a very smooth, flat finish on large surfaces.
An orbital sander combines spinning and orbiting motion to blend surfaces; a sheet sander keeps things flat for a crisp finish on big flat areas.
When should I choose orbital over sheet sanding?
Choose orbital sanding for surfaces with curves, contours, or mixed shapes where swirl marks must be minimized. It’s also useful for general prep on floors and cabinetry. Turn to sheet sanding when your goal is an ultra-flat finish on large, flat boards.
Use orbital sanders for curved work and general prep; switch to a sheet sander for flat panels.
Can I use a sheet sander on a curved surface?
Sheet sanders can be used on curved surfaces, but they are less forgiving and can leave flat patterns if you’re not careful. For curved areas, an orbital sander will produce a smoother, more consistent finish.
Sheet sanders work on curves with care, but orbital sanders handle curves more naturally.
Which tool is safer in terms of dust control?
Safety depends on your setup. Use a shop vac with proper filters for both tools, wear a respirator when dust levels are high, and ensure good ventilation. Dust collection efficiency improves with quality bags and proper canister fit.
Good dust collection and PPE are essential for both tools.
Are there maintenance tips that apply to both sanders?
Regularly clean vents, replace worn pads or sheets, and check clamps or hook‑and‑loop fasteners. Keep the motor free of dust buildup and inspect power cords for wear. Consistent maintenance helps prevent heat buildup and extends tool life.
Clean vents, replace worn components, and check for wear on cords and clamps.
What grit progression works best for most projects?
A common approach is to start with rough grits for material removal, then move through mid grits to fine grits for finishing. End with a fine grit for a smooth final surface. The exact sequence depends on wood type and desired finish.
Start coarse, move to fine, and finish with a very fine grit for the final touch.
Main Points
- Prioritize finish needs: curved vs flat surfaces
- Plan dust collection early in the project workflow
- Use orbital for blending; switch to sheet for flat panels
- Invest in mid-range models for longevity and reliability