Random Orbital vs Finishing Sander: A Practical Comparison
Learn the key differences between random orbital and finishing sanders, including motion, finish quality, grit guidance, and best-use scenarios for floors, decks, and walls.

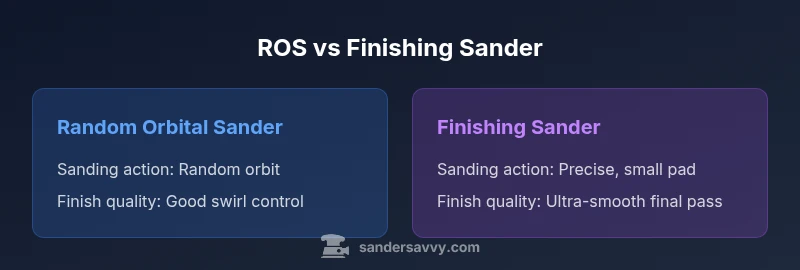
Two palm-sized sanding tools with different motion patterns: a random orbital sander (ROS) rotates and makes a random orbit to minimize swirl marks, while a finishing sander uses a smaller, precise pad for smooth, fine finishes. ROS excels at material removal and bulk leveling; finishing sander delivers ultra-smooth surfaces for the final pass. Use ROS for prep, finishing sander for final touches.
What is a random orbital sander?
The random orbital sander (ROS) is a versatile tool designed to blend rapid material removal with a finish that minimizes visible scratches. When you ask what is the difference between a random orbital sander and a finishing sander, the distinction mainly comes down to motion and surface quality. The ROS combines rotation with a random orbital path, which distributes abrasion in a way that masks sanding marks and helps prevent evenly spaced swirl patterns. For floors, decks, and walls, this makes the ROS excellent for initial leveling, contour work around cabinet bases, or large flat surfaces where speed matters. To get the best results, keep light, steady pressure and select grit progression that matches the material and the stage of the project. As you move from rough to fine grit, the ROS remains forgiving, but you should adjust your technique to avoid gouges on soft woods.
What is a finishing sander?
A finishing sander, often a quarter- or palm-sized tool with a rectangular pad, focuses on delivering the smoothest possible surface for paint, stain, or sealant. Finishing sander performance hinges on controlled, low-pressure strokes and consistent contact with the workpiece. When comparing to the random orbital sander, the finishing sander tends to leave far fewer marks because its motion is smaller and more precise. It’s ideal for final passes, edges, and corners where you want minimal texture and a perfectly uniform surface before finishing. For DIYers working on floors, decks, or walls, the finishing sander is a go-to for the last step before applying finish coats.
Core differences at a glance
- Sanding action: ROS uses a rotating pad with a random orbit to distribute abrasion; finishing sanders use a smaller, typically more linear motion for precise smoothing.
- Finish quality: ROS minimizes swirl with its random pattern; finishing sanders emphasize ultra-smooth, mark-free finishes, especially on edges.
- Material removal speed: ROS generally removes material faster on larger areas; finishing sanders are slower but deliver finer results in the final pass.
- Edge handling: ROS shines on flat surfaces but edges may require care; finishing sanders excel for tight corners and edges due to their compact pad.
- Grit strategy: For ROS, start with coarser grits then move down; for finishing sanders, emphasis is on higher grits (e.g., 180–220) for final smoothing.
When to use each tool in a project
Understanding project stages helps you decide which sander to pull first. For initial leveling of a rough deck board or floor plank, the ROS rapidly levels high spots and removes old coatings efficiently. As you approach the final coating, switch to a finishing sander to erase any remaining chatter marks and prepare a flawless surface for stain or clear coats. When working on edge work or trim, the finishing sander’s small footprint gives precise contact and reduces risk of gouging. For medium-dark finishes or painted surfaces, ROS can handle intermediate smoothing, then the finishing sander can refine the texture before coating. The rule of thumb is to use ROS to establish a flat, even base, then finish with the finishing sander for a pristine feel and appearance.
Grits, pads, and technique for results
Grit choice matters as you transition from rough to fine work. With a random orbital sander, begin with a coarser grit (around 60–120) to remove imperfections and level the surface, then step down to 120–180 for intermediate smoothing. When you switch to a finishing sander, use higher grits (180–220 or higher) to minimize scratches and achieve a true finish ready for staining or sealing. Pad size can influence control: ROS pads are typically larger, covering more surface quickly, while finishing sanders use smaller pads that are easier to maneuver on edges and corners. Technique is critical: maintain light, even pressure, avoid staying in one spot, and follow the grain direction to reduce texture.
Dust control, safety, and maintenance
Dust control is essential with both tools. Attach a compatible dust collection system or shop vacuum and wear a respirator or dust mask when sanding older materials or finishes that may release hazardous particles. Regularly check dust bags and ports for clogs, clean the vacuum filters, and replace worn sanding discs or pads as needed. For both tools, keep the work area clean and well-ventilated. Use eye protection and hearing protection, as both machines generate substantial noise and airborne dust. Proper maintenance—cleaning the pad surfaces, inspecting electrical cords, and replacing any damaged discs—extends tool life and keeps sanding results consistent.
Practical setup tips for accurate finishing
To achieve consistent results, set up a stable workbench or floor with secure clamps and good lighting. Pre-inspect the wood for nails or staples and remove them to prevent damage to sanding discs. For large flat surfaces, start with a ROS to even out the plane, then finish with a finishing sander using progressive grit steps. Pay attention to corner radii and edges by using the finishing sander to reach tight spots that the ROS might miss. Keep the sanding plan simple: rough work first, then progressively finer passes, and always finish with the highest grit your project requires before applying stain or sealer.
Quick buyer's guide: choosing between ROS and finishing sander
When choosing between a random orbital sander and a finishing sander, align your choice with project goals. Choose ROS for faster material removal and broad compatibility with a variety of surfaces, especially when prepping floors or decks. Choose a finishing sander when your priority is a flawless, paint-friendly surface with minimal scratch depth for the final coat. For most DIY projects, a combined approach—ROS for bulk prep and a finishing sander for the final pass—offers the best balance of speed and finish quality. Consider weight, grip, dust extraction compatibility, and pad size as you decide which tool to buy first, then add the other as your project demands grow.
Common mistakes to avoid
Common mistakes include applying too much pressure, which can gouge the surface; neglecting grit progression, which leaves visible scratches; and skipping dust collection, leading to messy work and compromised finish. Another frequent error is failing to maintain consistent motion or staying in one spot too long, creating dips or flat areas. Finally, using the wrong pad type for the material—especially on edges or corners—can damage delicate surfaces. By planning grit progression, using appropriate pads, and embracing dust control, you can achieve a professional result with either sander.
Comparison
| Feature | Random Orbital Sander | Finishing Sander |
|---|---|---|
| Sanding action | Rotating pad with a random orbit | Smaller pad with precise, controlled motion |
| Finish quality | Excellent swirl-free finish on many surfaces | Ultra-smooth finish, best for final passes |
| Material removal speed | Faster material removal on flat surfaces | Slower, more deliberate smoothing |
| Best for edges/corners | Versatile but edges need careful handling | Excellent for edges and tight spots |
| Grit strategy | Broader grit range, from coarse to mid-range | High-grit finishing focus for final passes |
| Dust collection | Typically strong dust port compatibility | Strong dust control with precise bags/ports |
What's Good
- Faster material removal with ROS on large surfaces
- Low swirl risk due to random orbit pattern
- Versatile across wood, paint, and fillers
- Accepts a wide grit range for prep to smoothing
- Good for edges when combined with right technique
Weaknesses
- Can leave swirl marks if technique is sloppy with finishing passes
- Not always ideal for ultra-fine finishing on tiny features
- Requires more practice to prevent gouging on soft woods
- Possibly bulkier and heavier than some finishing models
For most DIY projects, use ROS for prep and switch to a finishing sander for final smoothing
ROS speeds up material removal and handles larger areas well, while finishing sanders deliver premium finishes. A combined approach gives the best balance of efficiency and surface quality.
Your Questions Answered
Which sander is best for finishing hardwood floors?
For hardwood floors, a finishing sander provides the finest final surface, especially after initial leveling with a random orbital sander. Use the ROS to remove stock and the finishing sander for the final smoothing before applying sealant or finish.
For hardwood floors, start with a random orbital sander to level, then finish with a finishing sander for a premium smooth surface before finishing.
Can I use a random orbital sander on edges and corners?
Yes, but you must work slowly and carefully near edges. The finishing sander is often better for tight corners due to its smaller pad and precise control.
You can use ROS on edges, but for tight corners, switch to a finishing sander for better control.
Is there a noise difference between ROS and finishing sanders?
Both tools are loud and require hearing protection. Noise levels vary by model, pad size, and speed, so choose a unit with good vibration damping and a reliable dust collection system.
Both sanding tools are loud; protect your ears and use dust collection to reduce noise exposure.
What grit should I start with on a new project?
Begin with a coarser grit to remove imperfections and level the surface, then progress to mid grits, finishing with high-grit passes for the final blend.
Start coarse to remove material, then finish with high grits for a smooth surface.
Do I need dust extraction with both tools?
Yes. Dust collection improves visibility, reduces mess, and improves finish quality by limiting airborne particles that can settle into the finish.
Yes—use dust extraction for both tools to keep the work clean and achieve a better finish.
Are finishing sanders less versatile than ROS?
Finishing sanders excel at final smoothing and edges but are less versatile for heavy material removal. ROS is more adaptable for different surfaces and rapid prep.
Finishing sanders are great for final smoothing; ROS is more versatile for prep work.
Main Points
- Use ROS for initial leveling on large surfaces
- Switch to a finishing sander for final passes
- Progress grit from coarse to fine systematically
- Invest in a good dust collection setup
- Practice technique to avoid gouges and swirl marks