Electric Sander Rental: A Practical Guide for DIYers
Learn how to rent an electric sander: choose the right model, compare daily rates, understand rental terms, and safely complete floors, decks, and walls with minimal hassle.

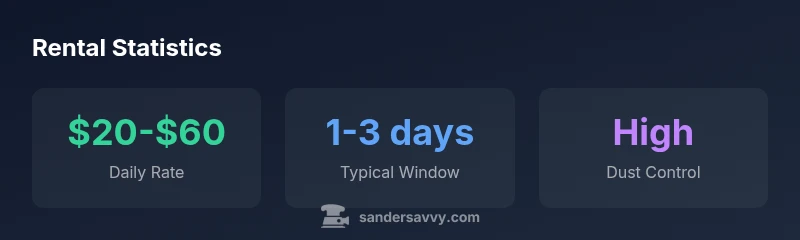
Electric sander rental is a cost-effective option for homeowners tackling floors, decks, or walls. Most shops charge about $20–$60 per day, with weekday discounts for longer rentals. For occasional projects, rental often beats buying. Always check for dust collection and grit compatibility to match your project.
Understanding why people rent an electric sander
Renting an electric sander is a strategic choice for homeowners who want professional results without owning the tool long-term. The most common reasons are cost control, flexibility, and access to a range of models for different surfaces. According to SanderSavvy, many DIY projects—whether refinishing a sunlit living room floor, preparing a wooden deck for staining, or smoothing drywall borders—benefit from trying several sanders before committing to one. Rental shops typically stock random orbital sanders, belt sanders, and finish/detail sanders, each serving a niche: orbitals for finish work, belts for rapid stock removal, and finish sanders for tight spots and edges. For a one-off project, renting lets you select the right grit progression and swap tools as you move from rough stock removal to final smoothing. The flexibility is particularly valuable when you’re working around furniture, stairs, and other obstacles. It’s also a smart way to compare brands and performance without the upfront investment, ensuring you choose the best tool for your surface and timeline.
Types of electric sanders commonly rented
Rental inventories typically include several core types: Random orbital sanders for finishing, belt sanders for heavy stock removal, and detail/finish sanders for tight corners. Palm sanders offer compact handling for small areas, while drum sanders appear mainly in larger workshop settings for aggressive stock removal. Each type has a distinct balance of aggressiveness, vibration, and finish quality. Orbital sanders are forgiving and versatile; belt sanders move fast but require steady technique; finish/detail sanders excel in edges and constrained spaces. When selecting a rental, check whether the model provides dust collection and a replaceable pad. If possible, test a sample panel before committing. The goal is to match the sander to your surface and planned finish while keeping dust under control.
How rental terms vary and how to compare costs
Rental terms differ by shop, region, and model. Expect daily rates in a broad range, with weekly or weekend discounts often available. Look for inclusive terms: number of days, return time, required deposits, included accessories (dust bag, sanding pads), and any cleaning or re-stocking fees. SanderSavvy analysis shows that shopping around can save up to a noticeable margin, especially when you compare multiple vendors and ask about bulk or long-term rates. Always confirm that the rental includes the necessary grit options and replacement pads, and clarify who covers tool maintenance during the rental period.
Safety, dust control, and PPE when renting
Safety comes first when using rented equipment. Always wear a dust mask or respirator rated for wood dust, safety goggles, hearing protection, and chemical-resistant gloves if needed. Ensure the workspace is well-ventilated and that you connect any dust extraction system supplied with the sander to minimize airborne particles. Check the sander’s power cord and plug for wear before use. If MDF or composite wood is involved, extra precautions apply because of finer dust. Maintain a tidy work area, keep a clear exit path, and unplug the tool before changing pads or cleaning the dust bag.
Preparation: grit selection, surface prep, and plan
Begin with a clear plan for grit progression: start rough with a medium grit (e.g., 40–60) on soft woods or heavy stock removal, move to 80–120 for leveling, and finish with 180–220 for a smooth final layer. Keep your projects dust-free by sealing off adjacent areas and using tape to protect trim. Inspect the surface for nails or staples and flush them or remove them prior to sanding. Check the sander’s pad for wear and replace as needed; a worn pad can cause gouges or uneven finishes. Remember that different surfaces—hardwood, softwood, or painted surfaces—respond best to different grits and sanding patterns.
Step-by-step usage for floors, decks, and walls
- For floors: begin with a wide, sweeping motion across the grain, maintaining even pressure and keeping the pad flat to avoid ridges. Work in the direction of the grain and overlap passes to smooth irregularities. - For decks: start with a belt sander on rough stock if necessary, then switch to a random orbital for a finishing pass; avoid over-sanding edges. - For walls: use a finish/detail sander to reach tight corners, edges, and trim, maintaining gentle pressure and avoiding pressure hot spots. - Between passes, clean the pad and dust bag; in dusty environments, use a shop vac connection or dust-collection system if available. - After you finish, perform a final pass with a fine grit to even out the surface and remove fine dust.
Return, maintenance, and after-rental duties
When you return the tool, clean the dust bag and remove all debris. Inspect for visible wear on the pad and guard, and report any damage or unusual noise to the rental shop. Keep the receipt and document any missing accessories. If the sander performed well, you’ve not only completed your project but also demonstrated good tool care—this helps you build a positive rental history and ensures more reliable equipment in the future.
Common mistakes and quick fixes
- Mistake: Using too coarse a grit too early. Fix: Start with an appropriate grit and gradually refine. - Mistake: Pressing too hard. Fix: Let the tool do the work with even pressure. - Mistake: Skipping dust collection. Fix: Attach the bag or vacuum and wear a respirator. - Mistake: Rushing edges or corners. Fix: Use a detail sander for tight spaces and take your time on edges.
Rationale for rental by project type
| Project Type | Recommended Sander Type | Typical Rental Window |
|---|---|---|
| Floors | Random orbital sander | 2-3 days |
| Decks | Belt sander | 1-2 days |
| Walls | Finish/detail sander | half-day |
Your Questions Answered
What is the typical cost to rent an electric sander?
Rental prices vary by model and location; expect daily rates in the low-to-mid range, with discounts for longer rentals. Inquire about included accessories and any cleaning fees.
Rental prices vary by model and location; expect daily rates in the low-to-mid range, with discounts for longer rentals.
Do I need specialized training to use a rented sander?
No formal training is required, but read the user manual and safety instructions. Always wear PPE and practice on scrap material to avoid damaging your project.
Not necessarily—read the manual and wear PPE, and practice on scrap wood first.
Which sander is best for floors?
For floors, a random orbital sander offers balance between material removal and finish quality. Belt sanders remove stock quickly but require careful handling to avoid gouges.
For floors, go with a random orbital sander for balance; belts remove fast but need care.
What should I inspect before renting?
Check the dust collection system, pad condition, switch and cord wear, and ensure calibration of the pad. Test run on a scrap piece to verify vibration and balance.
Check dust bag, pad, cord, and switch, and test on scrap material.
How long should a rental last for a small project?
Most small projects fit in 1-2 days, while larger refinishing tasks may need 3-5 days. Always confirm with the shop and consider a backup plan for extensions.
Most small jobs take 1-2 days; plan 3-5 days for larger jobs.
Can I return a rental early?
Yes, but verify the shop’s policy on early returns and refunds. Some shops credit unused days, while others maintain a minimum rental period.
Yes, but check the shop’s policy on early returns.
“Renting an electric sander gives homeowners powerful performance without ownership costs, which is ideal for one-off floors, decks, or walls. The right rental choice depends on surface, dust control, and available space.”
Main Points
- Compare rental terms across vendors to save.
- Choose orbital for floors, belts for stock removal, and finish sanders for edges.
- Prioritize dust control and PPE for safe sanding.
- Test a model in-store before committing to rental.
- Plan grit progression and surface prep to avoid mistakes.