Corner Sander vs Sheet Sander: A Practical Side-by-Side Guide
Compare corner sanders and sheet sanders to decide which tool fits edges, corners, and flat surfaces. Learn when to use each, how to finish with minimal gouges, and how to combine them for superior results.

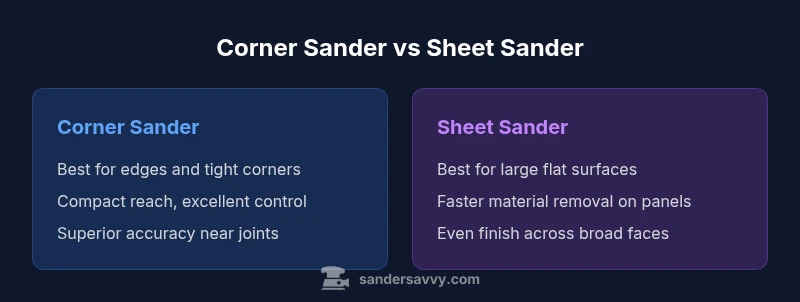
For most projects, the sheet sander offers versatility on large flat panels, while the corner sander excels at edges and tight corners. If you can only buy one, start with a sheet sander for general finishing and add a corner sander later for precise edge work. Using both tools in tandem yields the best overall finish and reduces rework.
Why the corner sander vs sheet sander distinction matters
Understanding the fundamental differences between a corner sander and a sheet sander helps homeowners and DIY enthusiasts plan a finishing workflow that minimizes mistakes and maximizes surface quality. The corner sander is designed to reach tight radii, inside edges, and awkward corners where a standard flat pad cannot fit. The sheet sander, often with a larger base and interchangeable sheets, is optimized for flat surfaces such as wide panels, doors, and floors. When you’re deciding between the two, consider the geometry of the workpiece, the finish you want, and how much time you’re willing to invest in tool changes. According to SanderSavvy, most projects benefit from a combination approach—using the sheet sander for the bulk of the surface and reserving the corner sander for the tricky edges. This complementary pairing helps minimize gouges and uneven transitions, ensuring a smoother final result across both flat areas and curved edges. In a nutshell, the choice should be dictated by the geometry of the job and the finish quality you aim to achieve, not by the color of the tool or a marketing claim.
How the two tools interact in a typical project
When you tackle a project, you’ll likely begin with material removal and gross leveling on flat sections using a sheet sander. The broad base provides consistent contact and helps avoid ridges. As you approach edges, corners, and confined spaces, switch to a corner sander to maintain control and prevent rounding over edges or creating dips near joints. The two tools aren’t mutually exclusive; they’re complementary. For homeowners, this often means acquiring one tool initially and expanding to a second once the scope includes edge work or intricate profiles. SanderSavvy analysis shows that a well-planned sequence—sheet sander first, corner sander last for final edge work—yields the most predictable finish across multiple boards or panels. Always adjust your grit progression: start coarse for material removal, then move to finer grits for a feathered, uniform surface. In practice, the corollary is simple: match tool geometry to workpiece geometry for best results.
Tool geometry and its effect on results
The sheet sander relies on a rectangular or square pad that covers more area, making it excellent for large, flat surfaces. Its flat, wide footprint reduces the risk of leaving gouges on broad planes when used correctly. A corner sander, by contrast, has a compact footprint and a curved or chamfered edge profile that conforms to tight corners and the inner radii of furniture or door frames. The geometry difference also affects dust collection and vibration feel. Sheet sanders typically require slower, careful movements to avoid creating gouges along edges, while corner sanders demand lighter touch and more frequent check-ins with the work surface to prevent over-sanding at corners. Factoring in these geometric traits is essential for achieving uniform finish and minimizing rework between tools.
Dust collection and noise considerations
Dust extraction efficiency often varies between models, but the general trend holds: larger sheet sanders with integrated dust ports perform better on open surfaces, while corner sanders may struggle to evacuate dust from tight crevices. To minimize airborne particles, attach a capable dust collection system and use a shop vac with a HEPA filter when possible. Noise levels tend to be similar across compact corner sanders and sheet sanders, but longer sessions on flat surfaces with a sheet sander may feel louder simply due to contact area and vibration. For a safer workspace, wear a suitable dust mask and eye protection, and always secure your workpiece to prevent unexpected kickback when transitioning from flat to edge work.
Practical guidance on grit choices and sanding sequence
A practical approach to grit progression starts with a coarse grit (e.g., 60–80) for material removal, moves to medium (120–150) for leveling, and finishes with a fine grit (180–220) for a silky surface. When using a corner sander on edges, keep the tile or joint outline visible and avoid grinding too aggressively near the boundary line; test in a hidden area first if possible. For sheet sanding, maintain an even pressure and keep the sander moving in a consistent motion to avoid creating hollows. Between transitions from sheet to corner sander, wipe the surface with a tack cloth to remove dust that could cause scratch marks or unevenly sanded spots. A disciplined grit sequence reduces the risk of oversanding and ensures a uniform finish across corners and planes.
Edge work and precision techniques for corners
Precision on corners requires a deliberate, patient approach. Start by identifying the tightest radii or junctions and plan your pass so that you remove material without crossing the boundary into adjacent surfaces. Use light pressure and a calm, circular or figure-eight motion near corners to avoid creating flat spots or rounding the edge excessively. Practically, you should approach corners last, after flattening broad areas with a sheet sander, then finish the last millimeters with the corner sander for crisp edges. This strategy minimizes the need for heavy hand sanding and reduces the chance of gouges, especially on softwoods or veneers with low tear-out resistance. With practice, your corner sander will become a precise instrument for edge refinement.
Surface preparation and finish quality across wood types
Wood species influence both tool choice and sanding strategy. Hardwoods often tolerate finer grits and more aggressive removal in early passes, whereas softwoods require gentler passes to avoid fuzzing and tear-out. Plywood and veneer present their own challenges, with thin laminates susceptible to chipping near edges. In the corner sander phase, use light passes and check for grain direction changes to avoid burning edges. The sheet sander phase should emphasize uniform scrubbing across flat surfaces, ensuring you don’t miss any low spots. By aligning grit progression with wood type and stress, you’ll achieve a higher-quality finish with fewer reworks.
Practical project scenarios and tool selection
Concrete examples help illustrate how to choose between corner sander and sheet sander. For refinishing a wooden tabletop with ornate edges, you’ll benefit from the corner sander for precise edge trim while the sheet sander handles the broad faces. For a long, flat door or cabinet face, the sheet sander is your primary tool, with the corner sander deployed sparingly for any tight radii or crucial joints. For decks or exterior surfaces with railings and posts, consider a hybrid workflow: sheet sander for planks, corner sander for posts and edge details. These scenario-based guidelines reduce guesswork and improve consistency between boards and surfaces.
Maintenance, replacement parts, and tool longevity
Regular maintenance of both tools extends their life and keeps performance consistent. Clean dust from the pad, check the sanding belts or discs for wear, and replace worn parts promptly to avoid gumming the finish. A simple routine of inspecting a few critical components—dust ports, power cords, and clamps—can prevent mid-project failures. When choosing between a corner sander and a sheet sander, assess availability of replacement parts and consumables (pads, discs, belts) locally and online. Stocking a few spare sheets and replacement dust collection bags helps you maintain momentum during projects and reduces downtime.
Decision framework: when to buy both vs. rent or borrow
For most homeowners tackling occasional projects, a single sheet sander may suffice for flat-work, with a corner sander added later as edge work becomes necessary. If your projects frequently involve intricate edges, chamfers, or curved profiles, owning both tools is more cost-effective in the long run than renting repeatedly. Renting can also be a viable option for a one-off job requiring edge work, but you’ll want to ensure the rental unit has a compatible dust port and you’re comfortable with tool handling. The key is to map out typical project types, estimate tool usage, and evaluate whether the incremental cost of a second sander justifies ongoing access and flexibility.
Summary and takeaways for decision-making
Finally, align your choice with your typical project scope. A sheet sander provides strong value for broad flat surfaces and finishing large panels, while a corner sander shines on edges, inside corners, and tight radii. If budget and space permit, adopting a two-tool approach offers the most versatility and highest quality finishes. If you must choose one tool to start, consider your most common tasks; many DIYers begin with a sheet sander for its general utility, then add a corner sander as soon as edge work becomes part of the workflow.
Comparison
| Feature | corner sander | sheet sander |
|---|---|---|
| Best for | Edges, corners, tight radii and intricate profiles | Flat surfaces, panels, doors, large decks |
| Surface reach | Compact footprint; excellent in confined spaces | Larger contact area; ideal for broad faces |
| Dust collection | Effective in tight edges with proper dust port | Typically strong on flat surfaces with larger ports |
| Weight & maneuverability | Usually lighter and easier to maneuver in corners | Can be heavier; more stable on flat planes |
| Grit progression | Grits similar to sheet sanders; start fine on edges | Broad grit range; aggressive material removal on large areas |
| Price range | $20-$60 for basic models | $60-$120 for mid-range models |
| Best for | Edge work and inside corners | Overall surface finishing and cross-panel consistency |
What's Good
- Improved edge and corner control with minimal gouges
- Sheet sander handles large flat surfaces quickly
- Using both tools yields the best overall finish
- Widely available accessories and replacement parts
Weaknesses
- Edge work requires careful technique to avoid rounding edges
- Sheet sanding can gouge if not used with proper contact
- Owning two tools increases storage needs and cost
- Dust collection can vary by model and setup
Use both tools when possible for best results; start with a sheet sander for flats and add a corner sander for edges.
A two-tool approach delivers superior finish across corners and planes. If constrained, prioritize flat-surface finishing with a sheet sander and plan for edge work later.
Your Questions Answered
What is the main difference between a corner sander and a sheet sander?
The corner sander is built to reach tight corners and edges, while the sheet sander covers large flat areas. The two tools complement each other, offering better control and a smoother finish when used together. For most DIY projects, a sheet sander handles the bulk, with a corner sander handling edges.
The corner sander shines on edges and tight spots, while the sheet sander tackles large flat areas. They work best together for a smooth finish.
Which sander is better for edges?
A corner sander is specifically designed for edges and inside corners. It allows precise material removal without rounding edge lines. For best results, reserve the corner sander for final edge refinements after flattening the face with a sheet sander.
For edges, the corner sander wins. Use it after you’ve leveled the flat areas with a sheet sander.
Can I rent corner or sheet sanders for a single project?
Yes, both tools are commonly available for short-term rental. Renting can be cost-effective for a single larger project, but ensure the unit has a compatible dust port and you’re comfortable with the tool’s balance. A rental may not always include replacement pads or discs.
Renting is an option for one-off jobs, but check the dust port and compatibility first.
How do I avoid gouging when sanding near edges with a sheet sander?
Keep light, even pressure and use slow, overlapping passes. Avoid staying in one spot; lift slightly as you approach the edge and sand diagonally to blend into the edge area. Finish with the corner sander for crisp edges.
Use light pressure and keep moving; blend into the edge with small, overlapping passes.
Are there versatile multi-sander tools that cover both tasks?
There are no single tools that perfectly replace both functions across all scenarios, though some oscillating tools and delta sanders offer decent edge access with flat surfaces. For best results, plan to use dedicated corner and sheet sanders or a system that supports both pad styles and easy transitions.
Most jobs benefit from dedicated edge and flat-surface sanders, though some multi-tools can cover simple edge work.
Main Points
- Assess project scope before buying
- Prioritize flat-surface finishing with a sheet sander
- Add a corner sander for precise edges
- Maintain dust collection for better results
- Match grit progression to wood type