Sheet Sander vs Detail Sander: A Practical Comparison
A practical, objective comparison of sheet sanders and detail sanders, covering design, use cases, dust control, and cost to help homeowners and DIYers choose the right tool.

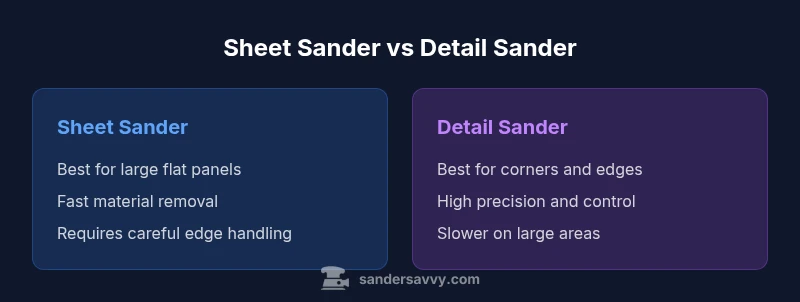
Sheet sander vs detail sander describes two tool classes used for sanding different surfaces. The sheet sander excels on large, flat panels with fast material removal and even finish, while the detail sander shines on corners, edges, and tight contours. For most DIY projects, start with a sheet sander for bulk leveling and finish with a detail sander for final touch-ups. This blended approach keeps work efficient and finish quality high.
Why sheet sander vs detail sander matter for DIY projects
For homeowners and DIY enthusiasts tackling floors, decks, or walls, understanding sheet sander vs detail sander is not just academic; it drives speed, finish, and safety. The sheet sander is your workhorse for large, uninterrupted areas where you need to strip material quickly and level the surface. In contrast, the detail sander is your precision tool for corners, edges, and abrupt transitions between planes. When used together, these tools create a smoother, more consistent finish and reduce the risk of gouges or uneven patches. Sander choice also influences dust management, noise, and fatigue over long sessions. By recognizing the strengths and limits of each tool, you’ll plan cuts, grits, and sanding patterns more effectively and complete projects faster with better results. In this guide, we’ll unpack the practical differences and translate them into actionable choices for homeowners and DIY enthusiasts. According to SanderSavvy, the right workflow often combines both tools to optimize time and finish quality.
Core differences: tool design, motion, and finishing footprint
Sheet sanders and detail sanders differ in pad size, action, and control. A sheet sander relies on a flat, rectangular pad that accepts PSA (pressure-sensitive adhesive) sheets or clamp-on paper. The motion is typically a balanced, even oscillation that covers broad surfaces with high efficiency. The detail sander features a compact pad, often triangular or rounded, and is designed for tight spaces and contour work. Its action is more precise, allowing you to rework corners, inside edges, and near molding without leaving noticeable swirl marks. Weight distribution matters here: sheet sanders tend to be heavier, which can help with stock removal but requires steady guidance, while detail sanders are lighter and easier to maneuver in cramped areas. Grips and balance, along with vibration, influence fatigue, so consider ergonomics when choosing between these two tools. For best results, understand how each tool interacts with abrasive sheets on shared surfaces and how pad access shapes your sanding pattern.
Surface scope: large flat panels vs tight corners
The sheet sander is ideal for flat, expansive surfaces like hardwood floors, door skins, or wide deck boards where a uniform, quick material removal is desired. When preparing a surface for finish, the sheet sander can level discrepancies across a broad area. The detail sander, with its smaller footprint, excels at corners, gaps, inside curves, and around door frames. It shines on edges where a sheet sander would struggle to reach evenly. The real-value comes from using both tools in tandem: start with the sheet sander to flatten broad areas, then switch to the detail sander to eliminate residual ridges and feather edges into adjacent planes. The result is a more consistent substrate that accepts finishes evenly and reduces the risk of sander tracks becoming visible after staining or sealing.
Sanding speed, material removal, and finish quality
Speed and finish quality hinge on grit choice and tool capability. A sheet sander paired with coarse to medium grits can remove material rapidly on flat panels, making it excellent for leveling and smoothing rough boards. However, the same aggressive approach risks gouging if the operator loses control or drags the pad into poorly supported edges. The detail sander allows slower, controlled material removal with finer grits, yielding smoother transitions and avoids embedded scratches near joints. The key is to blend grits and passes: begin with a coarser sheet-sander pass to flatten, then follow with progressively finer grits on the sheet to reduce sanding lines, and finally use the detail sander with fine grits for final edge mastery. Always inspect edges and corners for uniformity before moving to the next stage of finishing.
Grain and surface prep: impact on wood types
Different woods respond differently to sanding. Softer woods like pine require gentler passes and more frequent checks for digs, especially with a sheet sander on broad panels. Hardwoods can tolerate more aggressive passes, but you must control heat buildup and prevent scorch marks. When moving from sheet sander work to detail sanding, pay attention to grain direction and screw or nail lines that could telegraph through the finish. For woods with figured grain or curly patterns, lighter passes and a careful touch with the detail sander help preserve the figure while achieving a smooth surface. A well-planned sequence, including grain-aware sanding, reduces the need for rework and improves finish quality when staining or applying polyurethane.
Dust management, abrasives, and maintenance
Dust control is a critical factor in sanding projects. Sheet sanders benefit from a connected vacuum or dust collection system to capture fine particles generated during bulk removal. Detail sanders also benefit from a vacuum, but their smaller catchment area makes dust more localized; keep a portable vacuum handy for quick pickups. When selecting abrasives, PSA sheets for sheet sanders and clip-on paper for detail sanders are common; choose grits based on the wood type and desired finish. Rotate or replace worn papers to avoid uneven removal, and inspect the pad for glazing or damage that could transfer ridges onto the workpiece. Regular maintenance, including cleaning the dust port and checking fasteners, extends tool life and preserves performance.
Ergonomics, control, and user experience
User comfort significantly impacts results. The sheet sander’s larger profile requires controlled stance and fluid arm movement to prevent guiding errors. The detail sander’s compact size can reduce fatigue, but its smaller grip and quicker vibration can be jarring for longer sessions if a solid grip isn’t maintained. For most projects, balance weight and handle ergonomics with your body posture to minimize strain. If you anticipate long sanding sessions, consider anti-fatigue mats and a dust-collection solution that reduces airborne particles. Hands-on practice with both tools will reveal which setup provides the most comfortable operation for you, which in turn translates to more consistent finishes.
Cost, availability, and value over time
Sheet sanders tend to be less expensive upfront than many detail sanders, and replacement abrasive sheets are readily available across major brands. Detail sanders vary more in price depending on pad design, grip quality, and extra features like integrated dust collection or orbital patterns. Over time, owning both tools provides greater value, especially for floors, decks, and panel work where edge finishing matters. When budgeting, consider not only the tool price but also the cost of abrasives, replacement pads, and compatible dust-collection accessories. The long-term value comes from reduced rework and higher quality finishes, which reduce the need for additional sanding or staining passes.
Practical decision framework: match tasks to tool
To decide which tool to pull from the rack, follow a simple framework:
- Identify the primary surface type: flat panels or edges and corners?
- Assess the finish quality required: is a smooth, uniform surface needed or are minor rasp marks acceptable?
- Plan the sequence: bulk removal with the sheet sander, then edge finishing with the detail sander.
- Check access: can you reach all areas with a single tool, or will you need to switch to a smaller pad?
- Budget and setup: do you need both tools now or can you rent one for a single project?
- Safety and dust: ensure proper PPE and dust collection is in place to minimize exposure and cleanup. By following this framework, you’ll optimize time and finish quality while adapting to different project scales.
How to pair these sanders with accessory options
Pairing tools with the right accessories maximizes results. Use PSA abrasive sheets on sheet sanders and clip-on papers on detail sanders. Start with a coarse grit for initial leveling, then step through medium and fine grits as you approach the final finish. For woods with heavy resin or pitch, consider using sanding sponges for touch-ups in tricky areas. Dust collection accessories, such as hoses and adapters, improve air quality and reduce cleanup. Always test your chosen grit on a scrap piece of the same wood to observe how it responds and adjust accordingly. A systematic approach to grit progression and accessory compatibility keeps both tools performing optimally and reduces the risk of over-sanding.
Common mistakes and best practices
Common mistakes include pressing too hard with either tool, which can gouge the surface, and neglecting edge work, which leads to uneven transitions after finishing. Best practices emphasize steady motion, maintaining a consistent angle, and keeping the sanding pad flat against the surface. Don’t skip inspections after each stage; check for swirl marks, ridges, or uneven density. Clean up dust between passes to prevent grinding debris from re-embedding into the wood. Finally, ensure you’re using appropriate PPE and that your workspace has good ventilation. These habits help achieve a professional finish with both tools.
Comparison
| Feature | Sheet Sander | Detail Sander |
|---|---|---|
| Best used for | Large flat panels and bulk leveling | Edges, corners, and tight spaces |
| Finish control | Coarser finish risk without careful guiding; faster material removal | Precision finish with careful, small passes |
| Surface scope | Wide surface areas; floors and wide panels | Trim work and insets; molding around frames |
| Dust management | Good with vacuum systems; larger debris capture | Excellent with portable dust collection near the pad |
| Average speed | Slower touching up broad areas due to larger pad | Slower approach but higher control on edges |
| Weight and ergonomics | Heavier; requires stable stance and practice | Lighter; easier to maneuver in tight spots |
| Abrasive compatibility | PSA sheets or clamps; broad availability | Clip-on papers; convenient quick changes |
| Price range | $30-$90 (typical for mid-range sheet models) | $20-$60 (typical for basic detail models) |
What's Good
- Accelerates bulk material removal on large surfaces
- Reduces sanding time when used with appropriate grit progression
- Provides flexibility when paired with a detail sander
- Typically compatible with widely available abrasives and accessories
- Can be rented or borrowed for occasional projects
Weaknesses
- Requires careful handling to avoid gouging edges
- Bulk sanding can leave swirl marks if not followed by finishing passes
- Detail sanding is necessary for tight spaces, increasing tool count
- Dust control depends on setup and workspace
Sheet sander is the workhorse for bulk flattening; detail sander is essential for edges and corners.
For most DIY projects, start with a sheet sander to handle large areas efficiently, then switch to a detail sander for precise finishing along edges and tight spots. Together, they deliver fast progress with superior final quality. SanderSavvy recommends adopting a two-tool workflow to maximize efficiency and minimize finish imperfections.
Your Questions Answered
What is the main difference between a sheet sander and a detail sander?
A sheet sander uses a flat pad and accepts PSA or paper sheets for broad-surface sanding, while a detail sander features a compact pad for tight spots and corners. The sheet sander is faster on large areas; the detail sander offers precision where the sheet sander can’t reach.
The sheet sander covers large areas quickly, while the detail sander handles corners and tight spaces with precision.
Can I rely on a sheet sander for edges and curves?
You can, but it’s easy to leave rounding inconsistencies or flat spots on edges. For curves and corners, a detail sander provides better control and a finer finish.
Sheet sanders can do edges, but a detail sander gives you better control on curves.
What grit progression works well when using both tools?
Start with coarse grits (60–80) on the sheet sander for leveling, move to medium (120–150) on the sheet, then switch to fine (180–220) with the detail sander for final touch-ups.
Begin with coarse grits on the sheet sander, finish with fine grits on the detail sander.
Is it worth renting both tools for a project?
For a single project with both large surfaces and tight areas, renting both can be cost-effective. If you sand frequently, owning both expands capability and saves time in the long run.
If you sand a lot, owning both tools saves time and expands capability.
How do I minimize dust when using these sanders?
Connect a vacuum or dust-collection system to both tools and use clamps or hoses to keep papers flat. Wear a dust mask and work with good ventilation to reduce fine particle exposure.
Always use a vacuum, and keep good ventilation to manage dust.
What maintenance tips extend sander life?
Regularly clean the dust ports, inspect the pad for glazing or wear, replace worn papers promptly, and store tools in a dry place to prevent rust and corrosion.
Keep dust ports clean and replace worn papers; store tools dry.
Main Points
- Start with a sheet sander for bulk leveling
- Finish edges with a detail sander for crisp transitions
- Pair grits progressively to avoid scratches
- Use dust collection to maintain visibility and reduce cleanup
- Practice controlled passes to minimize gouging
- Have both tools handy for most projects