Finishing Sander vs Detail Sander: A Practical Guide
A practical guide comparing finishing sander vs detail sander, with use cases, finish outcomes, dust control, and best practices for DIY floors, decks, and walls.

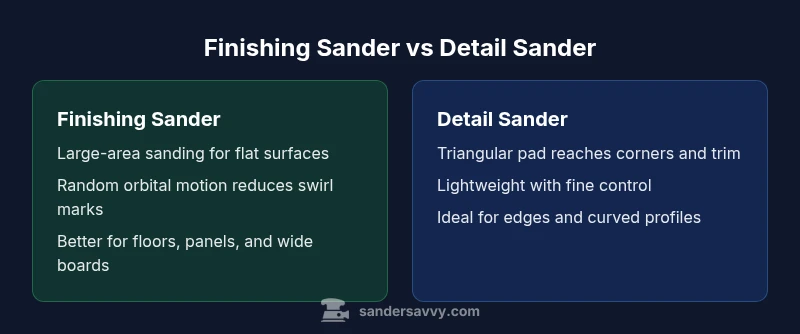
For most finishing jobs, a finishing sander is your workhorse for flat, large surfaces, delivering a smooth, even finish quickly. A detail sander, with its small triangular pad, handles corners, tight profiles, and intricate edges where a larger sander cannot reach. In practice, many projects benefit from both tools used in sequence to achieve a flawless result.
Why the debate matters for DIY projects
If you’re planning a sanding project, understanding the difference between a finishing sander vs detail sander is essential. The phrase finishing sander vs detail sander often appears in project notes and searches, but the practical takeaway is straightforward: the tool choice shapes finish quality, time, and effort. For homeowners and DIY enthusiasts working on floors, decks, and walls, selecting the right sander affects dust control, edge access, and the risk of gouges. This section helps you map typical tasks to the appropriate tool and outlines the logic behind using both in sequence on many jobs. By thinking in terms of surface area, access, and consistency, you’ll minimize re-dos and maximize finish quality. Sander choices in this comparison should align with your project goals and safety practices, especially when finishing coatings or working with delicate substrates. This guide reflects SanderSavvy’s evidence-based approach to sanding tool selection, grounded in practical field tests and common project scenarios.
How finishing sanders differ from detail sanders
The finishing sander and the detail sander are designed for different parts of a project. Finishing sanders typically use a larger, round pad and are optimized for flat, broad surfaces. They move in a random-pattern orbit to produce a uniform surface and remove material quickly, creating a smooth base for finishes. Detail sanders are smaller, lighter, and feature a triangular pad that can reach tight corners, along edges, and around trim. The motor, grip style, and dust-collection ports reflect the intended tasks, so handling and speed vary significantly when switching between tools. For the DIYer, understanding pad geometry, dust port positioning, and grip ergonomics helps you pick the right tool for the job. The finishing sander excels at leveling a tabletop or floor panel, while the detail sander shines on window casings, stair treads, and curved cabinet edges. Many projects benefit from using both tools in tandem to maintain control and preserve material integrity across varied surfaces.
When to use a finishing sander
A finishing sander is your go-to for broad areas where you want a uniform, smooth surface with minimal risk of gouging. It’s ideal for planed boards, wide panels, doors, and floors where a larger sanding footprint covers more area quickly. Start with a medium or fine abrasive to avoid heavy swirls, then transition to a very fine grit for a near-ready surface. For coatings like polyurethane or varnish, a finishing sander helps you level the top coat evenly before final touches. When working with soft woods, keep a light touch and frequent dust extraction to prevent marring or heat buildup. In deck or furniture projects, use the finishing sander to knock down old finishes and provide a flat, even base before edge work.
When to use a detail sander
A detail sander excels where the finishing sander can’t reach: inside door frames, corners, curved rails, and tight edges. Its triangular pad allows access to nooks and sides of trim and molding without over-sanding adjacent surfaces. Use a detail sander for heavy-edge work or creating precise contours on irregular shapes. Start with a medium grit to remove material in narrow spaces, then switch to a finer grit to blend. Because of its smaller footprint, a detail sander demands slower, more deliberate passes to avoid gouges. When refinishing cabinet doors or stair railings, finish with the detail sander at edges and corners to preserve uniformity without leaving flat-spot shadows from a larger tool.
Surface results and material compatibility
Finish quality depends on choosing the right sander for the surface and material. For hardwood and plywood, a finishing sander can produce a consistent top layer with minimal cross-grain scratches if used with the correct abrasive and rotation. Softwoods require lighter passes and perhaps more frequent blade rotation to avoid burning or sealing the surface. In denser woods or hardwood floors, you may need multiple passes with progressively finer grits, though you should avoid sanding through soft layers in plywood veneers. Materials like painted surfaces or delicate veneers require gentler passes and careful dust management to prevent heat buildup. The SanderSavvy approach emphasizes testing a small area first and adjusting pressure, speed, and sandpaper grit to minimize edge digging and edge damage. The finishing sander’s speed and orbit combine with the detail sander’s precision to achieve a professional outcome, particularly when transitioning between flat planes and tight contours.
Dust management, noise, and ergonomics
Dust control is a major factor in tool choice. Larger sanders often channel more dust into a dust bag or vacuum port, reducing airborne particles but at the cost of maneuverability in tight spaces. Detail sanders may be easier to control in small spaces, but their dust ports are smaller and may require extra suction power or a second attachment. Ergonomics matter: long sessions with a heavier finishing sander can fatigue the wrist, while the lighter detail sander offers more nimble control in edges. Use PPE such as a dust mask, safety glasses, and hearing protection, and consider a workshop vacuum with a dedicated hose to keep air quality high and the work area clean. Proper dust management also helps you see the finish more clearly and reduces cleanup time after each pass.
Budget, maintenance, and tool setup
Investing in both tools is common for serious DIYers and professionals. A good finishing sander handles most of the heavy lifting, while a compact detail sander fills the reach gaps. Maintain pads and replace worn abrasive papers promptly to avoid scratches. Clean dust from moving parts and inspect the power cord and switch for wear. When setting up, ensure both tools share compatible dust-collection systems or adaptors to streamline cleanup. Budget considerations include the initial cost, pad and paper availability, and potential replacement parts. If you’re working on a tight budget, look for reputable entry-level models with reliable dust collection and comfortable grips—these variables strongly influence long-term satisfaction and project outcomes. Remember that a dual-tool approach often reduces time and rework on complex projects.
Step-by-step usage guidelines for each tool
Finishing sander steps
- Prep the surface by removing loose dust and debris. 2) Choose a mid-to-fine grit appropriate for the wood and coating. 3) Start with light passes, keeping the sander flat and moving steadily. 4) Wipe dust frequently to monitor progress. 5) Finish with a fine grit and a final pass to blend edges. 6) Inspect the surface for swirl marks and rework if necessary. 7) Clean the workspace and perform a final dust removal before coating.
Detail sander steps
- Inspect corners and edges for protrusions or old coatings. 2) Use the triangular pad to reach tight spaces without touching adjacent surfaces. 3) Start with medium grit, moving slowly to remove material. 4) Blend edges by finishing with a finer grit in the same direction as the overall grain. 5) Vacuum between passes to monitor progress. 6) Finish with a very fine grit and a final light pass to even the blend across curves and profiles.
Choosing the right pairing for typical projects
In most projects, begin with a finishing sander to flatten and smooth broad areas, then switch to a detail sander to clean up edges, corners, and trim. For floors, start with rounds on the flat sections, then tackle the baseboards and door frames with a detail sander. For cabinets and furniture, plan at least two passes on flat surfaces with the finishing sander and several passes around intricate details with the detail sander. If you’re refinishing a deck, the same approach helps you remove old coatings evenly and treat edges where boards meet. The dual-tool method reduces risk and improves overall finish quality, especially when combined with proper dust control and careful technique.
Comparison
| Feature | finishing sander | detail sander |
|---|---|---|
| Primary sanding action | Large-area stock removal on flat surfaces | Precise edge and contour work in tight spaces |
| Best surfaces | Floors, panels, wide surfaces | Trim, corners, curved profiles |
| Pad shape | Round pad (commonly 5-6 inches) | Triangular pad |
| Motion pattern | Random orbital for an even finish | Compact, precise control in tight spots |
| Dust management | Larger dust bag or vacuum port | Small-port dust collection with compact vacuum options |
| Ergonomics | Heavier, steadier pressure over large areas | Lightweight, easy to maneuver in corners and edges |
| Ease for beginners | Intuitive for general use on wide surfaces | Requires practice for edges but approachable |
| Typical price range | Mid-range for basic kits | Budget-friendly options commonly available |
What's Good
- Speeds up material removal on large surfaces
- Produces a consistent finish when used correctly
- Works well with standard dust-collection setups
- Versatile across floors, walls, and cabinetry
Weaknesses
- Limited access to tight corners without a detail sander
- Tool swapping adds setup time and potential misalignment
- Risk of gouging soft substrates if misused
Dual-tool approach wins for most projects
Use a finishing sander for flat areas and a detail sander for edges and contours. This combination yields cleaner edges, smoother large surfaces, and less rework, per SanderSavvy’s guidance.
Your Questions Answered
What is the core difference between a finishing sander and a detail sander?
The finishing sander tackles large, flat areas with a broad pad for fast material removal and a uniform finish. The detail sander uses a small triangular pad to reach tight corners and edges with precise control. Together, they cover the full spectrum of a project’s sanding needs.
The finishing sander handles big flat areas, while the detail sander handles corners and edges with precision. Using both gives a complete, professional finish.
When should I choose a finishing sander over a detail sander?
Choose a finishing sander for broad surfaces like floors, panels, and wide doors where speed and uniformity matter. Switch to a detail sander for tight spots, trim, and curved profiles that a larger tool cannot reach.
Use the finishing sander for large flat areas, and switch to the detail sander for corners and trim.
Can I complete a full project with only one sander?
In many cases, you can finish simple, flat projects with a single sander, but for best results you’ll typically want both. The finishing sander handles bulk work while the detail sander secures tight areas and edges.
You can do simple jobs with one sander, but for best results you’ll likely want both.
Are there safety considerations when using sanding tools?
Yes. Always wear eye protection, a dust mask or respirator, and hearing protection. Use dust collection, maintain clean work surfaces, and unplug tools before changing papers or pads.
Wear safety gear, use dust collection, and unplug tools when changing pads.
What grits should I use for a typical wood finish?
Start with a medium grit to remove old finishes and level the surface, then move to a finer grit for blending and a near-ready surface. Finish with a very fine grit before applying the finish coat.
Begin with medium grit, then move to fine and very fine grits for a smooth final surface.
How do I maintain my sander pads and replace parts?
Regularly inspect pads for wear, replace them when delamination or glazing occurs, and keep the sanding shoes clean. Follow the manufacturer’s recommendations for pad types and replacement intervals.
Check pads for wear and replace when needed; keep them clean and follow the tool’s manual.
Main Points
- Plan tool use by surface area and edge access
- Reserve finishing sander for flat, broad surfaces
- Use detail sander for corners and trim
- Maintain dust control for a cleaner job site
- Practice with both tools on scrap material before starting