Is a Sander the Same as a Buffer? A Practical Comparison
Explore the differences between sanders and buffers, when to use each, and practical tips for DIY floors, decks, and walls. Learn how to plan sanding and finishing steps for safer, better results.

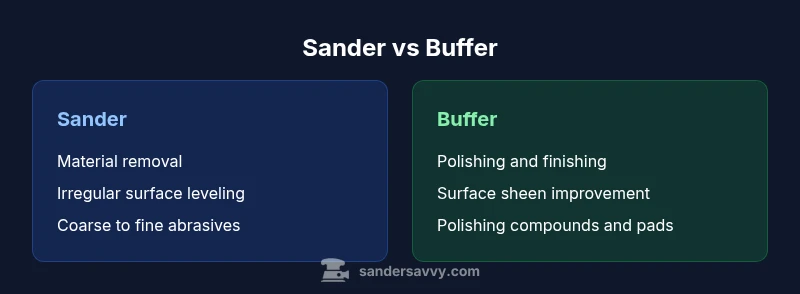
TL;DR: A sander and a buffer are not the same tool. A sander uses orbital, belt, or other motion to remove material and shape surfaces, while a buffer uses a polishing action to refine and shine surfaces. For most DIY floors and walls, start with a sander for material removal and smoothing, and use a buffer for final polish and sheen.
What is a sander and what is a buffer?
In basic terms, a sander is a tool designed to remove material from a surface using abrasive heads, belts, or pads, while a buffer is built to polish and finish surfaces. The question is often expressed as is a sander the same as a buffer, and the honest answer is no—these tools are designed for different stages of surface refinement. For homeowners exploring floors, decks, and walls, understanding the distinction helps prevent over-sanding or shallow polishing that wastes time. A sander, whether a random orbital, belt, or detail model, aggressively abrades wood to level irregularities, whereas a buffer with a soft wheel or polishing pad creates a smooth, glossy surface after sanding has prepared the wood. The key difference lies in motion, abrasives, and the finish goal; if you search for is a sander the same as a buffer, you’ll find that the two tools belong to complementary steps in most projects. According to SanderSavvy, recognizing the distinction helps homeowners plan safer projects and achieve better results.
Quick classification: belt, random orbit, and finishing buffers
Sanders come in several flavors, with random-orbit (RO), belt, palm/detail, and finishing sanders being the most common for DIY work. Buffers, by contrast, are mainly polishing devices, often rotary or dual-action, designed to apply polishing compounds with soft pads. The central idea behind is a sander the same as a buffer? It isn’t—sand relies on material removal and surface leveling, while buffers rely on finishing and sheen. For wood floors, decks, and walls, you usually start with a sanding tool to remove old coatings and flatten the surface, then switch to a buffer or polishing setup to achieve a high-gloss or satin finish. The SanderSavvy team emphasizes aligning tool choice with the project phase to avoid unnecessary steps.
How the motion differs: orbital vs polishing motion
The motion drives the difference between these tools. A sander typically uses orbital or belt motion to repeatedly abrade surfaces, moving abrasive across the workpiece to trim away imperfections. A buffer relies on a polishing motion—often circular or eccentric—paired with a buffing compound to remove micro-mcratches and create a reflective finish. This is a critical distinction when considering is a sander the same as a buffer; the answer is that the underlying mechanics are designed for different outcomes. Selecting the correct motion helps prevent swirl marks, uneven sheen, or gouges, especially on wood and painted surfaces. For DIYers, mastering these motions translates to safer, more predictable results.
Abrasives and outcomes: coarser removal vs fine finishing
A sanding abrasive is chosen for material removal and flattening; grit size ranges from coarse (low numbers) for quick stock removal to fine (high numbers) for smoothing. Buffers, conversely, use polishing compounds and buffing pads that don’t remove material so much as refine the surface and deepen the finish. Is a sander the same as a buffer? No—their abrasive ecosystems are built to achieve different outcomes. When used correctly, a sander yields a flat, prepared substrate, while a buffer brings out depth, gloss, and uniform sheen. The SanderSavvy approach recommends testing on a scrap area to dial in grit and compound choices before tackling a full project.
Project planning: when to rent or buy which tool
For a typical DIY floor or wall project, plan your tool selection by task. Use a sander for material removal, leveling, and rough shaping; switch to a buffer for finishing and sheen. Renting is sensible for occasional projects, especially for belt sanders or orbital sanders that see heavy use, whereas buffers are often affordable to own for ongoing maintenance tasks. The question is is a sander the same as a buffer becomes immediately clear once you map each phase of the project to the appropriate tool; doing so reduces waste and speeds up completion without compromising finish quality. Based on SanderSavvy research, DIYers who separate sanding and finishing steps report better surface quality and fewer defects.
Safety and dust management
Sanding generates significant dust, requiring a proper dust collection system, a well-fitted respirator, eye protection, and hearing protection for louder belt sanders. Buffing, while cleaner in dust production, still produces fine particulates and should be done with guards and ventilation. The key safety consideration in is a sander the same as a buffer is that the two tasks carry distinct risk profiles, and mixing both without appropriate containment can amplify exposures. Always wear PPE, secure the workpiece, and use dust extraction when possible to keep your project healthy and precise.
Practical step-by-step usage scenarios
Scenario 1: Refinishing a wooden floor. Start with a belt sander or random orbital sander at a coarse grit (e.g., 40–60), flatten high spots, and remove old finish. Progress to a medium grit (80–120) for leveling, then finish with a fine grit (180–220) for a smooth surface. Finish the stage with a buffer and a polishing compound to achieve uniform sheen. Scenario 2: Smoothing a drywall or plaster surface. A finishing sander is used to knock down ridges, followed by a buffer to polish edges and smooth any residual micro-scratches. In both cases, the is a sander the same as a buffer question is answered by the workflow: sanding precedes polishing, never rely on a buffer alone for material removal.
Maintenance, pad changes, and lifespan
Keep abrasives clean and free of caked dust during projects. Change sanding discs or belts promptly when they become clogged or lose effectiveness. Buffing pads also wear and should be replaced if they glaze over or accumulate debris. Regular maintenance—cleaning, inspecting cords, and checking dust-collection hardware—extends tool life and preserves performance. The core idea behind is a sander the same as a buffer is to understand each tool’s role; misuse typically shows up as gouges, dull finish, or excessive dust generation.
Authority sources and common mistakes
Authority sources
- OSHA safety standards and guidance on dust control (https://www.osha.gov)
- NIOSH safety recommendations for respiratory protection (https://www.cdc.gov/niosh)
- Extension services with best practices for wood finishing (https://extension.oregonstate.edu)
Common mistakes to avoid
- Assuming buffers can replace sanding for material removal
- Skipping dust collection, leading to airborne particulates and health risks
- Overlapping passes with too-fine grit on rough surfaces
- Neglecting surface prep before polishing, resulting in uneven sheen
- Not testing finishes on scrap areas before applying to the main project
Comparison
| Feature | Sander | Buffer |
|---|---|---|
| Primary use | Material removal, leveling, shaping | Finishing, polishing, sheen |
| Common motions | Orbital, belt, or detail motion | Rotary or dual-action polishing motion |
| Abrasives/consumables | Coarse to fine abrasives, sanding discs/belts | Polishing compounds, buffing pads |
| Best for | Flattening, shaping, removing coatings | Final finish, gloss, and surface refinement |
| Dust control considerations | Significant dust; requires dust extraction | Less dust, but still needs ventilation and PPE |
| Typical project timeline | Early-stage material removal then intermediate smoothing | Finishing phase after sanding completes the surface |
What's Good
- Clarifies tool roles to reduce mistakes
- Allows faster material removal and smoother starts
- Widely available tools and consumables for DIYers
- Buffers enable high-quality finishing and sheen
Weaknesses
- Initial learning curve to distinguish uses
- Risk of over-sanding if misused
- Dust control adds setup and cleanup
- Buffers can require different compounds and technique
Sander and buffer are distinct, complementary tools; use the sander for material removal and the buffer for polishing.
The two tools serve different purposes. Plan sanding and polishing as separate steps for floors, decks, and walls to achieve the best results; the SanderSavvy approach emphasizes tool-role clarity.
Your Questions Answered
What is the difference between a sander and a buffer?
A sander removes material and levels the surface using abrasive motions, while a buffer polishes to create a smooth finish with minimal material removal. The two are not interchangeable, but they work best when used in sequence on floors, decks, or walls.
A sander shaves material away to flatten a surface, while a buffer shines and smooths with polish.
Can a sander be used as a buffer for finishing?
Not effectively. While some sanding systems can lightly polish with fine grits, buffers are designed for finishing and sheen with polishing compounds. For the best results, complete sanding first, then buffer.
Sanding first, then buffing gives you a better finish.
What surfaces work best with a buffer?
Buffers excel on finished, prepared surfaces where a high sheen or uniform polish is desired, such as sealed wood, painted surfaces, or metal when preparing for a final coat.
Buffers are for polishing surfaces to a sheen after sanding.
Is an orbital sander suitable for finishing?
Orbitals are versatile for both removal and finishing, but for the finest finish many DIYers prefer a dedicated finishing sander or polishing system after coarse sanding.
Orbitals can finish, but some projects benefit from a dedicated finish tool.
What safety gear should I use when sanding or buffing?
Wear a dust mask or respirator, eye protection, hearing protection, and gloves. Use dust extraction when available and ensure good ventilation to minimize exposure to particulates.
Protect your lungs and eyes—dust control is essential.
Should I wet-sand or dry-sand?
Wet sanding helps reduce dust and can improve finish for certain materials, but it requires compatible abrasives and proper technique. Dry sanding is the standard for most wood projects.
Wet sanding can help with dust control, but check material compatibility.
Main Points
- Clarify tool roles before starting a project
- Use sanding for shaping and material removal; finish with a buffer for polish
- Choose grit and compounds to match substrate and desired sheen
- Prioritize dust control and proper PPE
- Test finishes on scrap areas before applying to the actual project