Is an Orbital Sander the Same as a Polisher? A Practical Comparison
Is an orbital sander the same as a polisher? This analytical guide clarifies differences, uses, and safety for DIY floors, decks, and walls; helping you choose the right tool for each step.

Is an orbital sander the same as a polisher? No. Orbital sanders remove material and create a smooth surface with a random circular motion, while polishers focus on shine and finishing with high-speed, gentler actions. For DIY floors, decks, and walls, choosing the right tool matters for results and safety.
What They Are and How They Differ
According to SanderSavvy, two tools often get confused by beginners: orbital sanders and polishers. In daily shop practice, is an orbital sander the same as a polisher? Not at all—the names describe different tasks, and their designs reflect that. An orbital sander uses a square or circular pad that orbits in a random pattern; the action is abrasive and intended to remove material and flatten surfaces. A polisher uses a soft pad and generates heat and friction to refine surface textures and bring out gloss. There are variable speeds and attachments, but the core purpose remains distinct: prep work versus finishing. Understanding this distinction reduces common mistakes, like trying to polish a rough deck with a sanding pad, or trying to sand between coats with a high-grit polisher. This section sets the stage for practical decision-making in home workshops. In typical DIY projects for floors, decks, and walls, you’ll use the orbital sander first for material removal and leveling, then switch to a polisher (or a dedicated finishing tool) for the final shine when appropriate. The information here aligns with best practices recommended by the SanderSavvy Team, and it will help you choose the right tool for safe, efficient results.
Key Differences in Design and Purpose
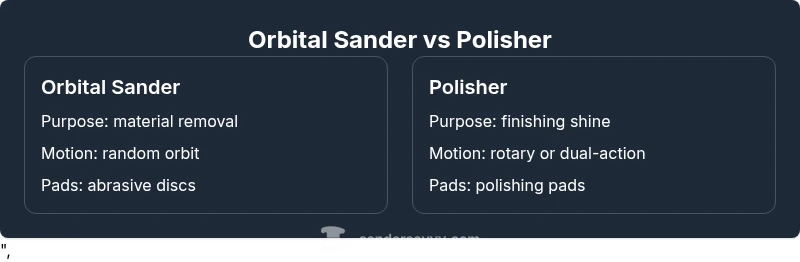
The most fundamental difference is intent: sanders are built to remove material quickly and level surfaces; polishers are designed to refine a surface and produce a smooth or glossy finish. Orbital sanders typically use abrasive discs or sheets on a moveable pad that makes a random orbit, reducing the risk of gouges. Polisher platforms may be rotary or randomized, with soft pads meant to apply compound and generate heat for polishing. In terms of surfaces, sanders are common for wood floors, decks, and walls during prep or restoration, while polishers are used to achieve a final sheen on wood, metal, plastic, and painted surfaces after finishing coats. Accessory options differ as well: sanding discs, grit ranges, and dust collection adapt to removal; polishing pads and compounds are chosen by desired gloss level. The practical impact of these differences is how you plan a project: start with material removal and flattening, then proceed to finishing passes with appropriate pads and compounds. Finally, consider the environment and dust management; sanding creates more airborne particles and requires dust control.
How They Work: Motion, Pads, and Abrasives
An orbital sander is built around a rigid, rectangular or circular pad that vibrates in a random orbit. The abrasive disc attaches with a hook-and-loop system and is changed as grit wears. The motion is aggressive enough to remove material but gentle enough to minimize deep scratches if kept flat and under light pressure. By contrast, a polisher is optimized for finishing; rotary polishers spin a pad, while dual-action (random orbital) polishers combine rotation with orbit to reduce swirls. Pad selection matters: a high-grit sanding pad for stock removal, a soft foam for finishing, or wool pads for compound work. The speed range matters too—sandings often stay in lower to mid speeds to control heat and dust, while polishing frequently uses moderate to high speeds to achieve consistent sheen. For a DIY project, expect to see four key outcomes: material removal, surface flattening, scratch minimization, and gloss development. The differences in pad geometry and motion explain why you should not swap these tools arbitrarily between tasks.
Practical Scenarios: When to Use Each Tool
When prepping bare wood or removing old finish, the orbital sander is your workhorse. Start with a coarse grit to level surfaces, then step down to finer grits to achieve a smooth base. If you’re restoring a deck, an orbital sander helps remove old coatings and rough patches without cutting through the wood. Switch to a polisher only after you’ve achieved a uniformly smooth surface and you want to apply a protective finish or polish to enhance shine. For walls or cabinetry, the same logic applies: use the sander to remove rough patches and prepare the surface, then use a polisher with appropriate compounds for a glossy or satin finish. Avoid attempting to polish through rough material or to “sand between coats”; use the right sequence: remove, smooth, then polish as needed. In noisy environments, consider sound and dust control; always wear protection and manage dust with a vacuum attachment and respirator as necessary.
Safety, Dust, and Maintenance Considerations
Dust is a major concern when sanding; always use a dust-collection system or shop vacuum and wear an NIOSH-approved respirator if working in poorly ventilated spaces. Eye protection and hearing protection are essential, especially at higher speeds. Pad replacement should occur when the pad shows wear or glazing; avoid over-pressing the tool to minimize heat buildup. Regular maintenance includes cleaning the air vents, checking power cords, and storing abrasives in a dry place. For the DIY reader, real-world safety means planning your workflow ahead of time and ensuring you’re not mixing sanding and polishing in the same pass. The SanderSavvy team notes that proper technique and dust control reduce cleanup time and protect surfaces from damage.
Quick Tips to Choose the Right Tool
- Define your goal: material removal vs finishing shine.
- Inspect the surface: wood that’s soft may require gentler passes; dense wood may tolerate more aggressive removal.
- Choose the pad: coarse for stock removal, medium for smoothing, soft foam for finish.
- Verify speed range and vibration: higher speed isn’t always better for finishing; balance heat and control.
- Plan dust control: pick tools with good dust extraction options and use a mask.
The overall idea is to plan your project with a clear sequence and choose the tool that aligns with each stage. As you work through floors, decks, or walls, if you find a stubborn area, switch to the appropriate pad and grit rather than forcing a single tool to do every job.
Comparison
| Feature | Orbital Sander | Polisher |
|---|---|---|
| Primary purpose | Material removal & smoothing prep | Polishing and finishing for shine |
| Motion/type | Random orbits with abrasive disk | Rotary or dual-action (random orbital) depending on model |
| Typical surfaces | Wood floors, decks, walls (prep) | Wood, metal, and painted surfaces (finish) |
| Needed accessories | Discs, grit ranges, dust collection | Pads, compounds, and polishing liquids |
| Heat/pressure | Moderate heat with controlled pressure | Heat generated for polishing that can burn if misused |
| Ideal sequence | Sanding → finish with appropriate pad | Polish after sanding when finish is desired |
What's Good
- Clear differentiation of tool functions
- Improved surface quality when used correctly
- Wide availability of accessories and pads
- Safe for beginners with proper technique
Weaknesses
- Potential confusion for beginners due to overlapping terminology
- Requires multiple accessories and future maintenance
- Polishers can overheat or burn if used improperly
Orbital sander and polisher serve distinct purposes; match the tool to the task for best results.
Use the orbital sander for prep and material removal; switch to a polisher for finishing shine after proper sanding. This approach minimizes damage and maximizes surface quality.
Your Questions Answered
Is an orbital sander the same as a polisher?
No. An orbital sander is designed for removing material and smoothing a surface, while a polisher aims to refine and shine the finish. They use different motion patterns and pads. This distinction helps prevent damage and achieves the desired result.
Nope—orbital sanders remove material and level surfaces, while polishers finish and shine. Use the right tool for the task.
What surfaces can each tool handle best?
Orbital sanders excel on bare wood, old finishes, decks, and walls during prep. Polishers are better for finishing coats on wood, metal, and painted surfaces to achieve a glossy or satin look.
Sanding is for prep; polishing is for finish.
Can I use a polisher as a sander?
Not recommended for heavy material removal. Polishers are designed for finishing and can skip past the surface instead of removing the roughness, leading to uneven results.
A polisher isn’t a substitute for sanding when you need material removal.
What safety gear should I use?
Wear eye protection, a dust mask or respirator, and hearing protection. Use a dust extraction system and read the tool’s manual for safety precautions.
Eye protection, dust mask, and ear protection are essential.
How do I choose between models?
Consider pad type (sanding discs vs polishing pads), grit range, speed settings, and weight. A model with good dust control and comfortable handling is ideal for DIY use.
Look at pads, speed, and dust control to pick the right model.
Are cords or cordless options better?
Cordless offers mobility but limited runtime; cords provide steady power for longer sessions. Choose based on your workshop layout and project length.
Cordless is flexible, but you’ll trade runtime for mobility.
Main Points
- Identify the core differences between sanding and polishing
- Match tool to surface and finish goal
- Use proper abrasives and pads for safe operation
- Understand safety and maintenance to extend tool life
- Plan your project sequence: prep then finish