Sander versus Stuff: A Practical Sanding Comparison
An analytical comparison of using a sander versus other sanding options for wood finishing, covering power, control, dust management, finish quality, and safety. Learn which approach fits your project, budget, and timeline with real-world guidance from SanderSavvy.

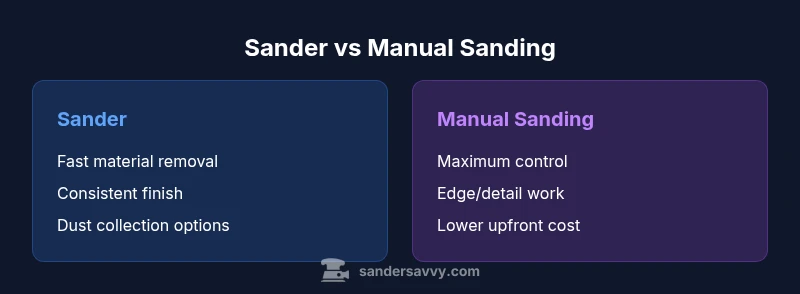
Sander versus stuff captures a practical framework to compare powered sanding with manual or improvised options. A sander delivers speed, consistency, and safer dust control for most wood projects, while manual methods excel at detail work and tight curves. This quick TL;DR helps you pick the right approach based on surface type, finish goal, and safety needs.
What "sander versus stuff" means in practice
In everyday woodworking, the phrase sander versus stuff refers to weighing a powered sanding tool against its non-powered or improvised counterparts—hand sanding, scrapers, polishing sponges, or improvised abrasive surfaces. According to SanderSavvy, framing the decision this way helps homeowners and pros see where speed, consistency, and control matter most. The central question is not simply which tool is fastest, but which approach minimizes gouges, preserves grain integrity, and achieves the desired finish with safe dust management. This distinction matters across floors, decks, and walls where surface geometry varies and finish expectations differ. By analyzing the task first—flat surfaces, edges, or curved profiles—you can predict how much time and effort a given option will require and what safety considerations apply.
Key decision factors when choosing a sander vs alternatives
Choosing between a sander and alternatives hinges on several core factors. First, surface area and geometry determine whether a belt sander’s brute force or a detail sander’s precision is appropriate. Second, the desired finish helps decide grit sequencing and tool choice; finish quality improves with appropriate grit progression and stable contact. Third, dust management is critical for indoor work—sanders with integrated dust collection or compatible vacuums dramatically improve air quality. Fourth, budget and learning curve matter: a simple manual approach costs less upfront but takes more time and effort, whereas power tools require an upfront investment and some technique. Finally, project timelines and safety considerations—noise, vibration, and PPE needs—affect which method you select. In most typical home projects, a sander offers the best balance of speed and consistency, but for edges, corners, and delicate profiles, manual methods still shine.
Power tools breakdown: belt sander vs orbital sander vs detail sander vs manual
Power sanders come in several flavors, each with strengths and tradeoffs. A belt sander excels on flat, wide surfaces and heavy material removal but can gouge if misused. A random-orbit or palm sander provides a smoother finish on larger areas with less aggressive aggression, reducing risk of gouging and leaving fewer swirl marks. A detail sander fills in tight corners and curves where larger tools won’t fit, delivering controlled material removal without overworking nearby areas. Manual sanding, while slow, offers supreme tactile feedback on grain direction and is ideal for finishing tasks near edges where precision is paramount. The choice depends on the surface geometry, the wood species, the coating to be removed, and the final finish you aim to achieve. The “stuff” in this context often means scrapers, abrasive pads, or improvised tools; these can be useful for initial material removal or edge work, but they seldom match a well-chosen sander for repeatability and speed over large areas. For beginners, starting with a random-orbit sander and a few grits is a reliable pathway to good results, reserving belt or detail work for specific tasks.
Material and finish considerations: wood type, coatings, and sanding goals
Wood species and coatings dictate your sanding plan. Hardwood floors and engineered woods often tolerate more aggressive initial grit before moving to finer grits, while softwoods require gentler progression to avoid gouging. Finishes—from oil to polyurethane—follow their own curing and compatibility rules; some finishes respond poorly to deep scratches, while others can be sanded between coats for a smoother final result. When sanding decks, you may encounter old finishes or contaminants that require repeated passes and careful dust management. The selected sander must align with the material’s hardness, grain pattern, and any embedded residues. In practice, you’ll typically begin with a coarser grit (around 60–80) to remove old coatings or level high spots, then move toward progressively finer grits (120–180, then 220) for a smooth, ready-to-finish surface. Manual steps or edge work may be needed for close corners and irregular shapes. The goal is to minimize project risk while achieving an even, uniform surface that accepts the chosen finish well. Remember that wrong grit choices or over-sanding can alter thickness and raise concerns about surface texture, so plan your progression with the wood type in mind.
Dust control, safety, and work environment
Dust management is one of the most important considerations for indoor sanding. A good dust extraction setup reduces airborne particles, protects lungs, and makes cleanup easier. When possible, connect your sander to a vacuum system designed for dust collection or use a HEPA-filtered mask, safety glasses, and hearing protection. Work in a well-ventilated area and cover nearby surfaces to prevent dust settled on furniture, walls, or HVAC vents. For decks or exterior projects, staining or finishing might require weather protection and more robust PPE. If you’re sanding a large area, develop a plan to pause work and safely empty the dust canister to maintain consistent suction. A well-chosen sander with attached dust collection improves indoor air quality and improves the final look by limiting particulate contamination that could become embedded in the finish. A good rule of thumb is to prioritize dust-control features first, especially for long sessions or walls and ceilings that create upward airflow patterns. In addition, consider powered respirators if you’re dealing with older finishes that may contain hazardous components.
Practical setup: grit progression and technique
Successful sanding hinges on a clean workflow and correct grit progression. Start with a coarse grit to flatten uneven areas, then switch to mid-range grits to remove the scratch marks from the previous pass. Finally, finish with fine grits for a polished surface that accepts top coats evenly. Maintain consistent pressure and keep the sander moving to avoid creating waves or gouges. For edges and contours, use a detail sander or hand sanding to maintain control and grain direction; keep the tool at a slight angle to follow the wood’s natural contours. Check your progress frequently, wipe away dispersion dust, and evaluate the surface under proper lighting to catch any remaining imperfections. Remember that the goal is a uniform scratch pattern that allows the finish to bond smoothly without showing heavy swirl marks. If you’re unsure about a texture, test on a small hidden area first before proceeding across the entire piece. Maintaining a consistent technique across large areas is key to professional-looking results.
Common mistakes and how to fix them
Common sanding mistakes include jumping between grits too quickly, which creates uneven surfaces and more work later; applying too much pressure, which can gouge or wear out discs; and neglecting dust control, which can contaminate the finish. To fix these issues, establish a clear grit progression and maintain a light, steady pressure. Always keep the sander flat on the surface and move it in smooth, overlapping passes. For edges and corners, switch to a detail sander or manual approach to avoid rounding or tearing the wood near joints. Inspect the surface under bright lighting and run your hand across the grain to detect any remaining inconsistencies. Finally, ensure your dust collection is functioning correctly, and replace worn discs to prevent inefficient material removal and uneven finishes. With careful technique and a methodical approach, you’ll minimize errors and achieve a consistent, professional look across the project.
Case studies: floors, decks, and walls
Floor refinishing typically benefits from a random-orbit sander for general flattening and a belt sander for heavy removal on rough patches. For decks, you’ll rely on an orbital sander with appropriate grit progression and careful attention to edges and railings to avoid damage. Walls and ceilings generally call for a smaller, detail-oriented sander or a finishing pad to avoid gouging plaster or drywall. In all cases, the aim is to remove old coatings, create a uniformly smooth surface, and prepare for finishing coats. The best practice is to plan tasks by surface type, test progress on a small area, and adjust grit progression based on observed results. This approach reduces waste, improves finish quality, and helps you stay within budget and schedule. The key is to align the tool selection with the material behavior and the final aesthetic you want to achieve. A methodical, tested plan reduces trial-and-error time and yields predictable, durable results.
Comparison
| Feature | sander | manual sanding |
|---|---|---|
| Power & speed | High-speed material removal with a sander | Slow, effort-dependent with manual sanding |
| Control & finesse | Consistent results with controlled motion (especially orbital/belt options) | Greater tactile control but variable results depending on technique |
| Finish quality | More uniform surface when paired with correct grit progression | Finish quality highly variable; depends on pressure and technique |
| Dust management | Often features dust collection or vacuum compatibility | Produces more dust without dedicated collection |
| Best for | Large flat surfaces and time-sensitive projects | Detail work, edges, corners, and delicate curves |
What's Good
- Faster material removal on large surfaces
- More consistent finish with proper technique
- Better dust control when using a dust collection system
- Versatile across floors, decks, and walls
- Safer for long sessions due to controlled vibration and ergonomic designs
Weaknesses
- Higher upfront cost and ongoing maintenance
- Requires some technique to avoid gouging and swirl marks
- Noise and dust require PPE and containment
- Edge work may still require manual approaches
Sander dominates for bulk work; manual methods remain essential for detail edges
In most projects, a sander provides speed and consistency that manual methods cannot match. Use manual sanding selectively for corners, profiles, and refinishing tasks where pristine control is crucial. The overall takeaway is to combine both approaches strategically for best results.
Your Questions Answered
What is the main difference between a sander and manual sanding?
A sander uses a motor to drive abrasive surfaces, delivering faster material removal and more consistent results. Manual sanding relies on hand pressure and motion, offering superior tactile feedback and control in tight spots but taking longer and requiring more effort.
A sander moves the abrasive automatically for speed, while manual sanding relies on your hand to guide the surface for precision.
When should I choose a belt sander over a random orbital sander?
Choose a belt sander for heavy material removal on large flat surfaces. A random orbital sander excels for finishing and removing scratches with a finer, more even texture. For edges and delicate sections, consider a detail sander or manual work.
Use a belt sander for rough starts, an orbital sander for finishing, and a detail sander for tight spots.
Can I achieve a fine finish with hand sanding?
Yes, with time and proper technique. Hand sanding is ideal for final touches, corners, and smoothing curves where machines cannot reach. Pair hand work with a final light pass using a finishing pad for the best results.
Hand sanding can achieve a flawless finish in tricky areas when you’re careful about grain direction and pressure.
What safety gear should I wear when using a sander?
Wear eye protection, a dust mask or respirator, hearing protection, and gloves as needed. Use a dust extraction system whenever possible and work in a well-ventilated area to minimize exposure to dust.
Protect your eyes and lungs—dust control and hearing protection matter as much as the tool you choose.
How do I prevent gouges while sanding curves?
Keep the sander moving, avoid applying heavy pressure, and use a smaller, detail sander for curves. Test in a hidden area first and adjust your technique to follow the wood grain along the curve.
Move smoothly, don’t press hard, and switch to a detail sander for curves.
Is dust extraction really necessary for DIY projects?
Dust extraction significantly improves air quality and finish quality by reducing airborne particles. It also makes cleanup easier and reduces scratch risk caused by embedded dust.
Yes—dust control is key for health and finish quality, especially indoors.
Main Points
- Assess surface type before tool choice
- Progress grit methodically from coarse to fine
- Prioritize dust-control strategies in every project
- Reserve manual sanding for edges and intricate details
- Test progress on a small area before full-scale work