Square Sander vs Round: A Practical Comparison for Woodworking
A detailed comparison of square and round sanders, focusing on edge work, finish quality, dust control, and cost to help homeowners and DIY enthusiasts choose the right tool for floors, decks, and walls.

The quick answer: orbital sanders are best for smooth finishes and speed, while square sanders handle edges and corners with precision. For most DIYers, having both offers maximum versatility; consult the full guide for practical, project-based choices.
What square sander vs round means for woodworking
According to SanderSavvy, the choice between a square sander and a round sander isn't about which is universally better, but about how you plan to approach corners, edges, and finishing. In practice, the square sander's flat pad and rectangular shape provide precise control along joints and inside cabinet corners, while the round, or orbital, sander delivers consistent surface speed that helps reduce swirl marks on large flat surfaces. The SanderSavvy team found that many homeowners encounter two common patterns: they underestimate edge work and end up re-doing sections near baseboards, or they over-rely on orbital tools and discover that corners stay stubborn. Understanding the fundamental differences in pad geometry, motion, and dust collection will save time and protect the workpiece. This guide compares the two types in practical terms, explains when to pick each tool, and outlines how to combine them into a single, efficient workflow. It also explains how to optimize sanding dust and pad life to keep projects clean and safe.
Core Differences in Pad Design and Motion
Sander pads come in two dominant geometries: square/rectangular pads and circular/round pads. The squared shape provides flush, edge-to-edge contact that’s ideal for straight runs along trim, cabinets, and the inside corner of door frames. The orbital action on a round pad delivers a more uniform wear pattern on large flat surfaces, which helps produce a smoother finish more quickly. In practice, many hobbyists notice that the square sander can feel more “direct” and precise on tight corners, while the orbital sander feels forgiving on long, open seams. The key takeaway is that pad geometry and motion drive where each tool excels, and a balanced workflow often uses both during a single project. The SanderSavvy team recommends testing a small sample panel with each tool to observe how the finish behaves before committing to a full run.
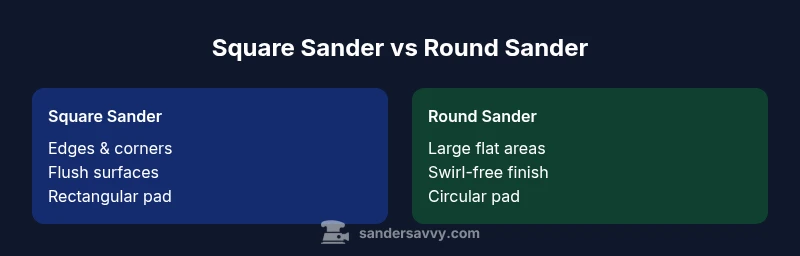
Edges and Corners: Why Square Wins
Edges, corners, and flush profiles pose the toughest challenges for sanding. A square sander’s rectangular pad maintains flat contact along edge faces, letting you feather joints and trim with clean lines. Round sanders, by contrast, can skip or round over sharp transitions if you rely on them exclusively near walls or baseboards. For door frames, cabinet edges, and stair landings, the square sander becomes the workhorse. Practical technique matters: you’ll often set up an initial pass with the square sander to flatten the edge, then switch to the orbital tool for finishing passes that blend into adjacent surfaces. This split approach minimizes the risk of gouges and ensures consistent edge detail across the project.
Finishing with Round/Orbital for Consistency
When the goal is a uniform, swirl-free finish across broad surfaces, the orbital sander shines. The round pad distributes motion evenly, reducing the risk of visible scratch patterns. For floors, decks, or large panels, the orbital sander speeds material removal while maintaining a smooth surface texture. Watch for overlapping passes and keep the sander moving to avoid creating ridges. To maximize results, pair the orbital sander with appropriate finishing grits, and always end with a final light pass at the fine grit to seal the surface. The combination of consistent orbit action and careful pass sequencing yields the best compromise between speed and quality.
Dust Management and Vacuum Compatibility
Dust is the silent partner in any sanding job. Both square and round sanders benefit from a robust dust extraction setup, but the way dust is captured can differ. Many square sanders use rectangular pads with compatible abrasive sheets or block attachments, which can simplify waste collection near edges. Round sanders typically integrate well with standard dust ports and vacuum hoses due to their circular pad interface. Regardless of tool type, using a high-quality vacuum or dust extractor, along with properly fitted sanding discs or sheets, dramatically improves air quality and finish cleanliness. The SanderSavvy analysis shows that better dust control reduces cleanup time and protects occupants from fine wood particles.
Sandpaper Options and Costs
Sanding consumables shape both performance and cost. Rectangular pads used by square sanders are common in workshop settings and can be cost-effective when you stick to a few grits. Circular discs for orbital sanders are widely available and often inexpensive, with abundant compatibility across brands. When planning a project, budget for a small supply of grits from rough to very fine to accommodate edge work and finishing. A practical tip is to pair the right grit on each tool so you can move quickly from shaping to smoothing without changing formats mid-job. SanderSavvy notes that the cost efficiency of discs vs blocks will depend on your preferred brand and the scale of your projects.
Surfaces and Material Types: Hardwood, Softwood, Plywood, Decks
Different materials demand different sanding strategies. Hardwood often benefits from careful, progressive grits and a light touch to avoid scorch marks, whether you’re using a square or a round sander. Softwoods require more attention to prevent tear-out, with more frequent pad changes to avoid embedding resin into the paper. Plywood edges deserve precise control to minimize fiber lifting. Decks benefit from a more aggressive initial stage with the orbital sander on the broad, flat boards, followed by edge work with the square sander for trim and railing components. The goal is to adapt the tool and grit sequence to the substrate and the finish you intend to achieve.
Practical Workflow: Step-by-Step Use
Begin with a square sander to flatten edges and remove high spots along joints. Move slowly along the grain and maintain contact with the edge to prevent gouges. Switch to the orbital sander for broad surface preparation, using a progression of grits from coarse to fine. Blend seams by overlapping passes and gradually reduce pressure as you approach final finishes. After the primary sanding, return to the square sander for touch-ups on corners and profiles that still show irregularities. Finish with a final pass using the orbital sander and a fine grit for a clean, ready-to-finish surface. This workflow balances speed, control, and quality.
Budget, Durability, and Maintenance
Budgeting for both tools is often a smart move for a multi-surface project. While orbital sanders tend to be affordable and offer quick results on large areas, square sanders deliver lasting edge control that’s hard to replicate with a round pad. Pad life and dust seals contribute to the long-term cost; choosing high-quality pads and maintaining vacuum integrity helps extend tool life. The SanderSavvy team emphasizes investing in reliable dust collection and replacement pads, which reduces overall wear and improves results over time.
Practical Buying Guide: What to Buy First
If you’re starting from scratch, prioritize an orbital sander for its versatility on large flat areas and finishing work. A square sander becomes a close second for edges, corners, and flush joints. If budget allows, consider a two-tool setup that covers both roles, then complement with compatible accessories like sanding blocks, abrasive sheets, and a dust extractor. When evaluating models, check pad size, weight, vibration control, dust port compatibility, and pad availability. The goal is a balanced setup that keeps your workflow smooth and predictable across floors, decks, and walls.
Common Mistakes and How to Avoid Them
Relying on a single tool for all tasks leads to subpar finishes and edge defects. Overusing orbital sanding near joints can cause rounding of edges; under-sanding corners with a square sander leaves visible lines. Always test on a scrap piece to determine how the finish will react to each tool and grit. Maintain steady pressure and use proper technique—let the tool do the work, avoid forcing the pad across the surface, and frequently check in with your eye and touch to ensure uniform results.
Maintenance and Longevity: Pads, Bearings, Dust Seals
Pad care is the backbone of performance. Replace worn pads promptly, inspect dust seals, and ensure the dust collection system remains clear. Regularly clean the base plate and verify that the pad attachment is secure. Balanced maintenance reduces vibration and extends bearing life, which in turn keeps both square and round sanders performing consistently across projects. The goal is a dependable setup that preserves tool accuracy and user safety over time.
Comparison
| Feature | Square Sander | Round Sander (Orbital) |
|---|---|---|
| Primary Use Case | Edges, corners, and flush surfaces | Large flat areas and finish smoothing |
| Finish Quality | Precise edge finishing with minimal rounding | Very smooth, swirl-free finishes on open surfaces |
| Edge Accessibility | Excellent edge control in tight spaces | Limited edge control; best on open boards |
| Dust Collection | Effective with rectangular pads and compatible dust systems | Excellent with standard dust ports and vacuums |
| Sandpaper Availability | Rectangular pads; various grits; common in shops | Circular discs; widely available and inexpensive |
| Vibration and Comfort | Direct feel in corners; stable on edges | Balanced for large surface use but can transmit more vibration |
| Weight and Size | Typically longer and flatter; reaches into edge areas | Compact circular pad; easier to maneuver on flats |
| Best For | Cabinet edges, trim, stairs and tight joints | Floors, decks, tabletops and wide surfaces |
| Best Value | Excellent when edge work is frequent; versatile with blocks | High value for speed and consistent broad-surface results |
What's Good
- Excellent edge control for corners and trim
- Faster material removal near edges
- Cleaner edge finishes along joints
- Works well with compatible sanding blocks
- Can be paired with both tool types for versatility
Weaknesses
- Orbital sander can leave swirl marks if not used carefully
- Square sander may be awkward on large flat surfaces
- Replacement pads and discs can be price-sensitive depending on brand
- Switching between tools requires setup time and planning
Both tools are essential; use orbital for speed and finish, square for precision on edges; a two-tool approach wins most projects.
For best results, prioritize an orbital sander for broad surfaces and quick smoothing, and complement with a square sander for edges and corners. The combination offers efficiency, control, and higher-quality finishes across floors, decks, and walls.
Your Questions Answered
What is the main difference between square and orbital sanders?
The square sander uses a rectangular pad for precise edge work, while the orbital (round) sander uses a circular pad for consistent, fast smoothing on wide surfaces. Each tool excels in different tasks, making a combined approach practical for many projects.
Square sanders are best for edges and corners, orbital sanders for flat surfaces and speed.
Can I use a square sander on curves or rounded edges?
Square sanders can be adapted to some curves with careful hand-guiding, but they’re not ideal for deep curves. For rounded profiles, an orbital sander provides a safer, smoother finish without leaving flat spots.
Use a square sander for gentle curves only if you control the motion carefully; orbital is safer for deeper curves.
Which sander is best for decks and floors?
For decks and floors, the orbital sander is typically preferred for its speed and even finish on large flat surfaces. A square sander is useful near edges and trim where corners need attention.
Orbital for the big flat areas, square for the edges and trim.
How important is dust control with sanding tools?
Dust control is crucial for health and finish quality. A good dust collection setup reduces cleanup time and improves visibility, especially on dust-prone hardwoods and finishes.
Dust control matters—use a vacuum system and keep filters clean.
What maintenance helps extend sander life?
Regularly inspect pads, seals, and dust extraction paths. Clean surfaces, replace worn pads promptly, and store tools in a dry area to prevent rust and warping.
Keep pads clean and replace worn parts to extend life.
Main Points
- Start edges with a square sander for precision
- Finish broad surfaces with an orbital sander for speed
- Invest in good dust collection to protect health
- Keep pads clean and swap when worn to maintain results
- Match grit progression to material type and finish goal