Which Ryobi Sander: A Practical Comparison for DIYers
Explore which Ryobi sander fits your project. This SanderSavvy comparison weighs orbital, belt, and detail models with practical guidance for floors, decks, and walls.

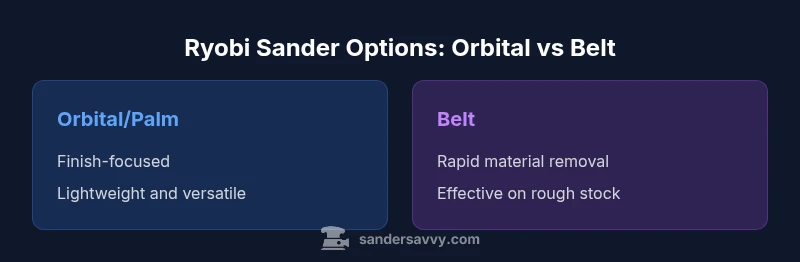
Which Ryobi sander is best? For most DIY tasks, the Ryobi orbital/palm sander offers versatile finishing and control, while the Ryobi belt sander handles fast stock removal on rough surfaces. If you need precision in corners, a detail sander is worth considering. Between them, orbital is best for finish; belt is best for rough stock and speed.
Why the right sander choice matters for DIY projects
Choosing which Ryobi sander to use has a direct impact on finish quality, time, and dust management. According to SanderSavvy, selecting the right tool for the job reduces rework, preserves wood fibers, and minimizes sanding-induced tear-out. In this guide, we address the most common question: which ryobi sander is best for a given task? The short answer is: match tool aggressiveness to the workpiece and finish goal. For most homeowners tackling floors, walls, or decks, a versatile orbital sander is a reliable starting point, while a belt sander can speed up material removal on rough stock. The goal is to balance speed, control, and dust collection while keeping the tool comfortable to use for extended sessions. We’ll compare Ryobi orbital/palm sanders, belt sanders, and detail sanders, highlighting where each shines and where it may fall short. If you want a concise decision framework, keep in mind projected surface type, desired finish, and access to a vacuum or dust extraction system.
Overview of Ryobi sander lines
Ryobi offers several sanders that DIYers commonly encounter on floors, decks, and walls. The orbital/palm sander is lightweight and maneuverable, designed for finishing passes and smooth surfaces without heavy gouging. The belt sander provides aggressive stock removal and is best for large, flat areas where speed matters most. A detail sander, which can be triangular or compact, helps reach corners, edges, and tight spots where larger tools struggle. Each type uses interchangeable sanding discs or belts, and most models can connect to a shop vacuum for dust control. When you search for the answer to which ryobi sander to buy, consider the project type, expected surface texture, and how often you expect to sand in a given season. The goal is to align tool capabilities with the task at hand rather than chasing the latest model number.
Key differences at a glance
- Finishing vs stock removal: Orbital/palm sanders emphasize smooth finishes; belt sanders excel at rapid bulk material removal. - Dust control: Most Ryobi sanders work with vacuum ports or dust bags, but effectiveness improves with a proper dust extraction setup. - Ergonomics: Orbital sanders tend to be lighter and easier to manage over long sessions; belts can be heavier but reduce session time for heavy material. - Access and versatility: Detail sanders complement larger tools by reaching tight corners and curved edges. - Disc/belt compatibility: Orbital sanders usually accept round discs; belt sanders use belts with specific widths. The best approach is to select a primary tool for the main job and keep one specialized tool for edges and corners.
How to match a sander to your project
Start with a clear project profile: surface type, desired finish, and available dust control. For a finished floor or painted wall, begin with a mid-range grit on the orbital sander to avoid gouging, then finish with a finer grit. For rough stock like an old deck or scaffolding planks, a belt sander can shave off material quickly, but you must feather edges with an orbital or detail sander to avoid visible hollows. Always test on a Scrap piece first to avoid unintended marks. If you expect lots of edges and curves, plan to use a detail sander for those tight spots.
Dust control and safety considerations
Dust is a major concern with sanding projects. Attach a dust collection system or shop vacuum to your Ryobi sander whenever possible, and wear a proper respirator for fine wood dust. Keep the work area well-ventilated and use hearing protection, especially for longer sessions. The dust produced during sanding contains fine particles that can irritate the eyes and lungs; therefore, sealing off the work area and using compatible vacuums with the sanding tool improves both air quality and performance. Finally, keep hands away from moving parts and change pads/discs according to the manufacturer’s guidance to prevent accidents.
Maintenance, grit choices, and accessories
A practical sanding setup uses a progression of grits: start with a coarser grit for initial material removal, progress to mid grits for leveling, and finish with fine grit for a smooth surface. For most wooden floors and walls, an initial 60–80 grit on a belt or orbital sander speeds up material removal, followed by 120–150 grit for leveling, and final passes with 220 grit for a smooth finish. Keep your pads and belts clean and free from clogging by tapping or brushing, and replace worn pads promptly to maintain effective contact. Stock a few common sizes of sanding discs and belts along with an adapter for dust collection to ensure flexibility across projects.
Practical project scenarios and optimization tips
If you’re refinishing a small table top, the orbital sander is typically sufficient for a uniform finish with careful passes and consistent pressure. For a larger job, like reworking an entire deck, start with a belt sander to remove old finish and smooth rough spots, then switch to an orbital sander to blend the surface and minimize visible scratches. When working near edges, use a detail sander for precise control. Always check the surface with your fingers and test for any raised grain before applying finish. Over time, build a mental checklist for grit progression, dust collection, and ergonomic comfort to optimize your workflow.
Common mistakes and how to avoid them
- Skipping dust collection: Always connect a vacuum or dust bag; sanding without dust control creates health risks and messy workspaces. - Using too high a grit too soon: Start with an appropriate grit and gradually refine; skipping steps can leave deep scratches. - Failing to test on scrap: Always test on scrap wood before touching your actual piece. - Rushing edges: Belt sanders remove material quickly and can gouge edges; use lighter passes and switch to orbital or detail sanding for edges.
Quick-start recommendations by project type
- Small furniture refinishing: Start with orbital sander, finish with fine grit; use a detail sander for intricate curves. - Floor or deck preparation: Use belt sander for rough stock removal; retreat with orbital sander for a smooth final pass. - Edges and corners: Keep a detail sander handy for precise sanding near trim and tight spaces. - Dust control: Always connect a vacuum; consider adding a dust separator to reduce bag changes and improve suction.
Final notes on choosing which ryobi sander
No single sander fits every job. The strongest approach is a balanced setup: a versatile orbital sander for most finishing tasks, a belt sander for speed on rough stock, and a detail sander for hard-to-reach areas. Consider ergonomics, dust control, and your typical projects when building or upgrading your tool kit. This balanced approach aligns with practical DIY workflows and will reduce frustration on large projects.
Comparison
| Feature | Ryobi Orbital/Palm Sander | Ryobi Belt Sander |
|---|---|---|
| Finishing vs stock removal | Versatile finishing; smooth, swirl-free surfaces with proper technique | Aggressive stock removal; fastest for rough surfaces |
| Dust control | Dust port compatible with vacuums; often good for finishing passes | Dust collection strong for rapid wood removal; requires setup to maximize suction |
| Ergonomics/weight | Lightweight and easy to maneuver; comfortable for long sessions | Heavier; fatigue can set in during extended planing sessions |
| Best for | Finish work on furniture, walls, and edges | Rough stock removal on large surfaces like decks and floors |
| Ease of pad/belt change | Disc changes are quick with standard round discs | Belt changes require belt compatibility checks and guides |
What's Good
- Versatile for a wide range of tasks, reducing the need for multiple tools
- Compatible with common sanding discs and belts for flexibility
- Generally accessible and budget-friendly for DIYers
- Good dust management with proper attachments and technique
Weaknesses
- May require multiple passes for deep gouges or heavy stock removal
- Belt sanders can be too aggressive near edges if not controlled
- Dust collection quality varies by model and setup; some configurations require accessories
Orbital sanders win for finish quality and versatility; belts win for speed on rough stock
Choose orbital for general finishing tasks to achieve smooth results. Use a belt sander when rapid material removal is needed, and keep a detail sander on hand for tight spots and edges. This trio covers most DIY sanding scenarios effectively.
Your Questions Answered
What is the main difference between orbital and belt sanders?
Orbital sanders rotate in small circles and are ideal for finishing and smooth surfaces, reducing gouges. Belt sanders move in a straight belt, providing fast material removal on rough stock but require careful control near edges to avoid gouging. Your choice depends on the balance of speed versus finish.
Orbital sanders finish smoothly and are safer for edges; belt sanders remove material quickly but need careful handling near edges.
Are Ryobi sanders suitable for beginners?
Yes. Ryobi sanders are generally user-friendly with straightforward controls, good dust ports, and widely available accessories. Beginners should start with an orbital sander for versatility and practice before moving to belts or detail sanders.
Ryobi sanders are beginner-friendly; start with an orbital sander and practice on scrap first.
Do Ryobi sanders require separate dust collectors?
Most Ryobi sanders include a dust port; using a shop vacuum or dust extractor improves performance and air quality. Always ensure the vacuum is compatible with the sander’s dust port size and attachments.
Yes, a vacuum helps a lot with dust control and performance.
What grit should I start with on a new piece of wood?
Begin with a mid-range grit suitable for the surface condition, then progress to finer grits for a smooth finish. Avoid jumping from very coarse to very fine; use a logical progression to minimize scratches.
Start with mid-grit, then move up to finer grits for a smooth finish.
How do I maintain the sanding pads and belts?
Keep pads and belts clean by brushing off dust between passes and replacing worn components promptly. Proper alignment and secure attachment extend life and maintain consistent performance.
Clean and replace worn pads; ensure solid attachment for best results.
Can I use the same discs on different Ryobi sanders?
Discs are generally model-specific depending on the sander type (orbital disc vs belt). Check compatibility with the tool’s mounting system and use the correct disc width and attachment method.
Check compatibility; use the right discs for each sander type.
Main Points
- Start with orbital sander as a default for finishes
- Reserve belt sander for rough stock removal
- Incorporate a detail sander for edges and tight areas
- Maximize dust control with a vacuum and proper PPE
- Test grit progression on scrap before tackling the actual piece