Difference Between Sander Types: Belt, Orbital, and More
In this comprehensive comparison, we explain the difference between sander types (belt, orbital, random orbital, palm, detail, and drum) to help DIYers choose the right tool for floors, decks, and walls.

The difference between sander types is primarily about stock removal versus finish quality. Belt sanders remove material quickly on flat surfaces, while orbital and random orbital sanders deliver smoother finishes with less gouging. For tight spots and edges, palm and detail sanders excel—and you’ll often use a drum sander for floors. See our full chart for specifics.
What is a sander and why the difference matters
Sanders are power tools that apply abrasive material to wood, metal, or composite surfaces. They are designed to remove material, flatten surfaces, or create a smooth finish, depending on the model and attachment. The key question for most DIY projects is not just what a sander does, but how it does it. The keyword here, the difference between sander, matters because choosing the right tool affects speed, surface quality, and the risk of gouges or swirl marks. According to SanderSavvy, understanding these distinctions helps homeowners and pros select the tool that balances efficiency with finish quality. When you pick the wrong sander for a job, you’ll either waste time or end up with a finish that needs rework. Keep this in mind as you evaluate power, pads, and abrasives for your next project.
Key sander types and core differences
Sander tools are typically categorized by their baseplate, attachment system, and intended finish outcome. The most common types are belt sanders, orbital sanders, random orbital sanders, palm (or hand) sanders, detail sanders, and drum sanders. Each category has a characteristic role:
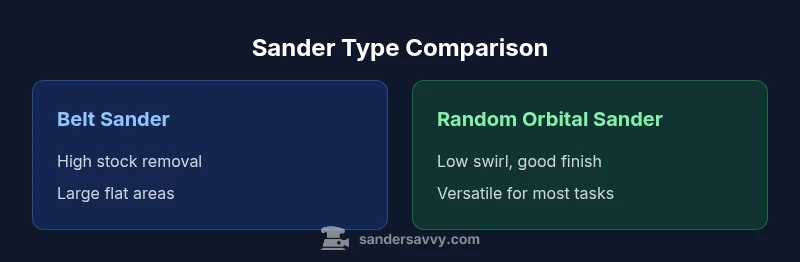
- Belt sander: Large, aggressive stock removal on flat surfaces. Best for rapid leveling of boards or removing old finish from wide planks.
- Orbital sander: A smaller, lighter tool that uses a theta-shaped orbit to level surfaces with minimal gouging. Good for prepare-and-finish work, but can leave faint scratches if used aggressively.
- Random orbital sander: Combines orbital motion with a randomized pattern to reduce swirl marks and produce a smoother final surface. A versatile, all-around choice for most DIY tasks.
- Palm sander: Small, maneuverable, and ideal for edges, corners, and tight spots where larger tools won’t fit.
- Detail sander: A compact tool with shapeable pads for tight crevices and intricate work—great for trim and inlays.
- Drum sander: A larger floor-focused machine that sands across wide surfaces; professional-grade and typically used for floor refinishing or heavy leveling.
Choosing among these requires understanding your surface, the level of finish you want, and the risk of gouging. Some jobs demand cross-cut precision, while others need aggressive material removal. The table below highlights how these tools differ in practice.
Performance factors that matter when comparing sanders
When evaluating sanders, several performance factors influence the outcome: material removal rate, finish quality, control, weight, vibration, and dust collection. Belt sanders excel at fast stock removal but can gouge if you aren’t careful. Orbital sanders provide a good balance, but the finish may show minor swirl marks if used improperly. Random orbital sanders reduce swirl, delivering a smoother final coat with less effort. Palm and detail sanders shine on edges and corners, while drum sanders are best left to floor refinishing professionals due to their breadth and power.
Surface preparation is also about technique. Start with coarser grits for heavy leveling, then progress to finer grits for a polished finish. Dust extraction improves visibility and keeps abrasives from clogging. Ergonomics matter too: heavier tools can cause fatigue, and vibration can impact control. SanderSavvy analyses indicate that most DIY projects succeed when users select a tool that fits the job size and devote time to proper dust control and pad selection.
Use-case scenarios: choose based on project type
- Floor preparation (large flat surfaces): A belt sander or drum sander (for floors) can remove material quickly; finish with a drum sander or flooring sander for final leveling. For small areas, a random orbital sander paired with a wide sanding pad can reduce swirl marks while removing material.
- Wall and deck refinishing: Orbital and random orbital sanders are versatile for walls and decks; use palm or detail sanders for railings, trim, and tight corners.
- Fine finish work: Use a random orbital or finish sander with fine grits to achieve a smooth surface without visible swirl marks. Avoid aggressive upfront removal unless necessary.
- Edges and cutouts: Palm or detail sanders are designed for precise control where larger tools can’t reach.
Practical selection framework: matching tool to job
- Define the project scope and surface area. 2) Decide whether you need fast stock removal or a high-quality finish. 3) Consider edge work and tight spots—these guide palm/detail sander choice. 4) Plan your grit progression from coarse to fine. 5) Pair the tool with a compatible dust extraction setup. 6) Check pad types and adhesion systems for your chosen sander. Following this framework minimizes rework and helps you achieve a professional-looking result.
Maintenance, safety, and technique basics
Safety first: wear eye protection, ear protection if using louder tools, and a dust mask or respirator when sanding dusty materials. Always clamp workpieces securely and keep hands away from moving parts. Clean the pads after use to prevent clogging, and replace worn pads promptly to maintain consistent performance. Regularly check the power cord and switch for damage. Proper technique—steady motion, consistent pressure, and consistent speed—yields the best results and reduces the risk of gouges or swirl marks.
Getting the right accessories and setup for your sander toolkit
Stock up on a range of abrasives from coarse to fine and be mindful of grit progression. Keep a spare set of sanding pads in the right size for your sander type, as pad integrity affects heat buildup and finish quality. Ensure your dust extraction system is compatible with your sander’s suction requirements and that you have a clean workspace to prevent debris from scratching surfaces.
Feature Comparison
| Feature | Belt Sander | Orbital Sander | Random Orbital Sander | Palm Sander | Detail Sander | Drum Sander |
|---|---|---|---|---|---|---|
| Power level | high | medium | medium | low | low | high |
| Baseplate size | Large | Small | Medium | Small | Medium | Large |
| Dust collection | Excellent | Good | Excellent | Moderate | Moderate | Moderate |
| Finish quality | Rough stock removal | Good for finishing | Excellent for finishing | Edges-focused | Detail-oriented finish | Floor-wide smoothing |
| Best for | Heavy stock removal on flat surfaces | Balanced prep and finish | All-around finishing with low gouge risk | Edges and tight spots | Detail work and inlay prep | Floor sanding and refinishing |
What's Good
- Helps you choose the right tool for the job
- Highlights trade-offs between stock removal and finish quality
- Encourages safer sanding practices and dust control
- Promotes efficient project planning and grit progression
Weaknesses
- Can be confusing due to tool overlap and multiple accessories
- Requires investments in multiple sanders for optimal results
- Learning curve for new users to master grip and motion
Random orbital sander offers the best overall balance for DIYers, with belt sanders excelling at heavy stock removal and palm/detail sanders handling edges and tight spaces.
For most projects, start with a random orbital sander to achieve a smooth finish efficiently. Reserve a belt sander for rapid leveling on large flat surfaces, and use palm or detail sanders for hard-to-reach areas. The right combo minimizes rework and maximizes surface quality.
Your Questions Answered
What is the main difference between belt sanders and orbital sanders?
Belt sanders remove material quickly on flat surfaces but can gouge if not guided carefully. Orbital sanders remove material more gently and provide a smoother finish, making them versatile for larger projects and finishing stages.
Belt sanders remove material quickly but require careful handling to avoid gouges; orbital sanders are gentler and good for finishing overall.
Which sander is best for finishing versus stock removal?
For heavy stock removal, belt or drum sanders excel. For finishing, a random orbital or orbital sander provides the smoothest results with fewer swirl marks. Use palm or detail sanders for edges and tight areas.
Use belt or drum for removal; go with random orbital for finish and edges for tight spots.
Can I rely on a palm sander for large flat surfaces?
Palm sanders are designed for edges and tight spots, not large surface areas. For floors or wide panels, a larger tool like a belt or random orbital sander is typically more efficient.
Palms are great for corners, not big flat areas—use a larger sander for floors.
What safety tips should I follow when sanding?
Wear eye and hearing protection, a dust mask or respirator, and keep the workspace well-ventilated. Clamp workpieces securely and avoid overheating pads by using light, even pressure and intermittent stops to cool the tool.
Always protect your eyes and lungs, clamp your work, and avoid overheating the pad.
Do I need a dust extraction system with sanders?
A dust extraction system or a vacuum-enabled sander dramatically improves visibility and air quality, reduces cleanup, and extends abrasive life by preventing clogging. Check compatibility with your sander model.
Yes—dust extraction improves safety and cleanliness and helps maintain tool performance.
How should I maintain sanding pads and discs?
Keep pads clean and free of embedded grit, replace worn pads promptly, and store abrasives in a dry, organized place to avoid moisture damage and contamination.
Keep pads clean, replace worn ones, and store abrasives properly.
Main Points
- Assess project scope before choosing a sander
- Balance stock removal needs with finish quality goals
- Prioritize dust collection and safety gear
- Match grit progression to the task and sander type
- Practice proper technique to avoid gouges and swirl marks