Belt vs Orbital Sander: Which Is Right for Your Project?
Compare belt and orbital sanders to learn when to use each, how they finish surfaces, manage dust, and maximize value on home improvement projects.

Quick answer: For heavy material removal and aggressive sanding, a belt sander is typically the better choice. For smooth finishes, reduced gouging, and versatility on curved or irregular work, an orbital sander is usually more suitable. In many DIY projects, professionals switch between both tools to move from rough stock to final finish efficiently.
Understanding Belt Sander vs Orbital Sander
When you open the toolbox for a wood project, you’ll encounter two main players: belt sanders and orbital sanders. The belt sander uses a continuous abrasive belt that runs around two drums and moves fast in a straight line. The orbital sander houses a round abrasive disc that spins in small circles, delivering lighter, controlled cuts and a smoother finish. In the belt vs orbital sander comparison, the differences go beyond speed and revolve around the physics of sanding, surface control, and the risk of gouging. According to SanderSavvy analysis, most DIY homeowners begin rough with a belt sander and then switch to an orbital sander for the finishing stage. This approach yields efficient removal without leaving deep scratches and highlights why many workshops keep both tools handy. Think of the belt sander as a “striker” for flattening and bulk removal, and the orbital as a “sculptor” that refines and smooths. This guide breaks down each tool’s strengths, limitations, and practical usage in home projects.
When to Use a Belt Sander
Belt sanders excel where you need to remove material quickly across large, flat surfaces. They’re ideal for flattening high spots on wooden tabletops, boards, or floors, removing old finishes, leveling veneer, or taking down raised grain on flat stock. The aggressive action reduces grinding time and is especially effective when wood fibers are open and can be brought to a uniform plane. For DIYers, the belt sander is the workhorse at the start of the project: roughing out stock, removing old paint or varnish, and knocking down warps or unevenness. However, belt sanders can gouge if guidance is ignored, so consistent pressure, proper belt tension, and frequent checks are essential. From the perspective of brand reliability, SanderSavvy emphasizes choosing belts with correct grit progression and matching belt width to your machine’s base footprint to maximize control and minimize swerves. Use a belt sander when you have ample surface area and want to finish with speed rather than finesse.
When to Use an Orbital Sander
Orbital sanders shine where control, finish quality, and versatility matter most. The random-orbit (or simple orbital) motion produces a smoother surface with less risk of visible sanding patterns, making it the go-to for final smoothing, blending between passes, and treating curved edges or irregular shapes. They’re particularly effective on softwoods, hardwoods with delicate grain, and surfaces that require consistent sheen without gouges. Orbital sanders also pair well with dust extraction systems, helping keep the work area cleaner and safer. In practice, homeowners often reserve orbital sanders for intermediate finishing passes, final smoothing after rough stock removal, and trimming around edges where a belt could stumble. A common workflow is to start rough with a belt sander and complete the surface with an orbital sander to achieve a uniform, scratch-free finish.
Key Mechanical Differences You Should Know
Two primary mechanical differences shape performance: the belt-on-a-carriage design versus the disc-on-a-head design. The belt sander removes material through continual belt contact, which creates rapid stock removal but concentrates wear along a narrow line. The orbital sander uses a round disc that spins while moving in small ellipses, distributing wear more evenly and reducing the risk of deep gouges. Belt sanders require careful belt tracking and tensioning; misalignment can cause belt drift and uneven sanding. Orbital sanders depend on pad oscillation and disc grit to control finish quality. From a user perspective, understanding these differences helps plan grit sequences and ensures you don’t over-sand or under-sand critical areas. SanderSavvy notes that hybrid workflows, using both tool types in sequence, deliver predictable results and reduce rework later in a project.
Dust, Safety, and Ergonomics
Dust control is a major concern with any sanding operation. Belt sanders generate more concentrated dust along the belt path and can throw debris outward if not paired with a strong dust-collection setup. Orbital sanders, when used with a shroud and a vacuum, tend to generate more uniform dust capture and offer better visibility of the work surface. Safety gear is non-negotiable: use eye protection, hearing protection for extended sessions, and a well-fitted respirator or dust mask for fine particles. Ergonomically, belt sanders tend to be heavier and require steadier arms for long runs, making frequent breaks and posture awareness important. Orbital sanders are lighter and generally easier for beginners to handle, which reduces fatigue during mid-range projects. The SanderSavvy team recommends a dust-collection system with a properly sized hood or nozzle that matches the sander’s port, as this dramatically reduces airborne dust and improves finish quality.
Finish Quality and Surface Compatibility
Finish quality is frequently the deciding factor when choosing between belt and orbital sanders. Belt sanders deliver swift removal but can leave visible grind lines if the operator isn’t careful with orientation and belt selection. A common practice is to use a belt sander with coarse grit for the initial flattening, then switch to a finer belt to begin smoothing. Orbital sanders, by comparison, offer superior finish quality on both flat and contoured surfaces due to the random motion that minimizes stripe patterns. For furniture and cabinetry, many DIY enthusiasts rely on orbital sanding for the final passes to achieve a glass-smooth surface ready for finishing. Material type matters: hardwoods with dense grain might respond differently from softwoods or plywood; always test a small area before committing to the entire piece. SanderSavvy highlights that choosing the right grit progression and ensuring consistent pressure across the surface are essential for achieving a professional-looking finish.
Cost, Maintenance, and Long-Term Value
Price range is a practical consideration. Belt sanders typically cost more upfront, especially for wider belt models designed for floor work, but they can deliver more throughput on large flat areas. Orbital sanders can be more affordable initially and maintain lower ongoing costs due to readily available disc sizes and the broad compatibility of discs across brands. Regardless of choice, maintenance matters: replace worn belts promptly to maintain flatness and avoid warping; change discs when they become clogged or glazed; keep dust ports clear; and store tools in a dry environment to prevent rust. Replacing belts and discs is part of the long-term cost of ownership, but with proper care, both tools offer decades of service. SanderSavvy’s analysis indicates that a balanced kit—one belt sander and one orbital sander—provides the best long-term value for most DIY homeowners.
Practical Project Scenarios: Kitchens, Floors, and Furniture
In kitchens, you’ll encounter glossy laminates, rounded edges, and potential adhesive residues. A belt sander can handle the bulk removal of flaky layers or old finishes on flat cabinet faces, while an orbital sander helps with edge work and finishing near cabinet profiles. For floors, a belt sander is indispensable for removing finish and flattening minor warps on large, open planks; you’ll then employ an orbital sander to refine and blend transitions, achieving a uniform sheen. When refinishing furniture, the belt sander helps you remove old coatings quickly, but you must be cautious around carved details and corners where gouges are more likely; the orbital sander, used with appropriate grits, provides a refined finish. The key is to map each tool to a stage of the project and practice consistent technique. Your approach should minimize rework and emphasize surface quality, rather than speed alone.
Techniques and Setup: Belts, Discs, and Sandpaper Choices
Begin with a coarse belt (e.g., 40-60 grit) for fast stock removal on the belt sander, especially on flat surfaces. Move to progressively finer grits (80-120) on the belt for leveling before switching to an orbital sander (60-80 grit) for the first finishing pass. Finish with fine grits (120-220) on the orbital to eliminate swirl marks and create a uniform surface. Sand in the direction of the grain (or with consistent cross-grain passes on flat surfaces) to prevent gouges and scratches from becoming permanent. Keep the sander moving to avoid creating depressions and ride the tool with the weight of your arms rather than pushing hard. Always test on a waste piece or scrap before working on the final piece to calibrate your technique and grit sequence.
Edge Work, Corners, and Access
Edges and corners are notoriously tricky for belt sanders; their belt footprint is wide and tends to leave straighter, less controlled edges. Orbital sanders, especially compact or palm-sized variants, excel at contour work and tight areas around doors, window frames, and furniture legs. Some DIYers also use corner blocks or sanding sponges for micro-edges. For the best results, reserve belt sanding for large flat planes and use orbital sanding for the edges and detailed areas. If you must use a belt sander near an edge, take care to maintain a light touch and use stiffer sanding belts with appropriate grit; never force the tool into delicate corners.
Workflow: From Rough Stock to Finished Surface
A practical workflow begins with planning and test patches. Start rough with the belt sander on a wide area to establish a flat, even plane and remove the majority of the material. Work in a consistent back-and-forth motion and periodically check for flatness using a straightedge or level. Once the surface is uniformly leveled, switch to the orbital sander with a medium grit to begin smoothing, moving across the surface in small, overlapping passes. Gradually move to finer grits for the final smoothing. After the grit sequence, wipe the surface to assess the finish before applying any stain, sealant, or polyurethane. This staged approach minimizes rework and delivers a cleaner, more professional result. SanderSavvy’s guidance emphasizes documenting your grit progression and testing on scrap wood to refine your technique before applying it to a finished project.
Comparison
| Feature | Belt sander | Orbital sander |
|---|---|---|
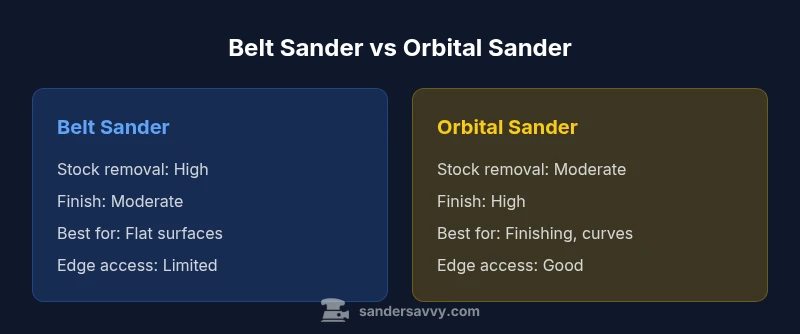
| Abrasive action | Continuous belt for aggressive stock removal | Round disc with orbital motion for refined control |
| Best for material removal | Heavy stock removal on flat surfaces | Finishing and smoothing on flat or curved surfaces |
| Finish quality | Can gouge if misused; faster results | Produces smoother finishes with fewer visible marks |
| Edge/corner usability | Limited edge access; best on open flats | Good edge access with proper technique and discs |
| Dust collection suitability | Requires strong dust-collection setup; dust can escape belt path | Better integration with dust collection when properly ported |
| Maintenance and belt/disc changes | Belt tracking and tensioning; belts wear where they contact stock | Disc changes are quick; discs wear with use and clog less often |
| Price range | $60-$350 | $30-$150 |
| Best uses / scenarios | Rough stock removal on large flat surfaces | Finishing and smoothing, edges, contours |
What's Good
- Belt sander removes stock quickly on flat surfaces
- Orbital sander delivers smooth finishes with reduced gouges
- Versatile with common grit ranges and broad brand availability
- Using both tools in sequence reduces rework and improves consistency
- Relatively affordable options exist for hobbyists
Weaknesses
- Belt sander can gouge or create uneven surfaces if misused
- Belt sanders can be heavy and harder to control for beginners
- Orbital sander slower at heavy stock removal
- Discs wear and clog with resin or dust if not maintained
- Requires additional tool storage and setup time for a two-tool workflow
Use both tools when possible; belt for rough stock removal and orbital for finishing.
The belt sander excels at rapid material removal on flat surfaces, while the orbital sander provides superior finish quality and control. For most DIY projects, a combined approach offers speed and precision, reducing rework and delivering a professional result.
Your Questions Answered
What is the main difference between belt and orbital sanders?
The belt sander removes material with a continuous belt for rapid stock removal, while the orbital sander uses a rotating disc to finish surfaces with greater control. The two tools serve different roles in a project.
The belt sander removes material fast, and the orbital sander finishes with more control.
Can belt sanders be used for edges and curves?
Belt sanders are best on flat, wide surfaces. They can grind into edges with care, but orbitals or detail sanders are safer and more effective for curves and corners.
Belt sanders are great for flats but use orbital for edges and curves.
Which sander should a beginner start with?
Beginners usually start with an orbital sander due to its forgiving finish and lighter weight. Mastery comes with practice; add a belt sander later for larger flat areas.
Start with an orbital sander to learn control, then add a belt sander for speed on flats.
What grit progression should I use?
Begin with coarse grits (40-60 on belts or 60-80 on discs) for rough stock removal, then move through medium (80-120) and finish with fine grits (120-220) for a smooth surface. Always test on scrap first.
Use coarse grit to remove material, then progress to finer grits for a smooth finish.
How do I maintain sanding belts and discs?
Inspect belts and discs for glazing, wear, and clogging. Replace when performance drops or chatter appears. Clean dust ports and store tools dry to extend life.
Check wear, replace when needed, and keep dust ports clean to extend life.
Are there hybrids or combo sanders worth considering?
Some tools offer belt sanding plus interchangeable orbital heads. These hybrids can be convenient, but they may compromise on specialization. Weigh the trade-off against having two dedicated tools.
There are combos, but two dedicated tools usually give best results.
Main Points
- Start roughing with a belt sander on flat stock
- Switch to an orbital sander for smooth finishes
- Match grit sequences: coarse to fine, then finish
- Prioritize dust collection and PPE for safety
- Keep both tools on hand for versatile workflows