Difference Between Belt Sander and Orbital Sander
Discover the difference between belt sander and orbital sander. An analytical guide covering action, finish quality, best uses, dust control, and practical tips for DIY homeowners.

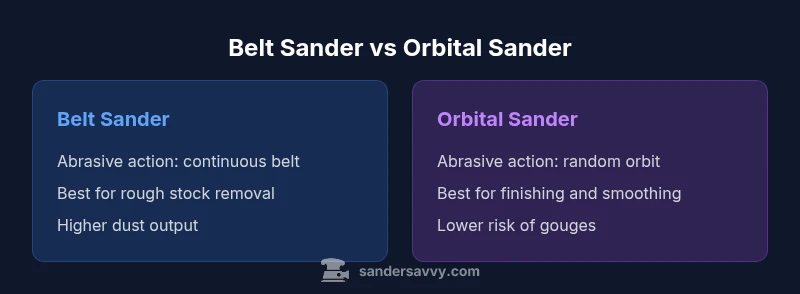
The belt sander and orbital sander differ most in action and output: belt sanders use a continuous belt for fast material removal, while orbital sanders use a rotating pad for a finer, swirl-free finish. Choose a belt sander for aggressive stock removal on rough surfaces, and an orbital sander for smoothing and finishing between coats.
Overview: The Core Contrast
When people first consider the difference between belt sander and orbital sander, they seek a simple rule of thumb. In practice, the belt sander is designed for speed and material removal, while the orbital sander excels at control and finish quality. According to SanderSavvy, understanding the underlying mechanics helps homeowners plan projects from rough stock removal to final smoothing. The belt sander operates with a continuous belt that moves in a straight line across the work surface, delivering rapid material removal with a distinctly aggressive touch. The orbital sander uses a round pad that orbits in small circles, producing a more uniform surface with fewer visible gouges. These core differences dictate project sequencing, grit progression, and how you protect delicate edges. The goal is to select the right tool for the task at hand rather than forcing one tool to do everything. Throughout this guide you will see how each tool behaves on wood floors, cabinetry, decks, and walls, and you will gain actionable insight into choosing, using, and maintaining them for safe sanding outcomes.
How a Belt Sander Works
A belt sander relies on a continuous abrasive belt that travels over two rollers. The belt’s orientation means it can strip stock quickly on flat, open surfaces, making it ideal for flattening high spots or removing old coatings in a hurry. The key operating principles include belt tension, tracking alignment, and the weight you apply to the base plate. When used with coarse grits, a belt sander quickly pares away material, exposing rough edges that need further refinement. It is important to keep the tool moving and avoid lingering in one spot to prevent gouging. Dust collection is essential because belt removal generates a lot of fine particles that can obscure visibility and clog abrasives. For DIY homeowners, learning belt belt changes, dust control, and track adjustments pays dividends in project speed and consistency.
How an Orbital Sander Works
In contrast, an orbital sander uses a rounded sanding pad that moves in a circular motion, producing a more uniform finish. The orbit radius and speed influence the heat generated and the surface flatness. Orbital sanders excel at finishing tasks because their random-orbit action minimizes crosshatch scratches and swirl marks that are common with aggressive tools. The typical workflow involves using finer grits with the sander moving steadily across each pass, overlapping slightly to even the surface. Dust collection is still important, but the lighter touch reduces the risk of gouging delicate edges. Handling a standard palm sander feels intuitive for long sessions and is preferable when you need to refine prepared surfaces prior to staining or sealing.
Real-World Performance: Task Matching and Results
Across common tasks, the belt sander shines in initial stock removal on large flats, floors, and rough lumber where speed matters more than finish. It is less forgiving near edges or corners, so tool control and steadiness are crucial. The orbital sander, by contrast, shines in finishing phases—smoothing repair patches, feathering transitions between different wood species, and preparing surfaces for finishing coats. In practice, most projects benefit from a sequential approach: begin with a belt sander to remove the lion’s share of material, then switch to an orbital sander to achieve a uniform, defect-free surface. By combining the strengths of both, you can minimize time while maximizing finish quality.
Finish Quality and Surface Effects
Finish quality is often the deciding factor in choosing between these tools. A belt sander can produce a very flat surface quickly but may leave deeper cross-grain marks if used aggressively. An orbital sander, when paired with progressive grits, tends to deliver a smoother finish with minimal cross-grain patterns. Edges and contours require careful handling, often with smaller sanding pads or detail sander attachments. When finishing floors, for example, after the belt has leveled the floor, an orbital sander with grits in the range appropriate for the wood species will often create a pristine surface ready for staining or sealing. The goal is to minimize scratches while achieving the intended texture and sheen.
Dust Control, Safety, and Maintenance
Dust management cannot be overlooked with either tool. Both belt and orbital sanders produce fine dust particles that can irritate the lungs and reduce visibility. Use a connected vacuum system and wear a respirator, eye protection, and hearing protection for extended sessions. Empty dust canisters and check bags regularly to maintain suction efficiency. For safety, never wrap the power cord around the tool and always unplug before belt changes or pad replacements. Routine maintenance, including checking belt tracking and pad wear, extends tool life and keeps results consistent across projects. Being mindful of dust generation also means choosing the right sandpaper grits and avoiding excessive pressure, which can cause wear and tear.
Decision Guide: When to Use Each Tool
Choosing between a belt sander and an orbital sander should be task driven. Use the belt sander for rapid stock removal on flat surfaces, large boards, and unfinished floors where time is a priority. Switch to an orbital sander for finishing work—edges, corners, and areas that demand a smooth, swirl-free finish. Remember that grain direction matters; plan passes to minimize scratches visible after staining. For floor refinishing or large deck projects, a belt sander followed by an orbital sander generally yields the best balance of speed and quality. If you are unsure which to start with, evaluate the surface roughness and the desired final texture. In most cases, beginning with a belt sander and finishing with orbital sanding offers the most predictable results.
Techniques, Tips, and Common Pitfalls
A few practical tips make a big difference. Always double-check belt tracking and use appropriate abrasive grits—coarse for rough removal, progressively finer for finish. Move the belt sander in long, steady passes and avoid staying in one spot to prevent gouging. With orbital sanders, work in overlapping passes, maintain a light touch to avoid burning the wood, and blend transitions between passes to avoid visible lines. Common pitfalls include over-sanding areas near edges, failing to wear protective gear, and neglecting to clean the workspace, which can lead to abrasive dust clogging the machine. Practicing on scrap pieces before tackling a project helps you calibrate pressure and motion without risking your actual work.
Authority Sources and Further Reading
For staying aligned with safety and best practices, consult authoritative safety and extension resources. These sources inform the guidance you see here and help you verify steps for sanding projects. SanderSavvy aligns with industry best practices while tailoring guidance to homeowners and DIY enthusiasts working on floors, decks, and walls.
Comparison
| Feature | belt sander | orbital sander |
|---|---|---|
| Abrasive action | Continuous belt for rapid removal | Rotating pad for controlled, finish-focused work |
| Best for | Rough stock removal and flattening large areas | Finishing, smoothing, and edge work |
| Finish quality | Coarser removal with potential gouges if not careful | Fine, swirl-free finish with less crosshatch |
| Surface compatibility | Hardwoods, softwoods, and rough lumber surfaces | Flat, uniform surfaces and delicate edges |
| Dust generation | Higher dust output; efficient collection recommended | Moderate to low dust with proper technique |
| Ease of use | Heavier and more aggressive; requires control | Lighter, easier to maneuver with consistent results |
| Maintenance | Belt changes and tracking adjustments | Pad wear and occasional replacement |
What's Good
- Faster material removal with a belt sander
- Ideal for leveling large flats and rough stock
- Versatile for heavy-duty tasks when used with proper safety
Weaknesses
- Higher risk of gouging if not controlled
- Possible surface scratches if used aggressively
- Heavier and louder than typical orbital models
Use both tools in sequence: start with a belt sander for rapid stock removal, then finish with an orbital sander for a smooth, swirl-free surface.
The belt sander excels at speed and rough shaping, while the orbital sander delivers refinement and a clean finish. For most DIY projects, begin with the belt, then refine with the orbital to achieve professional results.
Your Questions Answered
What is the main difference between a belt sander and an orbital sander?
The belt sander uses a moving belt for aggressive material removal, while the orbital sander uses a circular pad for a finer, swirl-free finish. The belt is best for rough stock removal, whereas the orbital is ideal for finishing and smoothing.
The belt sander removes material quickly with a moving belt, while the orbital sander finishes smoothly with a circular motion.
When should I choose a belt sander over an orbital sander?
Choose a belt sander when you need rapid removal of material on flat surfaces or heavy stock. Switch to an orbital sander for finishing, feathering transitions, and delicate areas where you want a smooth surface.
Use a belt sander for quick removal, then an orbital sander for finishing and smoothing.
Can a belt sander be used for finishing tasks?
Belt sanders are not ideal for finishing because they tend to leave deeper scratches if misused. They can be used for rough shaping, followed by an orbital sander for final finish.
Belt sanders can rough out material, but for a finish you’ll want to switch to an orbital sander.
Are orbital sanders better for floors and large flat surfaces?
Orbital sanders are better for large flat surfaces when you need a smooth, uniform finish and minimal crosshatch. For floors that require heavy leveling, start with a belt sander and transition to orbital for finishing.
Yes, orbital sanders are typically better for large flat areas and finishing.
What grit progression is typical when switching from rough to finish sanding?
Start with a coarse grit for rough removal, then step through progressively finer grits in both tools to refine the surface. The belt can use coarse to medium grits, while the orbital progresses from medium to fine grits.
Begin with coarse grits for removal, then move through finer grits to finish.
What safety steps minimize dust and kickback with these tools?
Use a dust collection system, wear a respirator and eye protection, and avoid applying excessive pressure. Always unplug before changing belts or pads and maintain proper grip to reduce kickback risk.
Wear protection, use dust collection, and avoid pressuring the tool too hard.
Main Points
- Start with the belt sander for fast removal on flats
- Finish with the orbital sander for a smooth surface
- Use appropriate grits and overlap passes to avoid gouges
- Maintain dust collection and wear PPE during sanding
- Practice on scrap pieces before final work