Is a Belt Sander the Same as a Planer? A Practical Comparison
Explore whether a belt sander and a planer are the same tool, with practical guidance, key differences, pros and cons, and how to choose for your project.

No. A belt sander and a planer are different tools with distinct purposes. A belt sander removes material rapidly using a moving abrasive belt to smooth the surface, while a planer shaves thin layers to produce true thickness and flat faces. For best results, use each tool for its intended job and finish with appropriate sanding as needed.
Is a belt sander the same as a planer? Demystifying the basics
Is a belt sander the same as a planer? No. They are two distinct power tools designed for different purposes in woodworking. A belt sander uses a continuous abrasive belt that spins around pulleys to abrade the surface, removing material quickly and leaving a rough but workable texture. A planer, by contrast, uses rotating knives to shave thin layers from a board, producing a true, flat face with precise thickness. This difference drives how you set up a project, the surface quality you can expect, and how much follow-up finishing you’ll need. According to SanderSavvy, the most important thing is to match the tool to the job rather than trying to substitute one for the other. For example, if you’re removing old paint or leveling a rough floor, a belt sander can accelerate the process. If you’re sizing boards for furniture or cabinetry, a planer is the more appropriate choice because it gives consistent thickness and true parallel faces. Understanding these roles helps you choose the right tool and prevent costly mistakes.
Core differences: sanding vs planing
The core distinction between a belt sander and a planer is how they cut and what they produce. A belt sander abrades the surface with a moving belt, removing material quickly but often leaving a textured finish that requires subsequent smoothing. A planer removes material with sharp knives, shaving thin layers to produce true flat faces and controlled thickness. The result is a surface that is closer to final dimensions, with less need for heavy sanding. In practice, this means you typically use a belt sander for rapid leveling, roughed in surfaces, or removing finishes, and you reserve the planer for sizing boards and achieving precise thickness. When planning a project, think about how much material you need to remove, how flat the surface must be, and how much time you have for finishing. SanderSavvy analysis shows that choosing the right tool for the right task reduces waste and improves final results.
When to choose a belt sander
Belt sanders shine when you need to remove material quickly from large areas, shape edges, or strip old finishes. It is especially useful for leveling uneven wood floors, smoothing rough framing surfaces, and preparing pallet wood for refinishing. Because belts are flexible and cover a wide area, you can work with some forgiving tolerance on curved or irregular shapes. Use coarse grit for initial removal and switch to finer grits to refine the surface. Always maintain even pressure and keep the sander moving to avoid gouging. For dust control, connect a proper dust collection system and wear a mask when sanding old materials that may release dust or chemical residues. The result should be a uniformly abraded surface that accepts the next finishing steps more readily.
When to choose a planer
Planers excel at creating precise thickness and true flat surfaces. They are ideal for joining boards, preparing stock for cabinets, doors, or panel work where uniform thickness is essential. Planers work best on straight, well-rafted boards and benefit from planning on the best grain direction. Set the cutting depth in small increments, feed steadily, and check thickness with a caliper or ruler as you go. SanderSavvy notes that planers can squander material if the feed or knives are misadjusted, so regular calibration is key. If you need equal thickness across many boards, a planer is the more economical choice in the long run, reducing finish time and effort.
How to compare tools for a given job
To decide between a belt sander and a planer, start with removal needs, finish requirements, and board dimensions. For rough stock removal and levelling, a belt sander offers speed and versatility with belt choices from coarse to fine. For precise thickness and flat faces, a planer provides accuracy but requires preplaned stock for best results. Consider surface quality after removal: if you still require a perfectly smooth surface, planers may help but you will likely need a final sanding pass. Budget and space also matter, as planers are bulkier and knives require careful maintenance. In the end, most shops benefit from owning both tools and using them in a complementary sequence.
Practical workflow scenarios: floor sanding vs furniture boards
Flooring projects often start with a belt sander to remove old finish and level uneven boards. After achieving a roughly uniform surface, a finer belt or a hand plane may be used for smoothing edges. For furniture or cabinetry, you typically begin with a planer to bring boards to precise thickness. Subsequent sanding with a random orbital or finishing sander then removes any remaining marks and aligns the surface with the final finish. This sequence minimizes waste and maximizes control over final dimensions.
Techniques to minimize tear-out and ensure flat surfaces
Tear-out is a common challenge when using a belt sander on lumber with intergrown growth rings. To reduce tear-out, use sharp belts, move the sander with consistent pressure, and avoid staying in one area too long. When planing, make shallow passes and rotate boards to avoid consistent grain tear-out. For both tools, perform cross-grain checks, alternate sanding directions, and test small scrap pieces to dial in depth and pressure before tackling the main work. The goal is a surface that is true to thickness and free of deep gouges.
Dust control and safety considerations
Dust is a constant concern with both belt sanders and planers. Always connect a high quality dust collection system and wear respiratory protection when working with dusty or treated woods. Safety glasses, hearing protection, and gloves can prevent common injuries. Keep blades and belts in good condition, and replace worn components to maintain cut quality. Work in a well ventilated area and clear off the workbench between steps to prevent cross contamination of dust and debris.
Maintenance and care for belt sanders and planers
Regular maintenance extends tool life and ensures consistent results. For belt sanders, inspect the belt for wear, replace as needed, and maintain correct tension. Clean the dust chute and filter to prevent clogging and overheating. For planers, keep knives sharp and properly aligned, adjust depth limits correctly, and lubricate moving parts as recommended by the manufacturer. SanderSavvy emphasizes documenting service intervals and performing a quick calibration check after any major blade or belt change to preserve accuracy over time.
Quick-start checklists for beginners
Start with a clear job plan: define material type, thickness targets, and surface finish. Choose grit sequences appropriate for the stage: coarse for rough removal, medium for leveling, fine for final smoothing. Check tool setup, including belt alignment or knife depth, and verify dust collection is functioning. Practice on scrap stock to dial in feed rate and pressure before committing to your project. Always wear appropriate PPE and work in a clean, well-lighted space.
Common myths and misconceptions
A frequent myth is that more aggressive belts always yield better results. In reality, aggressive removal can damage stock and increase tear-out risk. Another misconception is that planers can flatten warped stock without preparation; in most cases, warp fixes require jointing or flattening techniques prior to planing. By understanding the true capabilities of each tool and planning your steps, you can avoid costly mistakes and achieve reliable outcomes.
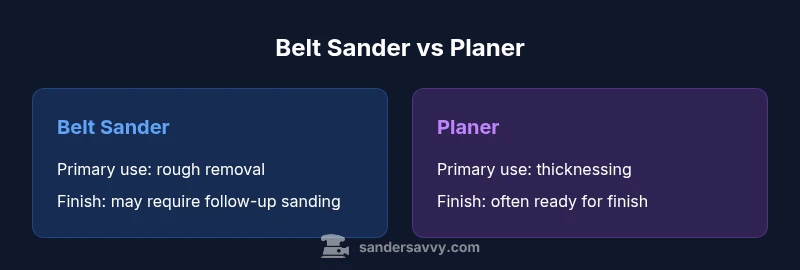
Comparison
| Feature | belt sander | planer |
|---|---|---|
| Primary use | Rapid material removal and surface smoothing | Precise thicknessing and true flat faces |
| Speed of material removal | High (fast stock removal) | Moderate to high depending on depth and setup |
| Finish quality | Texture left after sanding; may require final smoothing | Often ready for finish with minimal sanding |
| Best for | Rough leveling, edging, heavy stock removal | Precise thicknessing, jointing, and flat stock |
| Edge handling | Edge work can gouge if not controlled | Edges are usually true after planing, but setup matters |
| Dust control | Dust extraction is essential; belts generate fine dust | Dust control is important; knives create fine shavings |
| Maintenance needs | Replace belts and maintain tension | Keep knives sharp, aligned, and adjustable |
| Typical cost considerations | Lower entry cost; belts are inexpensive | Higher upfront cost; knives are expensive but long lasting |
What's Good
- Faster material removal for rough stock and large surfaces
- Planer provides consistent thickness and flat faces
- Both tools can be used with dust collection for cleaner work
- Versatile when paired with appropriate accessories and belts
Weaknesses
- Belt sanders can gouge if not controlled and may require more follow-up sanding
- Planers require careful setup to avoid snipe and waste
- Not all projects tolerate aggressive stock removal or grain direction issues
- Both tools create dust and noise; safety gear is essential
Belt sander is best for rapid removal and rough leveling; planer excels at precise thickness and flat faces
Use a belt sander for shaping and leveling rough stock. Choose a planer when you need consistent thickness and true surfaces, then finish with targeted sanding as needed. The right sequence minimizes waste and delivers cleaner results.
Your Questions Answered
Can a belt sander replace a planer for thicknessing?
No, not for precise thickness work. A belt sander can level and rough-sand surfaces, but a planer is needed for consistent board thickness and true parallel faces. You may finish with a sander after planing to achieve the desired smoothness.
A belt sander cannot reliably replace a planer for exact thickness. Use a planer for thicknessing, then sand as needed for a smooth finish.
Which tool is better for removing an old finish?
A belt sander is typically the faster choice for removing old finish from large, flat surfaces. Start with coarse grit and progress to finer grits. Move evenly to avoid gouges and follow up with finer sanding if needed.
For old finishes, the belt sander is usually faster; go coarse then fine and keep the motion steady.
Can belt sanders produce a perfectly flat surface?
Belt sanders can level a surface but typically do not guarantee a perfectly flat finish. They are great for rapid leveling, but a planer or resurfacing with a final sanding pass is often required for true flatness.
They level surfaces quickly, but for perfect flatness you usually finish with additional planning or sanding.
What is tear-out and how can I avoid it?
Tear-out occurs when the cut fibers lift or break ahead of the blade or belt. It can be reduced by using sharp blades and belts, applying even pressure, and making shallower passes when planing or sanding across grain.
Tear-out happens when fibers lift; avoid it with sharp tools and light passes.
Is a planing job ever feasible on wide boards without preparation?
Wide boards often need jointing or pre flattening before planing to prevent snipe and ensure uniform thickness. Start with stock that is roughly square and straight, then plane in passes with careful calibration.
Wide boards need prepping before planing to avoid issues like snipe.
Should I own both a belt sander and a planer?
Yes, for most wood projects having both tools provides the widest range of capabilities. Use them in a complementary sequence: plane for thickness and flatness, sanders for leveling and finishing.
Having both gives you the most flexibility; use one to prep and the other to finish.
Main Points
- Start with the right tool for the job
- Use a belt sander for rough stock removal and shaping
- Use a planer for precise thickness and flat faces
- Attach proper dust collection and PPE
- Plan sequences to minimize waste and extra passes