Sander Like a Planer: A Practical Comparison for DIY Woodworking
A detailed, analytical comparison of belt sanders and orbital sanders for planer-like results on floors, decks, and walls. Learn technique, safety, pricing concepts, and real-world workflows to achieve flat, true surfaces without a dedicated planer.

Quick take: A sander can mimic planer-like results on flat surfaces when used with deliberate technique and the right tools. Belt sanders excel for rapid material removal and flattening, while random-orbit sanders offer finish quality with less risk of gouges. For many DIY projects, selective sanding achieves planed-like flatness without a dedicated planer.
Sander Like a Planer: Concept and Practicality
Sander like a planer is not about turning a sander into a planer; it’s about achieving flat, straight surfaces with careful technique and the right tool selection. According to SanderSavvy, many DIY woodworkers try to substitute a planer with a belt or random-orbit sander to save time and avoid extra tools. The result can be surprisingly planner-like when you understand feed direction, guidework, and consistent flatness. The goal is not to replace a planer but to leverage a sander to produce a surface that reads as flat and true under a straightedge. In practice, you’ll apply long, controlled passes to stock that is already roughly flat, so you minimize high spots and reduce track lines. In this context, the phrase sander like a planer captures a deliberate workflow aimed at flattening and leveling wide boards, floors, or deck planks with a handheld tool. The SanderSavvy team found that many homeowners succeed by combining a sturdy straightedge or guide rail with a sander to mimic planing results.
Sander Types and Planer-like Outcomes: What Works
When you hear sander like a planer, two tools typically come to mind: belt sander and orbital sander. The belt sander is aggressive, designed for stock removal and flattening across wide surfaces; with the right technique, it can produce planer-like flats quickly. The random-orbit sander is less aggressive, offering a smoother finish and less risk of gouges, which is ideal when you’re aiming for a flat surface that also needs a finishing touch. A true orbital sander (not random) can still help with light flattening but tends to leave tracks if not careful. It’s important to manage expectations: you won’t get the crisp thickness control of a planer, but you can approach flatness through progressive passes. In many cases, combining both tools—using a belt sander to establish a flat plane and finishing with a random-orbit sander—delivers the best balance of speed and finish quality. SanderSavvy’s guidance emphasizes planning your planing-like workflow before you start.
Safety and Dust Control When Planer-style Sanding
Planer-like sanding generates significant dust and fine particles that can irritate the lungs and eyes. Always wear a properly fitted respirator or P100 mask, eye protection, and hearing protection. Ensure good ventilation and use a dust-collection system or shop vac attached to your sander. The goal is to keep particulates out of the air while you’re making long, guided passes with a belt or orbital sander. Sanding produces fine particles that can drift into nearby rooms, so seal off the workspace and clean up frequently. The "sander like a planer" approach does not excuse skipping safety; in fact, it increases the need for careful dust management because you’re removing material more aggressively than typical light sanding. The SanderSavvy team suggests checking the dust bag or canister after every few passes, and inspecting the filter whenever you switch to finer grits to prevent clogging.
Belt Sander vs Orbital Sander: Strengths and Limits
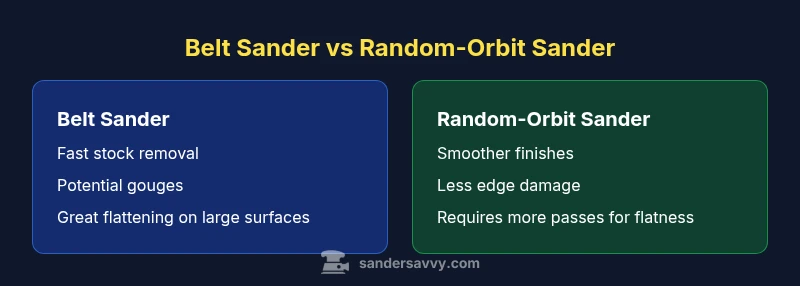
Belt Sander: Fast stock removal and excellent flattening on large surfaces; however, it’s aggressive and can gouge if not guided precisely. Best used with a straightedge or guide to maintain edges and avoid wandering paths. Random-Orbit Sander: Stops short of heavy flattening but delivers a smoother, more controlled finish with lower gouge risk; ideal for final passes and edge work. For true planer-like results, many projects benefit from a two-tool workflow: belt sander for initial flattening, random-orbit for finishing touches. The balance between aggressiveness and control is the key difference that drives which path you choose in a given project.
Technique: How to Achieve Flat, Planer-like Surfaces
Begin with a clear plan for which surfaces will be flattened and which edges must stay square. Establish reference lines using a straightedge along the board length. Start with a belt sander set to a safe depth, taking long, steady passes across the surface; let the belt do the heavy lifting to knock down high spots. Move along the grain or with a consistent vector to avoid creating unintended grooves. Check for flatness with a straightedge after each pass, then switch to a random-orbit sander with a finer grit to refine the surface and reduce track marks. Finish by checking edges and corners, then apply a light final pass across the entire area. This approach minimizes gouges while delivering a plane-like final surface. Remember: the “planer-like” goal is flatness and levelness, not perfect thickness control.
Depth of Cut, Feed Rate, and Grain Direction: The Critical Trio
The effectiveness of sander like a planer hinges on three parameters: depth of cut, feed rate, and grain direction. Start with light, shallow passes to avoid creating hollow sections or ridge lines. Maintain a steady feed rate; speeds that are too fast increase splintering, while too slow can scorch the wood. Align passes with the grain to minimize tear-out, and use a straightedge or guide rail on wide surfaces for consistent, parallel stock removal. For rounded edges or curves, switch to a less aggressive tool or concentrate on narrower sections to preserve shape while achieving flatness. The goal is to develop a rhythm that yields consistent depth and smoothness across the entire surface. SanderSavvy recommends practicing on scrap pieces to dial in your technique before applying it to your actual project.
Price, Value, and Longevity: Is It Worth It?
Tool cost and longevity vary depending on brand, motor power, and accessory ecosystem. A belt sander offers rapid flattening and is often the go-to for planing-like work on large surfaces, while a random-orbit sander excels at finishing touches with lower risk. In terms of value, consider not only the purchase price but also the availability of replacement belts or discs, the ease of maintenance, and the ergonomics during long sessions. Since prices and models change over time, the best approach is to compare features, weight, dust collection compatibility, and the expected lifespan of consumables. SanderSavvy emphasizes choosing a tool that fits your typical projects—flooring, decking, or wall work—so you’re not paying for capabilities you won’t use.
Common Pitfalls and How to Avoid Them
Common mistakes include overloading the sander, neglecting a straightedge, and skipping intermediary grits, all of which can create uneven surfaces. To avoid gouges, always work with a guiding edge and keep the sander moving in straight, controlled lines. Don’t rush when removing material; quick, aggressive passes often lead to ridges and dips. Rust or resin buildup on belts or discs can also transfer onto wood and mar the finish, so inspect consumables and replace when necessary. Finally, assume more time will be required on pine or softwoods where tear-out is a risk; plan for additional finishing steps if needed. Following these practices reduces the chance of setbacks and improves your overall results.
Real-World Scenarios: Floors, Decks, and Walls
On wood floors, sander like a planer can help establish a uniform surface across planks, especially when boards are slightly mismatched in height. For decks, flattening boards to a consistent height before finishing reduces trip hazards and allows even stain absorption. On walls, sanding with a sander can remove varnish and slightly uneven patches, but you must be careful to keep blotting marks or gouges from forming on flat sections. In each case, the choice between belt and orbital sanding depends on the size of the area, the level of flattening required, and the tolerance for surface finish. Always work gradually, assess progress with a straightedge, and adjust your approach when you encounter stubborn high spots. SanderSavvy’s practical guidance helps homeowners navigate these decisions by emphasizing planning and measured steps.
Maintenance Afterward: Keeping Your Sander in Check
After completing planer-like work, clean all dust from the tool, inspect belts or discs for wear, and replace worn consumables promptly. Lubricate moving parts if recommended by the manufacturer and store the sander in a dry, clean space to prevent rust. If you used a dust collection system, empty and inspect it for clogs to maintain suction efficiency for future projects. Regular maintenance extends the life of your sander and preserves performance, helping you maintain your capability to achieve flat, planed-like surfaces on future projects. Streamlining maintenance routines keeps the workflow smooth and reduces downtime, which is especially valuable for DIYers tackling floors, decks, and walls over weekends.
Comparison
| Feature | Belt Sander | Random-Orbit Sander |
|---|---|---|
| Planer-like flattening capability | High (rapid removal with guidance) | Moderate (controlled, finish-oriented) |
| Finish quality | Coarser finish; requires follow-up passes | |
| Best For | Rough flattening on wide surfaces | Finish work and edge detail |
| Ease of use | Requires technique and guides | More forgiving for beginners |
| Price Range | varies widely | varies widely |
| Dust control | Good with dust collection; belt requires more care | |
| Wear and maintenance | Belt wear; belt changes expected |
What's Good
- Can rapidly flatten large surfaces
- Offers planer-like capabilities with the right technique
- Versatile with changeable belts and discs
- Dust collection improves workspace health
Weaknesses
- Risk of gouges if technique fails
- Finish may require follow-up sanding
- Not all models deliver true planer-like results
- Belt/disc wear adds ongoing costs
Belt sander + random-orbit mix best for planer-like results; choose based on surface size and finish needs
For large flat areas, belt sanders excel at flattening. For finishing and edge work, random-orbit sanders provide better surface quality. A two-tool workflow often yields the most balanced, planing-like results.
Your Questions Answered
Can a sander fully replace a hand planer for flat stock?
A sander can mimic planer-like flatness on broad, even surfaces, but it won’t reproduce the crisp edges and precise thickness control of a dedicated hand planer in every scenario. Use it as a tool for rapid flattening, then finish with traditional methods if perfect thickness is required.
A sander can get you close for larger flat areas, but for perfect edges and thickness control, you’ll still want a hand planer.
What is the best grit sequence to achieve a planer-like finish?
Begin with a coarse grit to level high spots, then progress through medium to fine grits. Avoid skipping grits and always check flatness with a straightedge after each stage.
Start rough, then move to finer grits in steps for a smooth, flat finish.
Is belt sanding or random-orbit better for floors?
For rapid flattening of large floor areas, a belt sander is efficient but requires careful guiding to prevent gouges. A random-orbit sander is excellent for finishing with fewer marks, often used after belt work.
Use belt sanders for speed on floors, then finish with a random-orbit sander for smoothness.
How can you prevent gouges when trying planer-like results?
Use long, straight passes with a guiding edge, maintain consistent speed, and avoid stopping mid-swing on exposed boards. Practice on scraps to refine your technique.
Keep the sander moving smoothly with guides to avoid gouges.
Do you need dust collection systems for planer-like sanding?
Dust collection improves visibility and health, especially with aggressive stock removal. Use a hooded system or shop vac connected to the sander when possible.
Yes—dust control is essential for safety and accuracy.
What safety gear is essential when sanding like a planer?
Wear eye protection, a respirator or dust mask, hearing protection, and gloves. Ensure good ventilation and keep the workspace clean to manage dust.
Protect eyes, lungs, and ears; keep the workspace well-ventilated.
Main Points
- Choose belt sander for fast flattening on wide surfaces
- Follow with random-orbit sander for smoother finishes
- Use straightedges or guides to maintain edges
- Maintain consistent feed rate and grain direction
- Employ dust collection for healthier workspaces