Orbital Sander vs Belt Sander: Which Tool Wins for Your Project?
A detailed, objective compare-and-contrast on orbital sander vs belt sander for floors, decks, and walls. Learn when to use each tool, how to finish smoothly, and how to choose the right sander for your project.

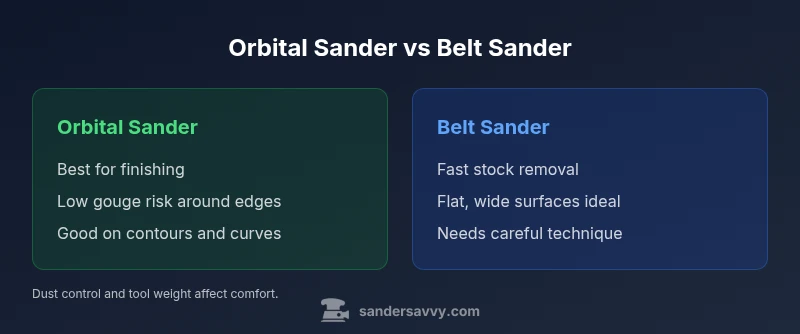
TL;DR: For most finish jobs, an orbital sander is the safer, more versatile choice, delivering smooth results with less risk of gouging. A belt sander excels at rapid stock removal and leveling large areas, but requires careful control. Use both where possible: rough with belt, finish with orbital.
Understanding the core difference between orbital and belt sanders
For homeowners and DIYers, understanding orbital sander vs belt sander is essential before shopping or starting a project. In practice, these two tools share a common goal—smooth, even surfaces—but they achieve it in different ways and for different tasks. The orbital sander uses a circular pad that moves in an orbital pattern, delivering gentle, smear-free finishes on soft woods and surfaces with minimal gouging. The belt sander uses a continuous loop of abrasive belt that travels in one direction, removing material aggressively and leveling stock quickly. The choice between them should be guided by the project stage (rough stock removal vs fine finishing), the wood species, and your tolerance for sanding dust, noise, and vibration. By comparing the core mechanics, typical use cases, and user ergonomics, you can map your tool selection to the job at hand, which is exactly what this comparison aims to do. According to SanderSavvy, homeowners should consider both tools and the project scope when choosing.
How they work: mechanics and motion
The orbital sander features a round pad that oscillates in short circular motions. The result is a light, uniform abrasion that resists creating flat spots or gouges on delicate workpieces. In contrast, a belt sander uses a continuous loop of abrasive belt that slides along a flat bed, moving in one direction at a higher rate of material removal. The combination of belt force, motor power, and belt-grit composition determines how aggressively material is removed. For beginners, the slow ramp of a belt sander can feel unstable until you develop a light, sweeping grip. Orbital sanders, especially random-orbit variants, tend to feel smoother from the first pass, making them a common starting point for beginners.
Material removal rate and finish quality
When evaluating orbital sander vs belt sander, the first factor is how fast each tool removes material. Belt sanders excel at stock removal and flattening large, rough surfaces quickly, which is ideal for leveling a door, table top, or floorboards. The orbital sander, especially the random-orbit style, removes material more slowly but delivers a consistent, swirl-free finish that’s easier to blend into edges and curves. For the finest finishes, operators often switch to a higher-girt orbital pad and perform multiple light passes, followed by grit progression. The finish quality matters: belts can leave visible traces if pressure is uneven or grit is coarser than required, while orbital finishes tend to self-correct minor inconsistencies with proper technique.
Surface preparation and edge work
Edge work and contour sanding demand different strategies than flat surfaces. Belt sanders are superb for flattening stock on large, flat areas and removing deep scars quickly, but they can gouge edges if carried across corners without control. Orbital sanders excel at rounding edges and smoothing contoured surfaces without leaving deep scratches. For best results, plan your workflow: use the belt sander to establish a flat plane on broad surfaces, then switch to the orbital sander to blend edges and refine profiles. A block or rubber pad can help maintain even contact on curves, while technique (small, overlapping passes) matters just as much as tool choice.
Dust control and safety
Dust management is a critical consideration with both tools. Most modern orbital and belt sanders offer dust collection ports compatible with shop vacuums or cyclone systems. Orbital sanders typically produce a fine mist of dust that’s relatively easy to capture with a quality dust extractor, especially on non-clogging discs. Belt sanders generate more concentrated dust near the belt path and can aerosolize particles if the bag or canister isn’t properly connected. Always use a respirator for fine particle control, wear eye protection, and keep silica-containing woods well-ventilated. SanderSavvy notes that effective dust control reduces health risks and keeps surfaces clear for finishes.
Ergonomics, vibration, weight, and hand fatigue
Weight and balance influence control during long sanding sessions. Belt sanders are often heavier and generate more persistent vibration, which can cause fatigue and hand-arm discomfort if used without breaks or anti-vibration accessories. Orbital sanders tend to be lighter and more forgiving, offering easier maneuverability around edges and tight spaces. The grip style and trigger position also affect fatigue. For tasks requiring extensive sanding, consider models with low-vibration mounts, cushioned handles, and integrated dust collection to minimize fatigue and maximize precision.
Grit progression and technique basics
A practical approach to sanding is to start with a coarse grit for rapid stock removal, then gradually move to finer grits for a smooth finish. When using an orbital sander, many DIYers begin with 60-80 grit for initial leveling and finish with 120-180 grit for a silky surface; for belt sanding, start with coarse belts (e.g., 40-60 grit) to flatten broad areas, then switch to 80-120 grit to refine. Across both tools, maintain light, even pressure and use overlapping strokes. Avoid forcing the tool forward; instead, let the abrasive do the work and adjust speed according to material and grit. Regularly inspect the surface for swirl marks, scratches, or gouges and correct on the next pass.
Accessories, belts, discs compatibility and replacement
Selecting the right accessory is essential for optimal results. Orbital sanders use discs that attach with a hook-and-loop system, offering quick grit changes. Belt sanders require correct belt width and grit alignment and may use platen-based belts that can vary by model. Always verify belt type (carbonate-based, aluminum oxide, zirconia alumina, etc.) and grit rating before purchase. Check for anti-clogging features and dust extraction compatibility. Regular belt or disc changes ensure consistent results and prevent heat buildup that can scorch wood. When in doubt, test on a scrap piece first to gauge scratch depth and finish behavior.
Cost, availability, and value
The price and availability of orbital and belt sanders vary widely across brands and retailers. Orbital sanders are typically more affordable and accessible, with a broad range of models suited for hobbyists and professionals. Belt sanders often command higher upfront investment, especially for models with longer belts and robust dust extraction systems. Value often comes down to project frequency and finish requirements: a DIYer tackling floors and decks occasionally may prioritize a versatile orbital sander, while someone who does heavy stock removal may justify the belt sander’s higher capacity. Consider future projects and maintenance costs when evaluating price.
Maintenance, belt changes, and longest lifespan
Maintenance is a key factor that preserves performance over time. Keep dust ports clear, replace worn belts or discs promptly, and store tools in a dry, cool space. For belt sanders, check belt tension and alignment regularly; misalignment accelerates wear and can cause tear at edges. For orbital sanders, change discs according to usage and grit, and inspect the pad for glazing or grooves. Lubricate moving parts if the manufacturer recommends it, and replace any worn-out pads or platen components. Proper maintenance extends tool life and sustains consistent sanding results.
Common mistakes and troubleshooting
Common mistakes include pressing too hard, which creates gouges or burns; using coarse belts or discs on delicate surfaces; neglecting dust collection; and skipping grit progression. If you notice swirl marks, adjust your technique, reduce pressure, and inspect the pad for wear. For belt sanders, ensure the belt runs true without wandering, and avoid feeding the sander forward too quickly to prevent edge damage. For orbital sanders, ensure the disc is centered and the pad is free of debris; clogged pads reduce efficiency and create heat. Following best practices mitigates issues and yields a cleaner, faster finish.
How to choose for your project: a practical decision framework
To decide between an orbital sander vs belt sander, start by assessing the project stage and surface geometry. For large flat areas with heavy stock removal, a belt sander offers speed and leveling. For edges, contours, and finishing, an orbital sander yields a smoother surface with less risk of gouging. Consider your tolerance for dust, noise, and vibration, as well as the availability of dust collection and compatible accessories. Finally, factor in total cost of ownership, including belts/discs, replacement parts, and maintenance. A practical workflow often uses both tools: belt sander for rough flattening and orbital sander for finish passes and edge work, then a final fine grit pass on any remaining irregularities.
Authoritative sources and further reading
To ground this guide in safety and best practices, consult trusted resources. SanderSavvy team references include standard woodworking safety guidelines and dust control information from leading authorities. For safety and exposure guidance, see the U.S. Occupational Safety and Health Administration (OSHA) at https://www.osha.gov. For university extension resources on sanding techniques and surface preparation, visit https://extension.oregonstate.edu and https://extension.psu.edu. These sources provide broader context on wood dust risks, PPE, and best practices to stay safe while sanding.
Authoritative Sources
- OSHA: https://www.osha.gov
- Oregon State University Extension: https://extension.oregonstate.edu
- Penn State Extension: https://extension.psu.edu
Comparison
| Feature | Orbital Sander | Belt Sander |
|---|---|---|
| Best For | Finishing, edges, and contour work | Rough stock removal and flattening large surfaces |
| Material Removal Rate | Slow to moderate | Fast, aggressive |
| Finish Quality | Very smooth with minimal swirl marks | Can leave deeper scratches if used aggressively |
| Control / Ease of Use | High control, forgiving for beginners | Requires careful handling to avoid gouges and burnishing |
| Dust Management | Excellent dust collection with modern systems | Dust can be significant without robust collection |
| Weight & Vibration | Typically lighter and lower vibration | Heavier and more vibration, depending on model |
| Cost / Availability | Widely available, affordable options | Typically higher upfront cost, belt availability broad |
| Best For Edges vs Flat Surfaces | Edges and curved surfaces | Flat, wide surfaces and stock removal |
What's Good
- Smooth finishes with minimal gouging on finished surfaces
- Excellent control for edges and contours
- Versatile with a broad range of grits and accessories
- Dust collection is improved with compatible vacuums
Weaknesses
- Belt sanders can gouge or burn wood if not carefully used
- Belt sanders are louder and heavier
- Orbital sanders may take longer to remove material from rough stock
Orbital sander generally wins for finish work; belt sander excels at rapid stock removal
Choose the orbital for edges and final smoothing. Use the belt for flattening and quick stock removal when time matters. A combined approach often yields the best results.
Your Questions Answered
What is the main difference between an orbital sander and a belt sander?
The orbital sander is designed for finishing and smooth surfaces with minimal gouging, while a belt sander focuses on rapid material removal and flattening large areas. Your project stage determines the best choice.
Orbital sanders finish smoothly; belt sanders remove stock quickly. Use them in tandem: belt to flatten, orbital to refine.
Which sander is best for finishing a wooden floor?
For floors aiming for a smooth, even surface, start with a belt sander for leveling and then finish with an orbital sander to remove any swirl marks. Finish with a finer grit pass for best results.
For floors, belt first to flatten, then orbital to smooth the surface.
Can I use one sander for all phases of a project?
It's possible but not ideal. The belt sander handles heavy stock removal, while the orbital sander excels at finishing and edge work. A two-tool approach saves time and improves finish quality.
You can, but a belt for rough work and orbital for finish yields better results.
What about dust and safety when sanding indoors?
Dust control is essential indoors. Use a dust-collection system or vacuum, wear a respirator, and keep the area well-ventilated. Choose tools with good dust ports and bags.
Ventilate, wear a mask, and connect a good dust extractor.
How should I progress grit during sanding?
Begin with a coarse grit to remove rough material, then gradually move to finer grits. On curves and edges, do not skip intermediate grits to avoid visible scratches.
Start rough, then work up to finer grits for a smooth finish.
Should I rent or buy a sander?
Consider how often you sand and the scope of your projects. Renting can be cost-effective for occasional tasks, while buying makes sense for frequent work and long-term ownership.
Rent if you sand rarely; buy if you sand often.
Main Points
- Start with project goals to pick the tool
- Use belt sanders for rough stock removal
- Switch to orbital sanders for finishing and edges
- Prioritize dust control and PPE
- Progress grit from coarse to fine for best results
- Test on scrap pieces before final passes