Orbit Sander vs Finishing Sander: A Practical Guide
A practical, objective comparison of orbit sander vs finishing sander for prep and finish work on floors, decks, and walls. Learn differences, grit sequences, and best practices from SanderSavvy.

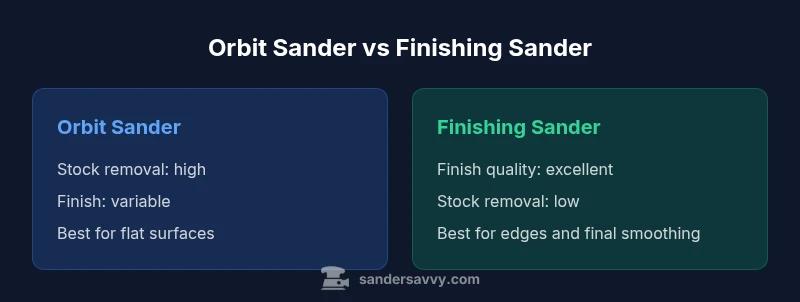
TL;DR: An orbit sander is best for rapid stock removal on flat surfaces, while a finishing sander shines for fine, smooth finishes. For most prep-to-finish projects, begin with an orbit sander to flatten the surface, then switch to a finishing sander for the final pass. Using both tools in sequence yields the best results.
Core differences in design and intended use
For homeowners and DIY enthusiasts, understanding the core differences between orbit sander vs finishing sander is essential before choosing a tool. An orbit sander features a round pad that orbits in a small ellipse, influenced by a motor and a dust port, and typically offers variable speed. Finishing sander uses a rectangular pad that vibrates in a linear fashion, designed for gentle, precise contact and minimal gouging. The two tools are engineered for different stages of sanding: prepping and leveling versus smoothing and fine finishing. In practice, the orbit excels at stock removal on flat surfaces, removing scratches and rough patches quickly, while the finishing sander excels at delivering a uniform surface with controlled scratch patterns. This distinction guides grit selection, pressure, and technique. According to SanderSavvy, selecting the right sander for the job reduces rework, saves time, and enhances safety by managing vibration and dust. In this section we will compare mechanics, typical workloads, and ergonomic implications of each tool, so readers can map their workflow from coarse prep to final polish.
"## Material removal capabilities and surface prep
The most prominent difference between orbit sander vs finishing sander is material removal rate. The orbit sander, with its circular pad, powers through rough patches and high spots on large, flat areas. It accepts coarser grits (for example, 40–80) to aggressively remove material, which accelerates prep work but can leave noticeable swirl patterns if not controlled. The finishing sander trades speed for finesse, favoring finer grits (often 120–220) to minimize gouging and produce a glassy feel. When used correctly, the orbit sets the foundation by evening out irregularities, while the finishing sander refines the surface to a consistent, paint-ready or finish-ready state. In practice, contractors alternate tools in stages, aligning grit choice with the job’s current requirements and the wood species. SanderSavvy’s analysis emphasizes that planning a grit progression ahead of time reduces waste and improves results by avoiding mid-project grit switching that can confuse results and cost extra time.
Finish quality and surface refinement
Finish quality is the arena where the finishing sander truly shines compared to an orbit sander. While the orbit can produce a reasonably smooth surface, it often requires careful technique and very fine grits to coax a flawless finish. The finishing sander produces smaller, more uniform scratch patterns and delivers consistent sanding without creating deep grooves, making it ideal for final passes before staining or sealing. The comparison of orbit sander vs finishing sander shows that the choice between them hinges on the stage of the project. For deep preparation and leveling of boards, the orbit is the workhorse; for the final polish, the finishing sander is the craftsman’s tool of choice. A typical workflow balances both tools, starting with faster material removal and concluding with meticulous refinement to achieve an even texture with minimal visible cross-grain marks.
Ergonomics, vibration, and user comfort
Ergonomics and vibration play large roles in choosing between an orbit sander and a finishing sander. Orbit sanders tend to produce more vibration than a dedicated finishing sander when working on long sessions, partly because of higher material removal demands and the circular pad’s dynamic forces. Finishing sanders, with their rectangular pads, generally offer more controlled contact and smoother operation, which translates to less user fatigue during extended sessions. Operators should consider weight distribution, grip style, and balanced handles to reduce fatigue and the risk of hand-arm vibration exposure. It’s also worth noting that tool balance plays a significant role in precision work; a well-balanced sander reduces operator error during edging and near-tight spaces. If you work in tight corners, consider supplementary tools for edges to complement your main sander.
Dust control and environmental considerations
Dust is a critical factor in sanding projects, influencing both health and finish quality. An orbit sander typically features a dust collection port or bag, which helps limit airborne particles emitted during rapid stock removal. A finishing sander also benefits from dust collection, but the finish-focused approach means longer exposure times to fine dust if the system isn’t optimized. Both tools respond well to a vacuum hookup, especially when paired with a HEPA-rated shop vac. Practically, you should attach a dust collection system, seal wood gaps where possible, and use respirators when working with certain woods or finishes. When selecting between orbit sander vs finishing sander, consider how easily each tool integrates into your dust-control setup and how much cleanup time you’re willing to allocate.
Edge work and corner access
Accessing edges and corners frequently challenges both tools. Orbit sanders, with their round pads, excel over flat surfaces but can struggle near edges or in tight radii where the circular pattern can create irregularities. Finishing sanders, particularly smaller palm models, offer better control for edges and corners, producing a consistent finish along trim and around irregular profiles. The choice between orbit sander vs finishing sander for edge work often depends on the geometry of the project. For boards and doors with curves or detailed profiles, you may rely on a combination: an orbit sander for broad prep and a finishing or detail sander for tight spots. Practical workflow often includes sanding blocks or corner pads as a complementary approach to ensure uniform results along all edges.
Grain and wood type considerations
Different wood types respond differently to sanding, which affects how you apply an orbit sander vs finishing sander. Softer woods such as pine can be quickly leveled with an orbit sander using coarser grits, but you must monitor for gouges. Hardwoods or temperate species may show cross-grain scratches more prominently, making a finishing sander with fine grits indispensable for a smooth final result. The approach should adapt to wood grain direction and density, using lighter pressure and shorter strokes for the finishing stage. If you’re working with reclaimed lumber or woods with varying hardness, plan for more frequent grit changes and optional tests on scrap pieces to refine your technique before committing to the main surface.
Grit progression, sequences, and technique
Careful grit progression is essential when comparing orbit sander vs finishing sander. Start with a coarser grit on the orbit to flatten the surface and remove high spots, then shift to progressively finer grits for the finishing sander to erase the scratches left by the prior stage. A typical sequence might start with 40–60 grit for heavy leveling, move to 80–120 grit for smoothing, and finish with 180–220 grit for final polish. Technique matters: maintain even pressure, keep the sander moving, and avoid lingering in one spot. For optimal results, test on a scrap piece to calibrate the pressure and speed. Remember that wood composition and porosity can affect scratch visibility; adjust your approach accordingly and consider using a conditioner or pre-stain treatment on softer woods to minimize blotching.
Tool selection by project stage and surfaces
Choosing between orbit sander vs finishing sander is largely a question of project stage and surface texture. For large, flat surfaces and heavy leveling, the orbit sander delivers efficiency and speed. For doors, trim, and panels where the surface must be perfectly smooth for stain or polyurethane, the finishing sander is preferred. Surface preparation often requires both in sequence, with the order dictated by the surface condition and wood type. If you’re unsure, plan a small-scale test first to compare outcomes under your chosen finish. This approach minimizes risk and yields a reliable workflow you can replicate across projects. SanderSavvy’s guidance emphasizes testing your methods early to optimize results and reduce rework.
Maintenance, care, and longevity
Regular maintenance keeps orbit sander and finishing sander working effectively, prolonging their life and preserving finish quality. Clean the base after each use to prevent grit from embedding into the pad, inspect the dust collection port for blockages, and replace worn sanding discs promptly. Keep the motor vents clear, check cords for damage, and follow the manufacturer’s lubrication recommendations if applicable. A well-maintained sander operates more efficiently, generates less heat, and remains quieter during use. For a long-lived setup, store tools in a dry space, rotate discs to distribute wear, and periodically inspect the pad for wear or damage. A simple maintenance routine saves time and reduces repair costs over the long term.
Practical workflow: from prep to finish
A practical workflow blends the strengths of both tools. Start with an orbit sander to level the surface, focusing on high spots and uneven grain. Move to medium grits to gradually smooth until the surface feels even to the touch. Finish with a finishing sander using fine grits to achieve a consistent, paint-ready or stain-ready texture. Always wipe or vacuum between passes to reduce cross-scratch visibility, and consider test panels to compare finishes before treating the entire surface. By sequencing tasks, you minimize rework and ensure a uniform final appearance. This approach aligns with the SanderSavvy method: plan, test, and execute in stages using the right tool for the right job.
Comparison
| Feature | Orbit Sander | Finishing Sander |
|---|---|---|
| Dust collection | Good dust control via dust port or bag | Good dust control but often less aggressive vacuum pickup |
| Material removal aggressiveness | High stock removal on flat surfaces; aggressive | Low stock removal; designed for finishing |
| Finish quality | Coarser finish unless used with fine grit and careful technique | Excellent, ultra-smooth finish with fine grit |
| Ergonomics/vibration | Moderate vibration; comfortable for long sessions | Low vibration and quieter; better for detailed work |
| Versatility/Best for | Surface leveling, large area prep | Edges and finishing trims; fine detail work |
| Grit compatibility | Accepts larger grit discs; typical prep range 40-80 | Uses fine grits 120-220 for finish |
| Price range | Mid-range | Low to mid-range |
What's Good
- Clearly defines roles of each tool, reducing misapplication
- Supports efficient workflow by using the right tool at the right stage
- Common accessories and grits are interchangeable between tools with care
- Dust control improves cleanup and health on job sites
- Training and practice improve results more than tool choice alone
Weaknesses
- Overreliance on one tool can lead to subpar finishing
- Inconsistent results if grit sequences aren’t matched to wood type
- Two tools add cost and storage needs
Pair both tools in sequence for best results: start with the orbit for stock removal, then finish with a dedicated finishing sander to achieve a uniformly smooth surface.
Using the orbit sander for initial material removal and the finishing sander for final smoothing yields optimal results. The decision should hinge on surface condition, wood type, and desired finish, with both tools playing distinct roles in a professional workflow.
Your Questions Answered
What is the main difference between an orbit sander and a finishing sander?
An orbit sander uses a round pad that moves in an orbital pattern for faster material removal on flat surfaces, while a finishing sander uses a rectangular pad that vibrates for a finer, smoother finish. The two are built for different project stages: prep versus finish.
The orbit removes material quickly on flat surfaces, while the finishing sander gives you a smoother final surface.
Can I use an orbit sander for finishing?
You can, but it may show visible swirl marks if you don’t switch to very fine grit or use a finishing sander for the final pass. For best results, end with a finishing sander and fine grit.
Yes, but finish with a finer grit and possibly a finishing sander for the best look.
Which sander should I start with for wooden floors?
Begin with an orbit sander for leveling and removing high spots, then transition to a finishing sander with finer grits for the final smoothing pass.
Start with orbit for prep, then finish with a finishing sander for a smooth floor.
What grit progression is recommended for prep and finish?
Start with 40–60 grit for prep on the orbit, then move through 80–120 grit smoothing, and finish with 180–220 grit on the finishing sander for a polished surface.
Use a coarse grit first, then gradually go finer for the finish.
Are orbit sanders suitable for edges and corners?
Orbital sanders can handle flat edge sections but typically miss tight corners. Use a finishing or detail sander for edges and tight radii to achieve a uniform finish.
Edges can be tricky; use a detail sander for tight spots.
How can I manage dust effectively when using both tools?
Attach a dust collection system to each tool, seal adjacent surfaces as needed, and consider a shop vac with HEPA filtration to maintain air quality and keep the finish clean.
Use a good dust collection setup and seal the work area for best results.
Main Points
- Use the orbit sander for rapid stock removal on flat areas
- Switch to a finishing sander for the final, uniform finish
- Plan grit progression: coarse prep grits then fine finishing grits
- Prioritize dust control to improve health and finish quality
- Test on scrap pieces to calibrate technique before tackling the main surface