Is a Drum Sander the Same as a Planer? A Practical Comparison for DIY
Learn the real differences between drum sanders and planers for floors, decks, and walls. This in-depth comparison covers operation, finish quality, safety, and practical tips to choose the right tool for your project.

No. A drum sander and a planer are not the same tool. A drum sander uses an abrasive belt on a rotating drum to level large, flat surfaces like floors or wide panels, while a planer shaves thin layers from board thickness using sharpened blades. Each tool serves distinct tasks, and choosing the right one depends on surface area, material, and final dimensions. For a deeper look, see our full comparison.
What you need to know about drum sander vs planer
According to SanderSavvy, the drum sander and planer are two distinct woodworking tools with different core purposes. A drum sander uses an abrasive belt mounted on a rotating drum to remove material from large, flat surfaces. It excels at evening out high spots and finishing a floor or wide panel without creating deep gouges. A planer, by contrast, relies on sharp blades to shave thin layers from a board, primarily to achieve a specific thickness and smooth, straight edges. If you ask 'is a drum sander the same as a planer,' the answer is no—while both are sanding/woodworking tools, they serve different roles. Understanding these differences is essential for planning projects on floors, decks, or walls and for selecting the right tool at the right stage of work. The SanderSavvy team emphasizes that choosing the proper tool depends on the surface area, material, and desired final dimensions, not on convenience alone.
How a drum sander works
A drum sander uses a motor-driven rotating drum wrapped with abrasive belt. As you move the tool across a floor or panel, the belt removes thin layers of material. The key to control is belt grit, feed rate, and drum speed: coarse grits remove material quickly but leave deeper scratches; fine grits finish the surface but require more passes. Drum sanders are often used with a heavy, flat base to promote even contact and minimize edge gouges. Proper dust collection is crucial because the belt generates a lot of fine dust. For DIYers, start with a mid-range grit (around 40-60 for heavy leveling, 80-120 for finish work) and test on scrap to dial in pressure and pass count.
How a planer works
A planer uses a cutter head with spinning blades that shave off a controlled thickness from a board. The setup includes feed rollers, a depth of cut adjustment, and tables for supporting long planks. Planers produce consistent thickness across the face of a board and are ideal for matching boards in a project. They excel at removing glue joints, squaring edges, and surfacing rough lumber. However, planers are not designed for flattening large surface areas; they can cause a step or hollow if used on uneven stock. For edges and ends, you often follow with hand or belt sanding to blend areas.
Key differences in removal method and surface finish
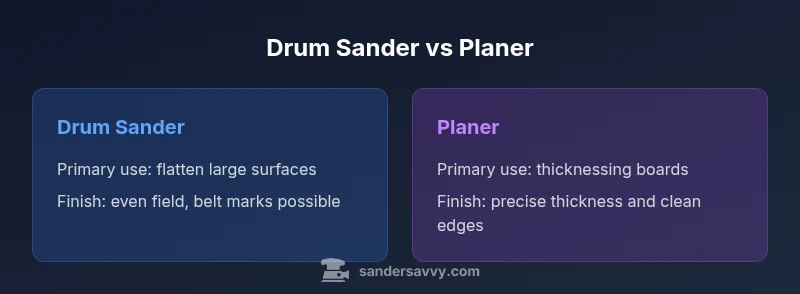
- Primary purpose: drum sander = flatten large surfaces; planer = control board thickness.
- Removal action: drum sander removes material with a belt-driven drum; planer shaves chips with blades.
- Edge handling: drum sanders are more challenging near edges; planers manage edges more predictably before final sanding.
- Surface consistency: drum sanders excel at uniform flatness across wide areas; planers ensure precise thickness and straight stock edges.
- Dust and cleanup: drum sanding creates fine sawdust and belt grit dust, while planing creates larger chips along with fine dust.
- Tool weight and maneuverability: drum sanders are heavier and less nimble on narrow edges; planers are more compact for edge work and on-site tuning.
Surface quality and finish expectations
When you finish a project, the drum sander tends to produce a uniform field across broad surfaces but may leave subtle belt marks that require follow-up sanding. Planers deliver consistent thickness, square faces, and clean edges, which minimizes the amount of subsequent flattening. In practice, most DIYers use a drum sander for large floor areas and a planer for boards to fit into a project, then finish with a final pass of a palm sander or random-orbit sander for an even blend. The finish you want will guide your grit choices and the sequence of tool use.
Dust, safety, and setup considerations
Both tools generate dust, but the type and volume differ. Drum sanding releases fine dust from the belt that travels with the belt’s contact, demanding robust dust collection and respirator use in enclosed spaces. Planers throw chips and dust in a more aerated pattern but still require masks and eye protection. Safety starts with securing the workpiece, using clamps, and ensuring the tool is level and stable. Wear hearing protection; use dust collection hoses that fit the tool’s inlet, and keep a clean workspace to prevent slips and injuries. For long runs, plan pauses to clear dust buildup and check belt or blade condition.
Use cases: floors, decks, walls
Drum sanders shine on floors, large decks, and plaster or wood panels where evenness matters and edge work is minimal. They can remove gloss, old finish, or uneven patches across wide areas. Planers are the go-to for preparing lumber: squaring boards, achieving uniform thickness across a batch, and finishing edges prior to joinery. In many projects, you’ll alternate tools: plane boards to final thickness, then use a drum sander to level the surface once the stock is assembled. This approach minimizes waste and produces a cleaner final appearance.
Tools and setup tips for DIY success
- Start with practice stock: test grit sequences on off-cuts before touching your project.
- For drum sanding: begin with a coarse grit to remove material quickly, then move to a finer grit for finishing.
- For planing: set a conservative depth of cut, take multiple light passes, and check thickness after every few boards.
- Use proper dust collection and a good mask or respirator to reduce inhalation of dust.
- Keep blades sharp and belts clean; dull tools gouge surfaces and require extra finishing passes.
- Plan your workflow: avoid pushing tools against grain or against the belt; work with grain and stabilize the stock.
Common mistakes and how to fix them
- Overloading the drum sander: slow the feed rate and reduce contact pressure to avoid gouges.
- Taking too deep a cut with a planer: shave in small increments; check thickness frequently.
- Skipping edge work: use a straight edge or edging sander to blend edges after flattening.
- Inadequate dust control: upgrade the dust collection setup before heavy material removal.
- Not testing on scrap: always test grit and depth settings before touching the main pieces.
How to decide between a drum sander and a planer
Ask yourself: Is the surface area primarily large and flat, requiring leveling across a broad field? If yes, a drum sander is often the best choice. Do you need precise thickness across multiple boards or want to square and prep rough lumber? If yes, a planer is the better tool. Consider the stock type, project scale, and the finish you desire. In tight spaces or for edges, you may need hand sanding or a palm sander to complete the blend.
Quick-start steps for beginners
- Define the project goal: surface flattening vs thickness control. 2) Inspect the stock: is it flat and repairable or rough and chunky? 3) Choose the correct tool for the main task. 4) Practice on test stock, adjust depth/grit, and set up dust collection. 5) Perform several light passes; stop when you see uniform finish or consistent thickness. 6) Finish with a light final pass using a finer grit for an even blend.
Maintenance and care for your sanding tools
Keep belts and blades sharp and clean. Check belt tension and replace worn belts promptly. Wipe the planer blades and re-lubricate as recommended by the manufacturer. Clean the dust collection system after heavy use to prevent clogging and reduce fire risk. Store equipment in a dry, clean area to prevent corrosion or warp. Regularly inspect safety guards, power cables, and clamps for wear and safety compliance.
Renting vs owning: cost and risk considerations
For most DIYers, renting a drum sander or a thickness planer is a practical way to access higher-performance tools without committing to a full purchase. Consider the project scope, frequency of use, and storage space when deciding to rent or buy. If you only tackle occasional floor leveling or a one-time lumber preparation, renting is typically the better financial move. For frequent projects, a dedicated drum sander or planer may be worth the investment to save time and ensure consistency over multiple jobs.
Comparison
| Feature | drum sander | planer |
|---|---|---|
| Primary use | Flatten large, flat surfaces (floors, decks, wide panels) | Thinly shave board thickness and smooth edges |
| Material removal method | Abrasive belt on a rotating drum; gradual removal | Cutter blades shave precise thickness from stock |
| Edge handling | Edge control is more challenging; careful technique required | Edges and ends are straightforward for thicknessing |
| Surface finish | Even surface across wide areas; may show belt marks | Very uniform thickness; crisp edges with proper setup |
| Dust and cleanup | Heavy dust and belt grit; requires strong ventilation | Chips and dust; use dust collection and PPE |
| Weight/handling | Typically heavier; requires space and steady handling | Generally lighter and more maneuverable for boards |
| Best for | Large flat surfaces and leveling surfaces | Board preparation, thicknessing, and edge readiness |
| Cost considerations | Mid-range tooling and rental options; replacement belts | Varies with blade quality and machine size |
What's Good
- Excellent for flattening large surface areas quickly
- Versatile with multiple belt grits for finish control
- Good for removing old finishes from floors and panels
- Relatively straightforward to set up for long runs
Weaknesses
- Not ideal for precise board thickness control
- Edge work requires careful technique to avoid gouges
- Can be messy and noisy; demands proper dust control
Drum sander excels at large surface flattening; planer shines for board thickness and edge prep
Choose a drum sander for leveling wide areas like floors or decks. Choose a planer for precise thicknessing and edge work. Use each tool for its strengths to achieve a clean, professional result.
Your Questions Answered
Is a drum sander the same as a planer?
No. A drum sander levels large flat surfaces with an abrasive belt, while a planer shaves thickness from boards with blades. They serve different purposes and are not interchangeable without compromising results.
No—the drum sander flattens large surfaces, the planer thicknesses boards. They’re used for different tasks, so choosing the right tool is essential.
Can you use a drum sander on edges or small pieces?
Drum sanders can be challenging near edges and small pieces due to belt wrap and risk of gouging. Use careful hand sanding or edging tools for edges and corners.
Edges are tricky with a drum sander; for small pieces, consider edge tools or hand sanding.
When should I choose planing over sanding for boards?
Choose a planer when you need precise board thickness and clean, square faces. Sanding is better for finishing surfaces after thicknessing when a uniform look is required.
Pick a planer for thicknessing; use sanding later to blend and finish.
What grit should I start with for each tool?
For a drum sander, start with a coarse grit (around 40-60) for leveling, then move to finer grits (80-120) for finish. For planing, begin with light cuts and measure thickness, then adjust with finer settings as needed.
Start coarse on the drum sander, fine-tune with higher grits; for planing, take light passes and check thickness often.
Is renting a drum sander worth it for a DIY project?
Yes, for occasional projects, renting provides access to powerful equipment without ownership costs. If you’ll use the tool repeatedly, buying may be more economical in the long run.
Rent for infrequent use; buying if you’ll regularly tackle sanding or planing tasks.
What safety gear is essential when using these tools?
Wear eye protection, hearing protection, and a proper respirator or dust mask. Ensure good dust collection and keep the work area well-ventilated to minimize exposure to fine dust and chips.
Protect your eyes and lungs; use dust collection and keep the area ventilated.
Main Points
- Match tool to surface size and task
- Plan for dust control and PPE from the start
- Test settings on scrap before working on the project
- Rent or borrow when you only need temporary access
- Finish with final smoothing to blend tool marks