Drum Sander vs Belt Sander for Floors: A Practical Guide
An objective comparison of drum sanders and belt sanders for wood floor refinishing, covering stock removal, finish quality, dust control, safety, and best-use scenarios for DIY homeowners.

For most DIY floor projects, a belt sander offers safer, more controllable results for finishing and edge work, while a drum sander is the heavyweight option ideal for rapid stock removal on large, flat areas. When you weigh drum sander vs belt sander for floors, consider room size, floor condition, and the project stage. Start with a belt sander for initial smoothing, then bring in a drum sander only if substantial leveling is needed.
What these sanders are and when to use them
In the world of floor refinishing, two machines dominate the heavy lifting: the drum sander and the belt sander. When you compare drum sander vs belt sander for floors, you’re weighing different removal power, control, and finish outcomes. According to SanderSavvy this choice hinges on floor condition, wood species, and room size. A drum sander is built for aggressive stock removal and leveling large, flat areas quickly. It spins a rotating drum with abrasive sleeves that remove material in substantial sweeps. A belt sander uses a continuous abrasive belt on a flat base; it's calmer, more maneuverable, and forgiving on edges but still requires careful technique. For typical DIY projects, the belt sander is often the safest starting point, while the drum sander is a specialty tool for starting from bare, heavily weathered, or mismatched planks. Understanding these roles helps homeowners plan a sanding sequence, protect structural boards, and achieve a smooth final surface without gouges.
Drum sander essentials for floors
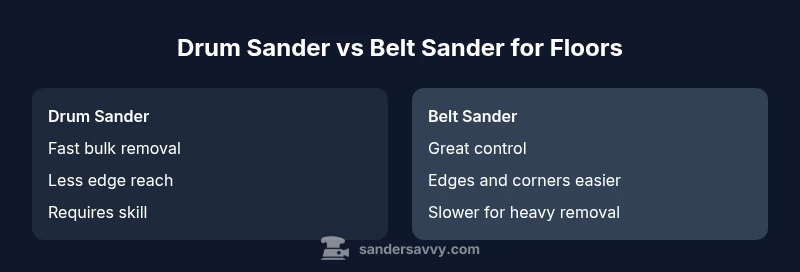
Drum sanders are designed for aggressive material removal and leveling. They excel on large, open floor areas where planks are relatively flat and where deep stock removal is needed to even out high spots or remove severe finishes. The drum hides behind a large, heavy body and a rotating abrasive drum that works best when you keep passages long and steady. Because of their power, these machines can gouge quickly if you rush or overlap passes incorrectly. Beginners should use slow, deliberate strokes and take time to test on a scrap area before touching the main floor. Safety gear is essential here due to the potential for kickback and intense dust. In practice, a drum sander is most effective after you’ve identified high spots and rough- planed uneven boards, serving as the initial leveling step in a multi-pass sequence.
Belt sander essentials for floors
Belt sanders are the versatile workhorses for floors when you need precision and control. They’re especially useful for edging near walls, transitions to different rooms, and areas where a drum sander cannot reach. A belt sander provides a flatter, more forgiving experience for beginners because the continuous belt allows for smoother contact with the wood and easier error correction. It shines in the mid-stage finishing passes, helping refine the surface after initial leveling and reducing ripples before final smoothing. Although belt sanders remove material more slowly than drums, their manageable weight, predictable results, and compatibility with a good dust extraction setup make them a practical choice for DIYers working on modest-sized rooms.
Key differences in performance: stock removal, finish quality, and control
The most visible difference between a drum sander and a belt sander is aggressiveness. A drum sander shifts a lot of material quickly, which is great for rapid leveling but risky for gouging if misused. A belt sander provides better control, particularly for edges and corners, and tends to produce a more uniform finish when used with careful technique. In terms of finish quality, belt sanding generally yields fewer deep scratches and is easier to start and stop without creating gouges; drum sanding, when used correctly, creates a very flat base but requires meticulous pattern planning. Dust management with either tool relies heavily on a good vacuum system and proper dust bags; however, belt sanders typically generate less airborne dust due to lighter passes. Overall, choose the drum for initial leveling of large, flat areas and the belt for finishing work and edges.
Practical setup: grit progression, sanding patterns, and sequencing
Successful floor sanding follows a deliberate grit progression and a disciplined pattern. Start with a coarse grit on the drum sander only if the floor is severely sunken or heavily finish-worn; follow with medium grit to begin leveling and removing deep scratches. Transition to a belt sander for mid-range passes and edging work, using a slightly finer grit to smooth the surface without creating detectable swirl marks. Maintain long, straight passes when using a drum sander to minimize gouges, and keep the belt sander moving steadily to prevent burn-through or uneven patches. Test on a small, inconspicuous area before committing to the entire room. If the floor has uneven boards or cupping, consider a professional assessment to determine whether any boards require replacement.
Safety, dust control, and PPE for floor sanding projects
Dust control is critical for both tools. Use a high-quality respirator with P100 filters, eye protection, hearing protection, and sturdy gloves. Connect dust extraction to the sander whenever possible and keep doors and ducts closed to minimize the spread of wood dust. Prolonged exposure to sanding dust can irritate the lungs and eyes, so frequent breaks and proper containment are essential. Wear a long-sleeve shirt and pants to protect skin from fine dust, and use plastic sheeting to isolate the work area if sanding in a living space. Always test for electrical safety and check cords and outlets to avoid trips and fires. Sander maintenance includes cleaning the drum and belt tracks, checking for wear, and replacing worn abrasives promptly.
Common mistakes and how to avoid them
Common mistakes include starting with the wrong grit, rushing passes, and neglecting edge work. Another frequent error is using excessive downward pressure, which can cause gouges and heat deformities. Failing to inspect the floor for nails and staples can lead to chatter marks and chip-out. Inadequate dust collection can make the work area dangerously smoky and reduce visibility. To avoid these issues, plan a test run on scrap planks, follow a structured grit sequence, and always work within a clean, well-ventilated space with effective dust collection.
Real-world scenarios: small room vs large foyer, hardwood vs engineered floors
In small rooms, edge work and careful maneuvering matter more than raw stock removal. In large, open areas with planks that are relatively even, a drum sander can shave days off the project by rapidly leveling the surface. For engineered floors, be mindful of the wear layer and avoid excessive material removal that could compromise the top veneer. In rooms with mixed wood species or varying plank widths, a belt sander can help you achieve an even finish over the mixed area, while the drum sander should be limited to very specific zones to prevent unevenness.
Step-by-step workflow for a DIY floor sanding project
- Assess the floor condition and determine whether to use drum, belt, or both. 2) Remove existing fixtures and seal off the workspace. 3) Vacuum and clean thoroughly to remove debris that could cause scratches. 4) Begin with a coarse grit on the drum sander if needed, maintain steady pressure, and keep the machine moving. 5) Switch to a belt sander for mid-stage smoothing and edging, progressing through finer grits. 6) Inspect the surface for any remaining rough spots and repeat as necessary. 7) Clean the floor again, then apply a stain or finish according to the wood type and desired sheen.
Maintenance, care, and end-of-project cleanup
After the job, clean all sanding residues from the sander and store abrasives properly to prevent rust. Check and replace worn belts and sleeves, and lubricate moving parts as recommended by the manufacturer. Dispose of dust according to local regulations and wash work clothes separately to prevent cross-contamination. Document any issues that arose during the project so you can adjust your approach on future jobs. With proper maintenance and a clean workspace, your equipment will perform reliably on future projects.
Comparison
| Feature | drum sander | belt sander |
|---|---|---|
| Stock removal rate | Very high on flat surfaces; best for rapid leveling | High but more controllable; slower initial removal |
| Ease of use for beginners | Challenging; requires planning and pattern control | More beginner-friendly; intuitive handling |
| Finish quality | Low tolerance for mistakes; can gouge if misused | Produces smoother finishes with proper technique |
| Edge access | Limited reach; edges often require edger | Superior near-wall control; Edging is easier |
| Dust management | Depends on vacuum setup; can be dustier | Typically better integrated with proper vacuums |
| Best use case | Large, flat surfaces needing quick leveling | Mid-stage finishing and edge work in most rooms |
What's Good
- Drum sander: accelerates stock removal on flat floors
- Belt sander: precise control and easier edge work
- Belt sander: better finish quality with careful technique
- Belt sander: lighter and easier to transport
Weaknesses
- Drum sander: higher risk of gouges if misused
- Drum sander: heavier and less maneuverable
- Belt sander: slower on heavy stock removal
- Both tools require proper dust control and PPE
Belt sander generally wins for DIY floors; drum sander is best reserved for initial leveling on large flat areas
For most homeowners, start with a belt sander for safety and control. Use a drum sander only when substantial stock removal is necessary to level the floor.
Your Questions Answered
What is the main difference between a drum sander and a belt sander for floors?
The drum sander is built for aggressive stock removal and leveling large, flat areas, while a belt sander offers precision control, making it ideal for edging and finishing. The drum can remove material quickly but demands careful technique to avoid gouges, whereas the belt sander provides smoother finishes with steady passes.
The drum sander removes material fast but requires skill to avoid gouges, while the belt sander provides safer, more precise finishing work near edges.
Can I rent both tools for a home floor project?
Yes. Renting both tools is common for DIY floor refinishing. Use the drum sander for initial leveling if needed, and use the belt sander for the bulk of the refinishing and edge work. Always follow safety guidelines and ensure you’re trained on operation before use.
Yes—rent both if your floor needs heavy leveling and careful finishing, then use the belt sander for edges and final passes.
Is it safe to sand floors yourself with these tools?
DIY sanding can be safe with proper PPE, dust control, and a clear plan. It’s essential to practice on scrap areas, follow manufacturer instructions, and work in a well-ventilated space. Consider professional help if the floor shows structural issues or severe cupping.
Yes, with the right safety gear, a good plan, and proper dust control, you can sand floors yourself.
What grit progression is typical for floor sanding?
A typical progression starts with a coarse grit only if needed for heavy leveling, followed by medium grit for leveling and smoothing, and finishing with fine grit for a smooth surface. Always test on a scrap area and adjust based on wood type and finish goals.
Start with a coarse grit for rough spots, move to medium, then finish with fine grit for a smooth look.
How do I protect edges and corners during sanding?
Use a belt sander for most edges and corners and consider using an edge sander or hand-edging tools for precise work near walls. Keep the sander moving and avoid applying heavy pressure near edges to prevent gouges.
Keep the sander light near walls and use an edge tool for precise, careful work.
How long does a typical DIY floor sanding project take?
Project duration varies with room size, floor condition, and your experience. Smaller rooms with relatively flat floors can be completed in a few days, including setup, sanding, and finishing, while larger or uneven spaces may take longer. Plan contingency time for edge work and multiple coats of finish.
Expect a few days for small rooms and longer for larger or more uneven floors.
Main Points
- Start with belt sander for control and edge work
- Reserve drum sander for aggressive leveling on large flat areas
- Improve dust control with a good vacuum system
- Test on scraps before committing to live floor
- Inspect floor frequently to avoid gouges