Drum Sander vs Orbital Sander for Hardwood Floors: A Practical Comparison
An analytical comparison of drum sander and orbital sander for hardwood floors, covering removal rates, finish quality, edge work, safety, and budgeting to help homeowners decide which tool to use.

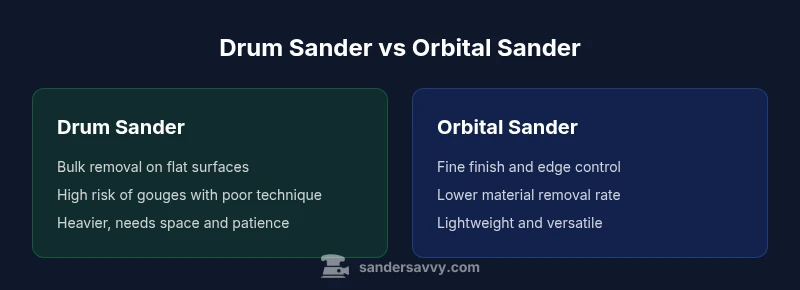
For hardwood floors, a drum sander vs orbital sander for hardwood floors reveals clear trade-offs: drum sanders remove material fastest on large, flat areas but require careful handling; orbital sanders deliver a smoother finish with better edge control, though they work more slowly. In most projects, professionals start with a drum sander for bulk leveling and finish with an orbital sander for final smoothing and detail work.
Key Mechanical Differences
When you compare the drum sander vs orbital sander for hardwood floors, the fundamental differences in mechanics define practical outcomes. A drum sander uses a rotating cylindrical drum wrapped with abrasive paper. This setup shaves off material quickly across broad, flat surfaces, making bulk leveling efficient. The trade-off is the tool's size and momentum, which can lead to gouges if you press too hard or ride over high spots. An orbital sander, by contrast, has a flat pad that moves in a freeform orbit. It delivers a finer, more uniform finish and excels at blending transitions, edges, and corners. The orbital sander is lighter and easier to maneuver in tighter spaces, but it typically removes material more slowly than a drum sander. For the topic of drum sander vs orbital sander for hardwood floors, this combination of speed and control shapes the typical workflow and expected results.
When to Use a Drum Sander (Bulk Removal)
A drum sander is the workhorse for bulk leveling on hardwood floors. It’s best used on large, uninterrupted expanses of single-species hardwood where the goal is to remove deep finish layers, level high spots, and flatten cupped boards. Before you start, verify floor conditions: loose boards must be secured, staples removed, and a stable dust collection plan in place. Expect the drum sander to strip more quickly than other tools, but be prepared to compensate with a light touch and consistent passes to avoid creating hollow areas or gouges. If the floor has severe unevenness or prominent nail or staple lines, you may need professional-grade equipment and careful technique to keep the surface uniform while minimizing risk.
When to Use an Orbital Sander (Finish Smoothing)
An orbital sander is ideal for finish work, fine leveling, and areas where a drum cannot reach or where abrupt changes occur near walls or edges. It produces a smoother, more uniform surface with less risk of gouging if used correctly. The orbital sander shines for feathering transitions between different sanding grades and for blending edges around door frames, transitions to adjoining rooms, and into corner nooks. For hardwood floors, this tool is the go-to for the final smoothing passes and for tackling surface irregularities left after bulk removal. When drum sander vs orbital sander for hardwood floors, plan to devote the orbital sander to the last passes for the most consistent finish.
Practical Workflow: Bulk Removal to Finishing
A well-planned workflow leverages both tools. Start with the drum sander on the largest, flattest sections to remove old coating and establish an even base. Maintain a steady pace and a consistent pressure to minimize gouges; work in long, overlapping passes rather than random patterns. After bulk removal, switch to progressively finer grits on the drum or move to the orbital sander for the final smoothing. The orbital sander should be used to refine the surface, blend around edges, and address any remaining ridges or dips. Conclude with a careful inspection under good light, and repeat passes with finer grits as needed until the surface is uniformly flat and ready for finishing.
Edge Work and Transitions: Walls, Vents, and Corners
Edges pose a challenge for drum sanders due to their width and cone-shaped base; you’ll need a dedicated edge sander or an agile orbital sander for those zones. When addressing corners and edges, an orbital sander provides excellent control and a better finish. Use edging tools sparingly and overlap with the main sanding to avoid creating inconsistent thickness. In tight spaces, such as near baseboards, doorjambs, and heater vents, proceed slowly and take time to blend with the main field. The drum sander vs orbital sander for hardwood floors decision often hinges on how well you can manage edges with the available attachments and techniques.
Dust, Safety, and Setup: A Practical Checklist
Dust control is essential when sanding hardwood floors. Always connect a high-capacity dust collection system and wear a respirator or a quality dust mask, eye protection, and hearing protection. Ensure the work area is well-ventilated, with access to fresh air and clear pathways to prevent tripping hazards. Check tool settings, clamp boards, and secure edges before starting. Practice on a scrap area to gauge tool behavior and adjust your stance and movement. Keeping the work area clean reduces dust migration and improves accuracy when switching between drum and orbital sanding.
Budget, Availability, and Skill Considerations
Renting vs owning sanding equipment is a common dilemma. Drum sanders tend to carry higher rental and upfront costs due to their bulk capacity, while orbital sanders are more compact and affordable to purchase or rent. Availability of drum sanders may be limited in smaller markets, so plan ahead if you anticipate needing bulk removal. Training and practice reduce mistakes; if you’re new to wood floor refinishing, consider a guided session or a pro visit to set you up for successful results. The drum sander vs orbital sander for hardwood floors decision is as much about skill and space as it is about speed and finish quality.
Common Mistakes and How to Avoid Them
Common errors include rushing bulk removal, over-pressing the drum sander, and failing to maintain a consistent pattern. To avoid gouges, use light, even pressure, keep the sander moving, and follow a logical plan of passes with overlapping strokes. When using an orbital sander, avoid staying in one spot for too long and keep to the grain direction or following natural floor contours to prevent flat spots. Regularly check your progress, dust every few passes, and adjust grit sequences to ensure uniform removal and a smooth finish. With careful technique, you can achieve a professional-grade floor look.
Real-world Scenarios and Checklists
- Scenario A: You’re refinishing a long, straight hallway with minimal edge damage. Plan bulk removal with the drum sander, then switch to an orbital sander for edges and finishing blends. - Scenario B: Your living room has intricate insets and irregular board heights. Prioritize the orbital sander for most of the surface, using a drum only where required and with caution. - Scenario C: You’re working in a small room with no dedicated dust extraction. Use a portable vacuum with a HEPA filter in conjunction with both tools and seal off the doorway to minimize dust spread. - Checklist: secure boards, fill gaps, ensure dust collection works, and practice on scrap boards before touching the actual floor.
Comparison
| Feature | Drum sander | Orbital sander |
|---|---|---|
| Material removal rate | Very high bulk removal on flat surfaces | Moderate, good for controlled finishing |
| Finish quality | Can leave deeper ridges if not managed | Produces smoother, more uniform finish |
| Edge access | Limited; requires edging tools for near walls | Excellent edge and corner control |
| Risk of gouging | Higher risk if misused or on uneven floors | Lower risk with careful technique |
| Weight and maneuverability | Bulky and heavier; requires space | Lightweight and easy to maneuver |
| Dust control compatibility | High-capacity dust systems recommended | Good dust collection with standard setups |
| Typical rental/purchase profile | Higher upfront and rental complexity | More affordable and widely available |
| Best for | Bulk leveling on large, flat floors | Finishing, edges, and transitions |
What's Good
- Drum sander accelerates bulk material removal for fast leveling
- Orbital sander delivers finer finishes with less risk of gouging
- Edge work is more manageable with orbital or dedicated edging tools
- Flexibility across wood species and coatings with appropriate grits
- Bulk removal followed by finishing yields a professional look
Weaknesses
- Drum sander can gouge if misused or overworked
- Drum sander requires more space and setup time
- Orbital sander may require more passes for heavy stock removal
- Edge work often necessitates separate edging tools or attachments
Use a drum sander for bulk leveling and an orbital sander for finishing
Drum sanders excel at rapid material removal on flat areas, while orbital sanders provide smoother finishes and safer edges. Pair them to achieve a fast, professional hardwood floor refinishing result.
Your Questions Answered
What is the primary difference between drum and orbital sanders for hardwood floors?
The drum sander is designed for rapid bulk material removal on large, flat areas but can gouge if misused. The orbital sander provides a finer finish with better control, particularly along edges and transitions. The drum handles leveling efficiently, while the orbital excels at smoothing and finishing.
Drum sanders remove material fast but need care to avoid gouges; orbital sanders give a smoother finish and better edge control. For best results, use both in sequence.
Can I complete a hardwood floor job with only an orbital sander?
In many cases, you can finish with an orbital sander after a light leveling, but for significant stock removal or leveling, a drum sander is more efficient. Relying solely on an orbital sander may extend project time and increase passes.
An orbital can finish, but for big jobs you’ll likely want a drum for bulk removal first.
Is a drum sander necessary for new hardwood floors?
Not always. If the surface is uniform and you only need to remove a light coating, an orbital sander or edging tools may suffice. For substantial leveling or resurfacing, a drum sander speeds the job significantly, but comes with higher risk and space needs.
A drum sander is not always required, but it can save time on major leveling.
What kind of edging tools work best with drum and orbital sanding?
Edging tools or an edging sander are essential when the main sander cannot reach close to walls. Use orbital sanding near edges and transitions, and pair it with a dedicated edge tool to ensure a consistent finish.
Edge tools help you finish close to walls; use orbital sanders for precise edges.
What safety precautions should I follow when sanding hardwood floors?
Wear a respirator, eye protection, and hearing protection. Use dust collection, close off adjacent rooms, and maintain clean work surfaces. Follow manufacturer guidelines for grit progression and tool speed to minimize dust and prevent accidents.
Wear protective gear, use dust collection, and follow grit progression for safety.
Renting vs owning: which is better for a one-time floor project?
For a single project, renting often makes sense due to the high upfront cost of bulk sanders. If you anticipate multiple floors or ongoing projects, owning can be cost-effective in the long run. Consider room size, storage space, and frequency of use.
Rent if it’s a one-off; own if you sand floors regularly.
Main Points
- Plan bulk removal first with a drum sander
- Finish with an orbital sander for a smooth surface
- Prioritize edge work with appropriate tools
- Maintain dust control and safety throughout
- Rent or buy based on space, budget, and skill