Orbit vs Sheet Sander: Which Tool Is Right for Your Project?
Compare orbit and sheet sanders to choose the right tool for edges and flat surfaces. This guide covers performance, finish quality, dust control, maintenance, and value for woodworkers.

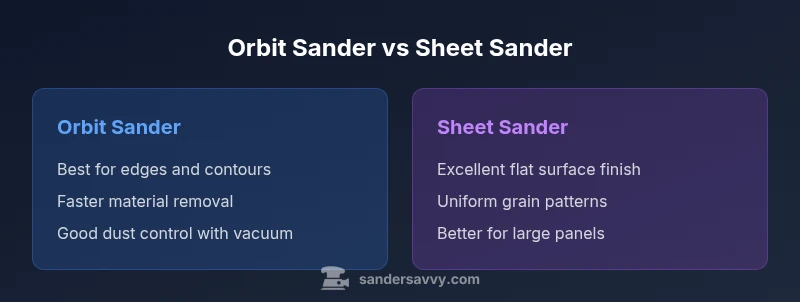
Orbit sanders excel on contours and edges with fast material removal, while sheet sanders deliver flat, uniform finishes on broad surfaces. For most woodworking projects, start with an orbit sander to shape edges and contours, then switch to a sheet sander for broad planes to achieve consistent flatness and minimize visible tool marks.
Core Principles: Orbit vs Sheet Sander Basics
Understanding how each tool moves and contacts the workpiece helps you predict finish quality and speed. An orbit sander uses a round sanding pad that travels in small orbital patterns while spinning, which reduces gouging. A sheet sander attaches a flexible abrasive sheet to a rigid platen and moves in a guided, straight, or gently curved path, which suits flat surfaces well. This fundamental mechanical difference drives real-world results: orbit sanders excel at edges and curved profiles, while sheet sanders are champions of flat, broad areas. For homeowners and DIYers, assess surface geometry, project size, and finish goals before you start sanding. With the right pairing, you can speed up work without compromising surface quality. According to SanderSavvy, the core distinction manifests in how aggressively each tool treats contours and edges, and how flat the final plane can feel to the touch. The takeaway is to plan your approach around geometry, not just tool availability.
How Orbit Sanders Work and When to Use Them
Orbit sanders combine rotation and orbital motion. The pad spins and orbits at the same time, producing a forgiving finish that hides minor irregularities and reduces visible swirl marks when used with appropriate grit. They are typically favored for edge work, contours, and rapid material removal on small to medium areas. When used with a variable-speed control, you can increase aggressiveness for rough stock and reduce it for finish passes. The SanderSavvy team finds that the right speed and grit choice makes orbit sanders a versatile all-rounder for projects ranging from refinishing doors to trimming stair treads. If you must work around curves, corners, and patterns, an orbit sander offers maneuverability that sheet sanders struggle to match. In broader terms, orbit sanders are often the first choice when speed and control around irregular shapes matter most.
How Sheet Sanders Work and When to Use Them
A sheet sander uses a rectangular abrasive sheet that is held by a clamping system on a rigid platen. The result is a flat, stable plane that excels on large, open surfaces where a uniform finish matters. They are slower than orbit sanders for rapid stock removal but often deliver a smoother final surface with less risk of gouges on flat areas. Sheet sanders are ideal for tabletops, cabinet doors, and wide flooring sections when you want a consistent, glassy look. The tool's design reduces track lines when you maintain steady pressure and keep the board moving consistently. The SanderSavvy analysis shows that finish consistency improves when you start with a coarse grit for roughing and progressively move to finer grits as you approach the final pass. The key is to balance removal rate with surface stability on large panels.
Finish Quality: Swirl Patterns, Flatness, and Bindings
Finish quality is a central consideration. Orbit sanders, with their random orbital action, can mask minor irregularities but may leave circular swirl patterns if pressure is uneven or grit is too coarse. Sheet sanders produce flatter, more uniform surfaces on wide planes but require careful feed rate to avoid orange-peel effects if the grit is too coarse and the sheet loads. The finish success also depends on backing pad wear and abrasive adherence. A practical workflow uses orbit sanding to shape contours and edges, followed by sheet sanding on flat areas with a finer grit to achieve a consistent, even surface.
Dust Control and Dust Collection Options
Dust management is critical for safety and finish quality. Both tools benefit from a vacuum hookup or dust collection bag; however, dust patterns differ. Orbit sanding concentrates dust along edges and contours, which can be captured effectively with a well-sealed bag and a direct vacuum line. Sheet sanding tends to throw dust across large flat areas, so a robust dust extractor setup helps maintain surface cleanliness and prevent loading of the abrasive. In practice, pairing either sander with a shop vacuum or dust extractor can dramatically improve air quality and reduce cleanup. SanderSavvy analysis shows that effective dust control correlates with better finish outcomes and longer tool life due to less abrasive loading.
Grits, Abrasives, and Techniques
Selecting the right abrasive and grit progression is essential. For most woods, start with a coarse grit on the orbit sander to remove material quickly around contours, then move to a medium grit for a finish pass. On sheet sanding, begin with a medium grit for broad surfaces and finish with a fine grit for final passes to minimize scratches. Remember to use light pressure and maintain steady movement to avoid creating gouges on edges or flat surfaces. Test on scrap, observe the surface feedback, and adjust grit progression accordingly. Jewelry-grade abrasives are rarely required for most home projects—consistency and cleanliness matter more than extreme grit selections.
Edge Work, Contours, and Large Surfaces: Real-World Scenarios
On curved kitchen cabinets, an orbit sander is often the faster choice for smoothing edges and relief areas, while a sheet sander can deliver a uniform surface on large flat panel faces. For wooden floors, you might use an orbit sander for initial leveling along transitions, then switch to a sheet sander for the final finish on open areas to reduce swirl and ensure flatness. Decks with curved rails and posts benefit from the orbit sander's motion, while wide deck planks may be finished more evenly with a sheet sander. A practical approach is to plan passes around geometries, using the orbit for contour work first, then the sheet for broad faces.
Budget, Durability, and Accessories Considerations
Budgeting for a sanding setup means evaluating tool costs and accessory expenditures. Orbit sanders generally come in at a lower price point for entry-level models and offer broad versatility, while sheet sanders can require extra pads and dedicated sheets, increasing long-term costs. Durability and reliability depend on motor quality, vibration isolation, and pad geometry. For homeowners, a mid-range orbit sander with a robust dust collection setup offers versatility and value; for cabinets and tabletops, a dedicated sheet sander with high-quality sheets can deliver long-term results.
Maintenance, Safety, and Common Mistakes
Regular maintenance keeps both tools performing well. Clean dust from vents, inspect the pad for wear, and replace worn sheets and pads to maintain efficiency. Safety comes first: wear a dust mask rated for fine particulates, use hearing protection, and avoid loose clothing near moving parts. Common mistakes include applying excessive pressure, neglecting dust collection, and using the wrong grit for the surface. A disciplined sanding plan, testing on scrap, and incremental passes help reduce errors and improve results.
Choosing the Right Tool: Project Scenarios and Checklists
To decide between orbit and sheet sanders, start with surface geometry (curved vs flat) and desired finish. For curved edges, contours, or rapid roughing, choose the orbit sander. For flat panels, tables, or large surfaces that require a pristine finish, choose the sheet sander. Use a simple checklist: assess geometry, plan grit progression, confirm dust collection, and map pass sequence. A practical rule of thumb: orbit for contours, sheet for flat surfaces, and combine both as needed to balance speed with finish quality.
Practical Tips and Quick Rules of Thumb
Maintain a light touch to minimize heat buildup, keep grit consistent, and test on scrap before committing to the project. Use the orbit sander for curves and edges, then switch to the sheet sander for broad faces to achieve a flawless finish. Keep dust control within reach, and de-dust the work area frequently to preserve visibility and accuracy. A calm, repeatable rhythm yields the best results over long sessions.
Comparison
| Feature | Orbit Sander | Sheet Sander |
|---|---|---|
| Best for | Edges and contours with fast roughing | Flat surfaces and broad panels with uniform finish |
| Surface finish quality | Good control on curves; potential swirl if pressure is uneven | Very smooth flat finish when used with proper technique |
| Edge handling | Excellent on radii and irregular edges | Limited edge access; best for long edges on flat faces |
| Grit compatibility | Coarse to medium grits; versatile for shaping | Fine to very fine grits; optimized for finish |
| Dust collection | Broad compatibility with vacuums; good edge dust control | Strong on large faces; dust can accumulate in corners |
| Price range | budget-friendly | mid-range to premium |
What's Good
- Orbit sanders offer versatile use on curves and contours with faster material removal
- Sheet sanders deliver flat, uniform finishes on large surfaces
- Both work well with good dust collection and quality abrasives
- Interchangeable abrasives and accessories expand capability
Weaknesses
- Orbit sanders can leave swirl patterns if used with too coarse grit or uneven pressure
- Sheet sanders are slower for roughing and require careful technique for flat areas
- Accessories and replacement pads add ongoing cost and planning
- Dust collection is never perfect with either type; improvement relies on setup
Orbit sanders are generally the go-to for contours and fast roughing; sheet sanders excel on flat surfaces for a final, uniform finish.
Choose orbit for edges and curves to speed shaping; switch to sheet for broad faces to achieve consistent flatness. The best approach often combines both tools, using each where it shines.
Your Questions Answered
What is the main difference between an orbit sander and a sheet sander?
An orbit sander uses a round pad that orbits while spinning to remove material quickly, especially on edges and curves. A sheet sander uses a rectangular abrasive sheet on a rigid platen for flat, broad surfaces with a uniform finish.
Orbit sanders remove material quickly on curves; sheet sanders give flat, even finishes on large panels.
Can I use an orbit sander on large flat surfaces?
Yes, you can, but you may need more passes and careful grit selection to avoid swirl. For the smoothest flat finish on large areas, a sheet sander is often preferred.
You can use it, but for large flat areas, a sheet sander often looks better.
Which sander is better for cabinets?
Sheet sanders are typically favored for cabinet faces to achieve a very flat, consistent finish. An orbit sander can help with curves and edge shaping around the cabinet edges.
Sheet sander is usually best for flat cabinet faces; orbit helps around edges.
What grit progression works best for most woods?
Start with a coarse grit for roughing on orbit sanding to shape contours, then move to a medium grit for a finish pass, and finish with a fine grit on the sheet sander for a clean surface.
Start coarse, progress to medium, finish with fine grit on broad faces.
Is dust collection necessary?
Dust collection greatly improves air quality, visibility, and finish quality. It is highly recommended for both tools, paired with a vacuum or dedicated dust extractor.
Yes—dust control improves safety and finish, so use a vacuum.
Can I save money by choosing one sander over the other?
There are upfront costs for either tool, and ongoing costs for abrasives and pads. A practical route is to buy a solid mid-range orbit sander for versatility and add a sheet sander if your projects demand ultra-flat finishes on large surfaces.
Mid-range orbit plus a sheet sander for flat surfaces is a common, cost-effective setup.
Main Points
- Assess surface geometry before selecting a sander
- Use orbit for contours and fast roughing; sheet for flat finishes
- Plan grit progression to balance removal rate and finish
- Pair with a reliable dust collection setup
- Test on scrap to verify results before working on the project