Vibrating Sander vs Orbital Sander: A Practical Guide for DIYers
Compare vibrating and orbital sanders to choose the right tool for floors, decks, and walls. This guide covers performance, finish quality, dust control, ergonomics, and cost for DIYers.

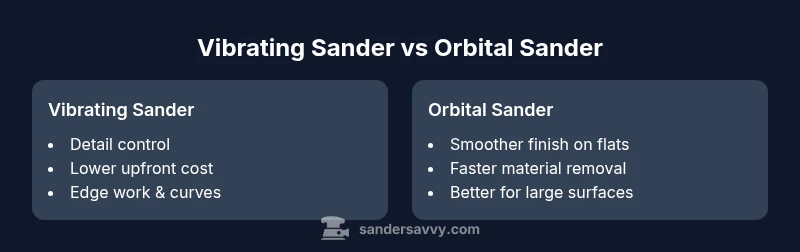
When weighing vibrating sander vs orbital sander, consider finish goals, project size, and comfort. The vibrating sander excels at detail work, cost control, and gentle material removal, while the orbital sander delivers smoother finishes on large surfaces and faster material removal. Use this quick guide to choose the right tool for your job.
About vibrating sander vs orbital sander
Sanding tools come in many motion patterns, but two of the most common for floors, decks, and walls are the vibrating sander and the orbital sander. The vibrating sander vs orbital sander comparison highlights how each tool translates motor power into a different working action. According to SanderSavvy, the vibrating sander (often called a palm sander) uses a rapid, linear vibration that keeps the pad flat against the surface, delivering controlled stock removal with less aggressive cutting. The SanderSavvy team found that this makes it a good choice for edges, curves, and detail work where precision matters more than raw speed. In contrast, the orbital sander delivers smooth, near-surface finishes by moving the pad in tiny circular paths. It removes material efficiently over large flat areas but can amplify dust and produce a different feel in the wood. Understanding these basics helps homeowners decide quickly which tool fits their project goals.
Core mechanical differences
The vibrating sander and orbital sander differ primarily in motion and force delivery. A vibrating sander produces a small, high-frequency linear motion that keeps the sanding pad flat and true against contours. An orbital sander executes a circular or path-based orbit, which creates a different dust plume and finish texture. Power transfer, pad contact area, and the type of grit that works best all influence performance. For curved edges and delicate profiles, the vibrating sander often delivers better control with less surface gouging. For broad, flat surfaces, the orbital sander tends to remove material more quickly and creates a consistently smooth surface. This section outlines how these mechanical differences translate to real-world results, so you can map tasks to tool behavior with confidence.
Finish quality and material compatibility
Finish quality depends on the motion profile and the user’s technique. The vibrating sander typically yields a more aggressive surface texture if overused, which can be ideal for quick stock removal but requires extra care for a final finish. The orbital sander tends to produce a finer, uniform finish on large areas, making it a favorite for prep work before staining or sealing hardwoods. Material compatibility matters as well: soft woods may sand smoothly with either tool, while hardwoods and plastics demand more careful grit selection and lighter passes. Always test a small area first to compare how each tool handles your specific material, and adjust pressure, speed, and stroke pattern accordingly.
Speed, aggressiveness, and material removal
Material removal rate is a common point of comparison between the vibrating sander vs orbital sander. On average, orbital sanders remove material more quickly on flat surfaces because of their larger effective cutting path and the ability to stay level over long runs. Vibrating sanders, while slower for bulk removal, offer precise control near edges, corners, and routed profiles. The choice often comes down to balancing speed against the risk of gouging, heat build-up, and dust production. Homeowners working on floors tend to favor orbitals for speed, but when shaping curves or blending transitions, a vibrating sander can be the better fit with careful technique.
Dust management and dust collection efficiency
Dust control is a practical consideration that affects both tool choices and health. Both vibrating and orbital sanders benefit from a vacuum attachment, high-efficiency dust bags, or a dedicated dust extractor. Orbital sanders tend to throw a broader dust plume when used aggressively on dense stock, which makes a good vacuum plan essential. Vibrating sanders usually generate dust more locally near edges and contours, which can be easier to capture with a well-placed attachment. Regardless of tool choice, establish a routine of interim vacuuming, use a respirator or dust mask, and wear eye protection to minimize exposure during sanding work.
Ergonomics and vibration exposure
Ergonomics play a big role in choosing between vibrating sander vs orbital sander for long projects. Orbital sanders typically have longer, flatter handles and more balanced weight distribution, which can reduce wrist strain during extended sessions. Vibrating sanders may transmit more vibration to the hand and forearm due to their high-frequency action, particularly at higher RPMs or with poorly balanced pads. To minimize fatigue, select models with good vibration dampening, padded grips, and a well-balanced pad. Take regular breaks and switch hands if you notice numbness or tingling after continuous use.
Cost considerations and long-term value
Price is a major factor for homeowners and DIY enthusiasts. Vibrating sanders are usually less expensive upfront and have simple maintenance, but cutting through tough stock slowly can extend project timelines. Orbital sanders tend to be pricier and generate higher initial costs, yet they provide faster material removal and superior surface quality on large areas. Long-term value should account for grit choices, dust collection efficiency, and blade/pad wear. If you sand frequently, investing in a robust vacuum system and quality pads can improve outcomes and reduce overall costs in the long run.
How to pick between vibrating and orbital sander for common tasks
When deciding between these two tools for everyday tasks, align the tool with the job size and surface quality you desire. For trim work, corners, and curved edges, a vibrating sander offers precision without deep gouging. For refinishing hardwood floors or smoothing large, flat panels, an orbital sander is typically the better workhorse. Consider the material type, desired finish, and your tolerance for dust and noise. A practical approach is to have both tools available and use the vibrating sander for edges and transitions, then switch to the orbital sander for broad surfaces to save time and achieve a more uniform finish.
Maintenance tips to extend tool life
Regular maintenance extends the life of both vibrating sander vs orbital sander. Keep metal tangs clean, inspect the pad for wear, and ensure the dust extraction path remains clear. Replace worn pads and check the power cord for any signs of damage. Lubricate any moving parts per the manufacturer’s recommendations and calibrate the dust collection system to maintain suction. By performing routine inspections after each project and using the correct grit, you reduce wear and improve performance over time.
Practical technique: choosing grit and technique
Grit selection is critical when balancing vibrating sander vs orbital sander. For initial material removal, start with 60–80 grit on hardwoods or plywood and move to 120–150 grit for finishing passes. For softwoods, you may be able to start at 80 grit and finish with 180 grit for a smooth surface. When using a vibrating sander, apply light to moderate pressure and use consistent passes to avoid gouging. For orbital sanders, keep the pad in light, even contact and avoid aggressive downward pressure that can leave swirl marks. Always test on a scrap piece first to confirm the finish.
Common mistakes and safety reminders
Avoid common mistakes such as pressing too hard, rushing passes, or ignoring dust control. Both tools generate fine dust that can irritate eyes, lungs, and skin; always wear a respirator and eye protection. Do not skip vacuuming and bagging dust halfway through a project, as dust can obscure your view and degrade finish quality. Keep spare pads and grit handy to prevent batching mistakes. Finally, never operate either sander while damp, and always unplug before changing pads or cleaning the tool.
Real-world task scenarios and checklists
Consider real-world scenarios to apply the vibrating sander vs orbital sander knowledge. For a cabinet door with routed edges, start with a vibrating sander to blend curves, then switch to an orbital sander to even out the surface. For a wide wooden deck, use an orbital sander for the large surface area before finishing with a vibrating sander for detail work around rails and edges. Create a quick task checklist to decide which tool to pick in each step: 1) material type, 2) surface area, 3) desired finish, 4) dust control readiness, 5) available time. This checklist can help you stay consistent during projects.
Comparison
| Feature | Vibrating Sander | Orbital Sander |
|---|---|---|
| Motion and finish texture | High-frequency linear vibration for edges and detail work | Circular orbits for smooth, uniform finish on large flat areas |
| Best for | Edges, contours, and precise material removal | Large flat surfaces and overall surface refinement |
| Material removal speed | Slower on heavy stock; better control | Faster on open surfaces with consistent results |
| Finish quality on softwood | Requires careful passes to avoid gouges | Typically yields a smoother base layer with less effort |
| Dust control | Effective with good technique and attachments | Tends to produce a larger dust plume; vacuum essential |
| Ergonomics and vibration | Potentially more hand fatigue with extended use | Generally balanced for longer sessions, depending on model |
| Cost and maintenance | Lower upfront cost; pad wear and consumables | Higher upfront cost; longer pad life with quality attachments |
What's Good
- Easy to learn and control for beginners
- Low upfront cost and simple maintenance
- Excellent for detail work and edges
- Minimal aggressive stock removal when used with care
Weaknesses
- Slower material removal on dense stock
- Potential for gouging if pressure is excessive
- Not ideal for smoothing large areas quickly
- Vibration can fatigue hands over long sessions
Orbital sander generally offers better finish and versatility; vibrating sander excels for detail work and cost efficiency
For large flat areas and a smooth finish, choose the orbital sander. For edges, corners, and budget-conscious tasks, the vibrating sander shines. In many workshops, both tools serve different roles to maximize efficiency.
Your Questions Answered
What is the main difference between vibrating sander and orbital sander?
The vibrating sander uses a high-frequency linear motion for precise control at edges and contours, while the orbital sander uses circular orbits for a smoother, uniform finish on larger surfaces. Both tools have their niches and trade-offs.
Vibrating sanders are great for edges; orbital sanders give a smoother large-area finish.
Which sander is best for finishing hardwood floors?
For hardwood floors, the orbital sander is usually preferred for an even, refined finish across large areas. Use a vibrating sander for edges and corners to blend transitions.
Orbital sanders are your go-to for floors; use a vibrating sander for edges.
Can vibrating sanders gouge wood?
Yes, if pressed too hard or moved irregularly, a vibrating sander can gouge wood. Practice light passes and maintain consistent motion near edges.
Be gentle and keep passes light to avoid gouges.
Are dust collection attachments essential for these sanders?
Dust attachments are highly recommended for both tools to protect your health and improve finish quality. Pair with a vacuum or dust extractor for best results.
Attach a good vacuum and seal dust collection for cleaner results.
How do I choose grit for each sander?
Start with 60–80 grit for initial stock removal, then move to 120–150 grit for smoothing. Finish with 180–220 grit for the final pass on hardwoods.
Begin with coarse grit for roughing, then finish with fine grit.
Is it worth renting either sander for a one-off project?
Renting can be cost-effective for a single project, especially if you need an orbital sander for a large surface. For frequent use, buying a reliable model is usually better value.
Rent if you only sand now and then; buy for frequent projects.
Main Points
- Match tool to task: orbital for large flats, vibrating for detail work
- Practice grit progression: start coarse, finish fine
- Always use proper dust collection and PPE
- Test on scrap before committing to a finish
- Maintain pads and check vibration for comfort