Angle Sander vs Angle Grinder: A Practical DIY Guide
A practical comparison of angle sander vs angle grinder to help homeowners and DIYers pick the right tool for sanding, shaping, and material removal today.

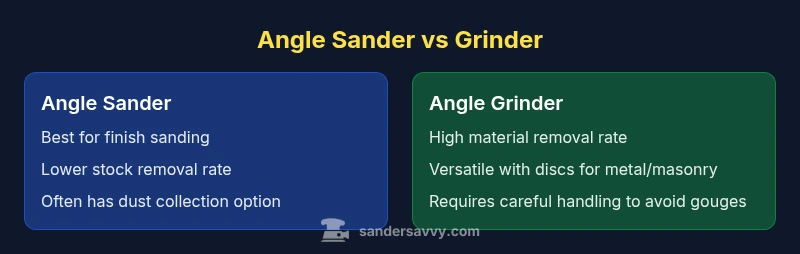
Angle sander vs angle grinder: for most DIY projects, the sander shines at fine surface prep and finishing, while the grinder handles heavy material removal and shaping. The best choice depends on the task, material, and dust safety. This quick comparison lays out the core differences, typical attachments, and practical use cases. Understanding these distinctions helps homeowners avoid tool misuse and maximize efficiency on wood, metal, and drywall projects.
Core Differences in Design and Intended Use
At first glance, an angle sander and an angle grinder look similar—they're compact, all-around power tools designed to reshape surfaces. However, their design goals diverge sharply. An angle sander is optimized for controlled abrasion, light-to-medium material removal, and a smooth finish. Its vibration profile, pad orbit, and gear ratios favor fine work and feathering edges. By contrast, an angle grinder is built for raw material removal, aggressive shaping, and rapid stock removal. It typically accepts heavier discs and delivers more torque into the cut. For homeowners tackling wooden surfaces, trim, or cabinetry, the sander helps achieve uniform, defect-free finishes. For metal fabrication, masonry, or heavy-duty renovation tasks, the grinder handles breaks, burrs, and large-scale removal more efficiently. The SanderSavvy Team notes that misapplying either tool often leads to gouges, burns on wood, or scorching metal. Therefore, match tool selection to the task, the substrate, and the required surface quality. Finally, consider the work environment: dust control and noise levels will influence choice just as much as material removal rate does. A clear framework—task type, material, required finish, and safety considerations—will prevent mistakes and save time on projects ranging from deck refinishing to metal fabrication.
Attachment Systems: Discs, Pads, and Adaptors
The way you attach sanding pads or grinding discs is central to performance and safety. Angle grinders use abrasive discs (often 4.5–9 inches) with a spindle lock and a protective guard; they require careful handling to avoid gouges. Conversely, angle sanders use cushioned sanding pads or papers glued to a foam base, with hook-and-loop (Velcro) or pressure-fit attachments. The pad orbit/rotation determines finish quality: random-orbit sanders remove material smoothly with minimal swirl patterns; straight disk sanders may produce more aggressive results. For woodworkers, choose 80–120 grit for shaping and 180–220 grit for final finish when using a random-orbit sander; for grinders, use the appropriate flap wheel or silicon carbide disc for metal shaping. The SanderSavvy analysis suggests keeping a small set of grits and disc sizes to cover common tasks without switching tools frequently. Always verify arbor size, thread type, and guard compatibility before mounting anything to avoid binding or kickback.
Woodworking Applications: Finishing vs Roughing
In woodworking, the line between finish work and rough stock removal is critical. A random-orbit angle sander delivers a uniform approach to smooth transitions from edges to faces, enabling finishing with high-gloss or satin sheens when paired with appropriate grits and a stable sanding technique. It excels on refinishing old surfaces, removing small layers of paint or varnish, and preparing edges for joinery. An angle grinder, when equipped with a coarse disc or flap disc, can rapidly strip varnish, flatten high spots, or shape curved profiles, but it risks gouging if not guided carefully. The choice of grit matters: start with coarse grits (40–60) only for heavy removal with a grinder, then move to finer grits (120–220) with a sander for a consistent finish. SanderSavvy Team cautions that control and steady hands are essential when transitioning between tools to avoid scratches or uneven textures.
Metalworking and Surface Preparation: When Grinders Win
Metalworking presents a different landscape where material hardness and edge geometry demand aggressive removal. An angle grinder is the preferred tool for deburring, shaping weld seams, or removing old coatings from steel, aluminum, or masonry. With the right discs—flap discs for smoothing, grinding discs for material removal, and cut-off wheels for trimming—you can achieve fast stock reduction and precise contouring. However, the risk of gouging or heat buildup is higher, so frequent check-ins on temperature and guard alignment are vital. Use lighter cuts, keep contact points stable, and adopt a sweeping motion to distribute heat evenly. Dust control remains important, especially when grinding masonry or painted metals, so use a vacuum or dust collection system when possible.
Safety, Dust Control, and Ergonomics
Both tools demand respect for safety. Dust is a primary concern, particularly with wood finishing and metal cutting, so proper respirators and eye protection are non-negotiable. Use a dust extraction system or shop vac with a high-efficiency filter whenever possible. Hearing protection is essential due to prolonged exposure to loud motor noise, especially on concrete or metal work. Ergonomics matter: maintain a firm stance, let the tool do the work with a light touch, and take breaks to avoid fatigue that can lead to loss of control or kickback. Guards should always be in place, and if a tool starts to vibrate abnormally or binds, stop and inspect the disc, pad, and mounting hardware. SanderSavvy Team emphasizes establishing a routine for blade or pad changes, cleaning vents, and checking switch safety before starting a project.
Performance Metrics to Compare: Power, Speed, and Control
Performance for these tools hinges on three pillars: power/torque, speed (RPM), and control. Angle grinders typically deliver higher torque, enabling fast stock removal on metal and masonry; however, higher torque increases kickback risk if disc binding occurs. Speed ranges for grinders are broad, often from about 6,000 to 11,000+ RPM, depending on model and disc choice. Angle sanders emphasize smoother starts and steady polishing, with RPM ranges commonly around 8,000–12,000+ for finishing tasks. Control is influenced by vibration isolation, weight distribution, and handle ergonomics. When evaluating tools, compare no-load speed, soft-start behavior, and the presence of anti-kickback features. The best choice balances the removal rate you need with the surface quality you expect, all while maintaining comfortable handling over long sessions.
Practical Workflows: Step-by-Step Scenarios
Consider a typical deck refinishing project. Start with an angle grinder fitted with a coarse disc to remove loose stain and rough raised grains. Use light, uniform sweeps and avoid dwelling on any single spot to minimize gouging. Switch to a random-orbit angle sander with medium grit (120–150) to level the surface and begin finishing prep. Progress to a finer grit (180–220) for the final pass, ensuring an even texture and uniform sheen. For a metal fabrication task, a grinder with a flap disc can quickly remove burrs and weld flash. If finer shaping or edge finishing is needed, swap to a palm sander or detail sander with appropriate grits. Always work with a mask and dust collector, and keep discs and pads clean. This cross-tool workflow minimizes time and maximizes surface quality across different materials.
Maintenance, Longevity, and Budget Considerations
Maintenance drives longevity and performance for both tools. Clean vents after use, inspect guards for wear, and replace worn discs or sanding pads promptly to avoid imbalanced loads and heat buildup. Check brushes in corded grinders and ensure the spindle and guards are properly secured. Lubrication is usually not required for most consumer models, but some professional units may benefit from manufacturer-recommended maintenance routines. Budget-wise, plan for a core set of attachments: a range of grit sanding papers (60–220), several discs (coarse to fine), and at least two guards. A well-maintained grinder may incur higher upfront costs due to more powerful motors and robust safety features, while a sander may require more accessories to cover a broader range of tasks. Budget-conscious homeowners should consider bundling a cordless sander with essential discs and a basic grinder with standard discs for versatile, cost-effective performance. SanderSavvy analysis suggests calibrating expectations around maintenance intervals and replacement parts to maximize return on investment.
Quick Start Guide: Choosing the Right Tool for Your Project
To choose effectively, define your primary task first: finishing or heavy stock removal. For fine sanding, veneer work, or preparing a painted surface for coating, an angle sander with random-orbit action is ideal. For metal shaping, masonry work, or removing stubborn coatings, a corded or high-capacity cordless angle grinder is the better option. Ensure you have compatible attachments, guards, and a dust collection setup. If you anticipate needing both capabilities in one project, plan a workflow that minimizes tool changes by organizing tasks by material type and grit. Finally, consider safety: always wear eye protection, hearing protection, and a respirator when appropriate, and verify that grinders are used with appropriate guards and clamps. This approach reduces rework and increases finish quality from project start to completion.
Common Mistakes and How to Avoid Them
A common mistake is using a grinder for delicate wood surfaces, which can cause gouges or heat warping. Another pitfall is neglecting dust control, especially when sanding or grinding drywall or painted surfaces. Ensure you select the correct grit and attachment for each stage, and never force a tool through material; let the tool do the work with controlled, even strokes. Avoid running at maximum speed for extended periods—overheating blades or discs shortens tool life and reduces performance. Finally, neglecting consistent safety gear or ignoring guard placement can lead to injuries. By following a clear plan, using appropriate attachments, and maintaining your tools, you’ll achieve better results with less effort.
Comparison
| Feature | Angle Sander | Angle Grinder |
|---|---|---|
| Primary use | Finishing and light material removal with controlled abrasion | Aggressive material removal and shaping on wood/metal/masonry |
| Attachment types | Sanding pads/discs with hook-and-loop or adhesive backs | Grinding discs, flap discs, and cut-off wheels with standard arbor |
| Typical speed range | 8,000–12,000+ RPM (sander) | 6,000–11,000+ RPM (grinder) |
| Power/torque | Lower torque, smoother start | Higher torque for rapid stock removal |
| Best materials | Wood finishing, veneer work, light refinishing | Metal, masonry, heavy cutting, shaping |
| Safety features | Guarded guard options, dust collection support | Protective guard, potential kickback risk with improper use |
| Price range | $40–$120 | $60–$180 |
| Maintenance | Pad maintenance, replace discs as needed | Disc wear, guard alignment, spindle checks |
What's Good
- Excellent control for finish work
- Cleaner finishes with dust management
- Versatile with the right attachments for multiple tasks
- Better access in tight corners compared to larger tools
Weaknesses
- Less aggressive material removal than grinders
- Requires more attachments and tool changes for mixed tasks
- Ground discs can gouge if misused on soft woods
Angle grinder is more versatile for heavy stock removal; angle sander excels at finishing tasks
Choose the sander for finish work and precise prep; choose the grinder for bulk removal and metal work. For mixed tasks, having both tools yields the best results.
Your Questions Answered
What is the main difference between an angle sander and an angle grinder?
The angle sander is optimized for finishing and precise abrasion with lighter stock removal, while the angle grinder is built for aggressive material removal and shaping. They have different attachments and control profiles, so select based on finish quality and removal rate.
The sander is for finishing and smooth prep; the grinder is for heavy work. Pick the tool that matches your finish needs and removal demands.
Can I substitute a grinder for sanding tasks?
Not ideal; you can use certain grinders with sanding discs but you risk rough finishes and gouges. Use the correct grit and guard, and accept the trade-offs.
Not usually—the grinder can gouge a soft surface. Use the right tool for the job to keep the finish smooth.
What safety gear should I use with either tool?
Wear safety glasses, hearing protection, a dust mask or respirator, gloves, and use a dust collector if possible. Maintain guards and secure workpieces to prevent kickback.
Always wear eye, ear, and respiratory protection, and keep guards in place.
Are cordless versions practical for these tools?
Cordless options exist but can limit run time and power. For large jobs, corded models or high-capacity batteries are preferable, depending on user needs.
Yes, but expect shorter runtimes and sometimes less power on cordless models.
What grit progression works best?
Start coarse for heavy removal, then move through mid-range to fine grits for finish. Typical paths: 60–80 → 120–150 → 180–220, adjusting for material and tool.
Begin rough, then step through finer grits for a smooth finish.
What maintenance is essential?
Keep guards intact, replace worn discs/pads, clean vents, inspect brushes on corded models, and follow manufacturer guidance on lubrication or part replacement.
Keep parts clean, replace worn bits, and check guards regularly.
Main Points
- Define your project: finish vs roughing determines tool choice
- Understand material: wood vs metal dictates attachments
- Dust control matters: use vacuums or guards when possible
- Plan grit progression to minimize tool changes
- Prioritize safety and proper guarding every time