Hand Sander vs Palm Sander: Which Wins for DIYers in 2026
A rigorous, field-tested comparison of hand sander and palm sander performance for floors, decks, and walls. Learn which tool fits your project, improves finish quality, and minimizes fatigue—backed by SanderSavvy analysis.

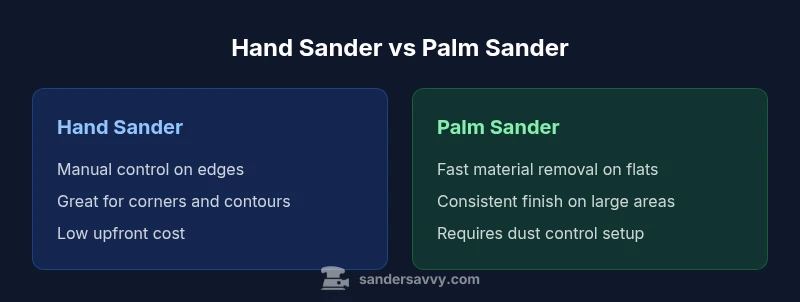
When choosing between a hand sander and a palm sander, the palm sander generally delivers faster flat-surface prep and clearer finishes, while the hand sander offers superior control for edges, curves, and delicate work. For most DIYers tackling floors or decks, the palm sander is the workhorse, with the hand sander reserved for detail work.
Hand Sander vs Palm Sander: Definitions and Core Differences
In woodworking and home improvement, the terms hand sander and palm sander describe two distinct approaches to surface preparation. A traditional hand sander refers to a manual sanding block or a small, hand-operated tool that relies on your grip and body motion to apply pressure. The palm sander is a compact electric tool designed to fit in your palm, delivering powered oscillations or a random-orbit motion that removes material quickly with consistent pressure. The core difference is control versus speed: the hand sander emphasizes finesse around edges and contours, while the palm sander accelerates flat-surface prep. For the keyword hand sander vs palm sander, the practical takeaway is that both have strong, distinct strengths, and most DIYers benefit from having both in their toolkit. According to SanderSavvy, the best approach is to match the tool to the surface geometry and finish you want, then supplement with proper grit progression and dust management. This article compares the two tools across ergonomics, performance, and use-case scenarios to help you decide which belongs in your toolbox. The SanderSavvy team found that understanding how each tool behaves on different substrates reduces rework and surface gouges, saving time and effort.
In practical terms, this means recognizing that a palm sander shines on large, flat areas, while a hand sander excels where precise control is needed around corners, moldings, and irregular shapes.
Ergonomics and Grip: How the Shape and Weight Shape Your Sander Experience
The ergonomics of hand sanders and palm sanders have a direct impact on comfort, control, and fatigue over long sanding sessions. A palm sander is designed to sit comfortably in the hand, with a compact footprint and textured grip that encourages a light, steady touch. However, even lightweight electric tools transmit vibration, which can lead to fatigue after extended use—especially if you’re sanding for hours on floors or decks. A hand sander, by contrast, relies on your grip and body position. While it can be lighter overall when you use a simple sanding block, the manual effort compounds quickly on large surfaces. In this section we compare grip width, handle shape, balance, and perceived vibration, and discuss how these factors influence control, edge work, and finishing quality. For many DIYers, this is the area where the decision begins to pivot toward the palm sander for speed—and toward the hand sander for precision near trim, radii, and detail work. SanderSavvy notes that tool balance is a common reason people switch between these two options mid-project.
From an expert standpoint, a well-chosen palm sander reduces wrist strain on repetitive passes, while a properly adjusted hand sander minimizes rebound and gouges on curved edges.
Sanding Action and Motion: Rotary, Orbital, and Manual Differences
Sanding action is the heart of the comparison. A palm sander typically uses a random-orbit or compact orbital motion that yields a smooth finish with consistent material removal on flat surfaces. A hand sander relies on manual motion and pressure, which gives you tactile feedback and superior control around corners, radii, and uneven textures. The result is a higher likelihood of preserving detail in trim, moldings, and curved features when using a hand sander. For bulk material removal on large, flat areas, the palm sander’s steady, uniform motion often outpaces manual methods. This section also touches on burn risk: improper pressure with any sander can heat wood fibers and leave burn marks, but the more forgiving surface area of a palm sander often makes this risk lower if you watch your grit progression and keep the surface moving. A practical takeaway is to pair a palm sander with finer grits for final passes and reserve the hand sander for shaping around edges and details.
From a technical perspective, the palm sander’s drive system and pad design are engineered to minimize gouges, whereas the hand sander’s manual feedback helps you sense when you are under- or over-sanding corners.
Weight, Vibration, and Fatigue: Practical Comfort
Long sanding sessions demand comfortable tools. Palm sanders are designed to be lightweight and compact, reducing arm reach strain but still transmitting vibration through the handle. Hand sanders, when used as traditional sanding blocks or compact blocks, tend to be even more lightweight and rely on your own body mechanics rather than a motor. The trade-off is that manual sanding requires sustained effort and can become tiring on large surfaces. In this section we discuss grip size, handle ergonomics, palm support, and how vibration mitigation (via rubber bushings or foam grips) affects control. We also outline best practices to minimize fatigue: alternating hand positions, taking short breaks, using modest feed rates, and selecting a palm sander with vibration-damping features if you plan large-area work. The goal is to maintain control without sacrificing speed, which is particularly important for novice DIYers who are learning what a comfortable rhythm feels like.
SanderSavvy’s practical guidance emphasizes alternating strategies: use the palm sander for bulk work, then switch to the hand sander for stubborn edges after a few passes.
Dust Collection and Setup: Bags, Vacuum Compatibility, and Sanding Dust Quality
Dust management is a critical, often overlooked, factor in sanding outcomes. Palm sanders typically come with built-in dust collection bags or micro-vacuum adapters; effective dust extraction improves visibility, finish quality, and health safety. Hand sanding creates more airborne dust near edges and contours, which can be less easy to capture with a basic setup. In this section we compare dust bag efficiency, the availability of compatible shop vac attachments, and how to optimize dust control for each tool. We also discuss respirator recommendations and dust masks that suit different project durations. The overall message is simple: cleaner air means better visibility, more consistent finishing, and a lower risk of irritation. For homeowners tackling cabinet doors, paneling, or trim, a palm sander with a good vacuum adapter is a wise investment, while manual sanding calls for a good mask and a well-ventilated workspace.
From an expert standpoint, SanderSavvy stresses that even the best dust collection can’t substitute proper PPE during dusty work.
Power Needs: Corded vs Cordless, Cordless Battery Life, and Runtime Planning
Power availability and runtime can make or break your sanding session. Palm sanders are commonly cordless for maximum maneuverability around furniture, stairs, or elevated surfaces, but this introduces limits on runtime and battery capacity. Hand sanders are inherently independent of power sources, which reduces planning constraints but increases physical demands. In this section we cover typical battery life expectations, charging strategies, and how to choose between corded and cordless models given your project length and workshop setup. For floors and large decks, plan for multiple batteries and a charging station so you don’t stall mid-sand. We include practical calculations for runtime based on grit choice and material hardness. The key takeaway is to balance convenience with endurance: for bulk work, a palm sander with spare batteries is ideal; for edge work or delicate projects, a hand sander provides reliability when an outlet is scarce.
SanderSavvy analysis highlights that cordless models are improving, but for heavy-duty sessions you should have a charger-ready workflow plan.
Grit Range, Surface Finish, and Burn Risk: Matching Grits to the Task
Finish quality hinges on grit progression and understanding how abrasive grades interact with the surface. Palm sanders excel when you follow a standard progression from coarse to fine grits, finishing with a micro-roughness that produces a smooth surface for coatings. A hand sander gives you more control over aggressive material removal in localized areas and edges where the risk of sanding through is higher. We provide practical guidance on selecting grit sequences for common substrates: softwood, hardwood, and painted surfaces. For example, you might start with a medium grit on a palm sander to remove machining marks and then step down to a fine grit for a final pass. When working near edges, switch to a hand sander to avoid rounding corners too aggressively. The overarching principle is consistency: maintain uniform pressure and speed, and keep the workpiece flat to avoid dips or gouges. SanderSavvy emphasizes testing grit sequences on scrap pieces first to calibrate your approach before committing to the finished surface.
Surface Compatibility: Floors, Decks, Walls, and Trim—Where Each Tool Shines
Different surfaces demand different strategies. Palm sanders are ideal for large, flat, unobstructed areas such as floor boards and deck surfaces where speed and uniformity matter. They are less forgiving around edges, trim, and irregular shapes. Hand sanders excel around railings, baseboards, moldings, and curved features where precise control and careful blending are required. This section provides practical examples and project-specific tips, including how to transition between tools mid-project, how to protect edges when sanding, and how to avoid over-sanding in recessed areas. We also cover finishing considerations—for example, how to maintain square edges on doors or how to blend a corner without leaving an obvious bevel line. The upshot is that you don’t have to choose one tool for every task; the most effective approach is a strategic mix based on geometry, coatings, and your finish goals.
Maintenance, Longevity, and Budget Considerations: Keeping Your Sanding Arsenal Ready
Budgeting for sanders isn’t just about the tool price; it includes consumables, abrasives, dust collection components, and maintenance. Palm sanders may require occasional pad replacement and battery care, while hand sanders demand smooth blades for blocks and consistent pressure with stable handles. In this section we outline a practical maintenance plan that covers pad inspection, grit changes, and safe storage. We also provide guidance on choosing long-lasting blocks and pads, how to extend battery life through proper charging routines, and when a tool upgrade makes sense. For homeowners who sand periodically, a well-built palm sander paired with a basic hand sanding block can cover most needs without breaking the bank. For more frequent users or professionals, a more robust kit with spare batteries, quality pads, and a trusted hand sander becomes a worthwhile investment. The takeaway is to budget for both initial purchase and ongoing consumables to maximize value over time.
Decision Framework: A Practical Start Guide to Hand Sander vs Palm Sander
Armed with an understanding of action, ergonomics, grit, and project type, you can build a simple decision framework. Start by listing your most common surfaces (floors, decks, walls, trim). For flat, wide surfaces, prioritize the palm sander; for edges and detail work, reach for the hand sander. Consider your project duration, workspace layout, and dust-management setup. If you’re a homeowner tackling a single room, a palm sander plus a dedicated hand sander for trim will usually cover you. If you’re renovating multiple rooms with varied features, a more nuanced mix and a plan for grit progression will prevent rework. From a practical standpoint, the best plan is to own both tools and tailor their use to the shape and finish you want. The SanderSavvy team recommends starting with a small, controlled project to calibrate your technique before expanding to larger surfaces.
Comparison
| Feature | hand sander | palm sander |
|---|---|---|
| Sanding action | Manual or block-based sanding; variable pressure | Electric manual palm sander with random-orbit/oscillating action |
| Control and precision | Excellent near edges; superior feedback | Good overall control on flat surfaces; less edge finesse |
| Surface finish quality | Blends well in contours; can be uneven if rushed | Smooth and uniform on large flat areas; fast material removal |
| Weight and fatigue | Low continuous effort but physically demanding over large areas | Lightweight and comfortable for long sessions; vibration persists |
| Dust collection | Depends on manual setup; often limits dust capture | Typically comes with bags or vac adapters; better dust control |
| Ideal uses | Edges, trim, contours, intricate work | Flat surfaces, large rooms, quick prep |
| Price range | Low upfront cost for basic manual options | Moderate upfront cost for compact electric palm sander |
| Grit progression | Variable by user and task; requires practice | Standard progression from coarse to fine; easier to plan |
What's Good
- Better control for edges and contours with a hand sander
- Palm sander accelerates flat-surface prep and finish readiness
- Low upfront cost for basic manual options
- Minimal space requirements for a palm sander kit
Weaknesses
- Manual sanding is labor-intensive and slower for large areas
- Palm sanders can leave burn marks if pressure is excessive or surface is held/static
- Dust collection isn’t perfect without a vacuum attachment
- Switching between tools adds setup time in complex projects
Palm sander generally wins for fast, flat-surface material removal; hand sander wins for edges and detail work.
For most DIY projects, use a palm sander for bulk work and a hand sander for corners and trim. Pair your tool choice with mindful grit progression and dust control for the best finish.
Your Questions Answered
What exactly qualifies as a hand sander versus a palm sander?
A hand sander is a manual sanding tool or block used with your hand. A palm sander is a small electric sander designed to fit in your palm and provide powered motion. The key distinction is manual control versus powered efficiency, with differing implications for edge work and flat-surface prep.
A hand sander is manual, and a palm sander is an electric palm-sized tool that speeds up flat-surface sanding.
Can I replace a palm sander with a hand sander to save money?
You can save upfront by using a hand sander for edge work, but you’ll typically spend more time on large flat areas. A mixed approach often balances cost and efficiency, especially on longer projects.
Yes, but it will take longer on flat areas; plan for more time if you forego the palm sander.
What surfaces are best for each tool?
Palm sanders excel on large flat surfaces like floors and decks, while hand sanders shine on edges, corners, and curved profiles where control matters most.
Use the palm sander for flats and the hand sander for edges and curves.
How do I prevent gouges or burn marks?
Keep the tool moving, use consistent pressure, and avoid dwell on one spot. Start with coarse grit and work up, checking frequently. A light touch with a palm sander and careful hand pressure with a block can prevent burns and gouging.
Move the tool steadily and don’t press hard in one spot.
What grit progression should I follow?
Begin with a moderate grit to remove marks, then step down to finer grits for a smooth finish. Typical sequences include 60–80 for initial flattening, then 120–180 for finishing on most woods.
Start with a medium grit, then go finer for a smooth finish.
Is dust control effective with basic palm sanders?
Dust control improves with a vacuum attachment or dust bag. Always wear a respirator for dusty work, and use a well-ventilated area to minimize airborne particles.
A vacuum attachment helps, but wear a respirator for safety.
Main Points
- Palm sander for speed on flat surfaces
- Hand sander for edges and detailed work
- Match grit progression to surface and tool
- Use dust collection to improve finish quality
- Test on scraps before final finishing