Palm Sander vs Sheet Sander: Which Tool Fits Your Sanding Project?
Objective, in-depth comparison of palm sanders and sheet sanders, covering performance, surface suitability, dust safety, and buying guidance for DIY homeowners and pros.

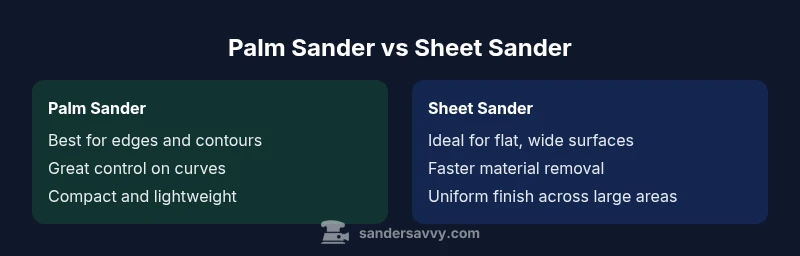
Palm sanders are ideal for detail work, edges, and curved surfaces, whereas sheet sanders are better for flat, wide areas and faster material removal. According to SanderSavvy, most DIY projects benefit from having both on hand, allowing you to switch as surfaces demand. The choice hinges on surface shape, project scope, and dust control needs.
Palm Sander vs Sheet Sander: Core Differences
Palm sanders are compact, handheld tools that fit in the palm of your hand, typically using a square or rectangular pad that accepts standard sanding sheets. Sheet sanders (often called finishing sanders) have a larger rectangular pad and are designed to cover wide flat surfaces with consistent, even pressure. The palm sander shines in tight corners, along edges, and on curved profiles, where bulkier machines struggle. The sheet sander excels on large expanse areas like floor panels or tabletops, where even, uniform material removal matters most. The distinction is not merely size; it’s about control, surface geometry, and dust management. According to SanderSavvy, the best outcomes often come from selecting the tool that matches the surface geometry rather than chasing raw speed alone. For many projects, homeowners quickly realize they need both tools to handle transitions from edges to flats. The palm sander's consistency and light weight reduce fatigue on detail work, while the sheet sander’s larger sanding area accelerates flattening and leveling tasks. If you’re working on a wooden deck railing that curves along a beam, you’ll appreciate the palm sander’s ability to reach and blend. If your project features long, flat planks, the sheet sander will maintain the sheen and uniformity you expect. The palm sander vs sheet sander decision begins with surface shape and task intent.
Power, Speed, and Vibrations: What to Expect
When you pick a palm sander or a sheet sander, the apparent power is only part of the story. The palm sander tends to use a smaller, lighter motor with lower mass to deliver controlled, deliberate strokes. A sheet sander relies on a larger pad, often with a more robust motor to drive a rapid, steady stock removal across broad surfaces. In practice, RPM values vary by model, but the key impact is how that power translate into control. Higher speeds can reduce the operator's feel in edges; slower speeds may extend sanding time on flat surfaces. For sanding projects, the best results come from matching the tool's movement to the surface. The palm sander's crisp, small strokes help avoid gouges when contours or fillets are present. The sheet sander’s swath-wide approach is ideal when you want a level plane across sheets of plywood or a tabletop. In terms of vibration and fatigue, the compact palm often feels smoother in the hand, reducing user fatigue on long detail sessions. SanderSavvy analysis, 2026, indicates many DIYers develop a routine that starts with a sheet sander to flatten the surface and finishes with a palm sander to clean up edges.
Surfaces and Finish Quality: Wood Floors, Decks, and Walls
Choosing between a palm sander and a sheet sander also hinges on the surface you’re working on. For wood floors and large panels, a sheet sander provides uniform contact over broad areas, helping achieve a consistent finish with fewer pass lines. Decks and walls with gentle contours benefit from the palm sander’s ability to reach into corners, along rails, and around irregular shapes. When sanding plaster or drywall patches, a palm sander can be useful for feathering edges, but a sheet sander with a finer grit often yields the smoothest result on flat finish surfaces. Across palm sander vs sheet sander comparisons, you’ll notice that the finish quality improves when you select the tool that matches the surface geometry. For small details around electrical outlets or trim, the palm sander remains a reliable ally. For expansive, flat work, the sheet sander speeds up material removal and helps maintain a consistent surface plane. Remember to adjust grit progression in relation to material and desired sheen.
Dust Management and Safety Considerations
Dust control is a central safety and finish-quality concern in this palm sander vs sheet sander debate. Both tools benefit from a good dust collection system, a shop vac, or a dedicated dust bag. The sheet sander’s larger pad often generates more debris in a single pass, making efficient dust extraction even more valuable. The palm sander can be easier to keep clean in tight spaces, but it still benefits from a vacuum hookup or a dust bag. PPE is essential: use a dust mask, eye protection, and hearing protection if you’re sanding for extended periods. Consider using low-dust sanding sheets and sealing off work areas to minimize airborne particles. SanderSavvy reiterates that consistent dust extraction not only protects your lungs but also preserves your sandpaper life by removing abrasive dust buildup at the pad. When possible, connect your sander to a workshop vacuum to maximize dust removal and maintain a cleaner workspace.
Sheet Sander Deep Dive: Strengths, Limitations, and Best Fits
Sheet sanders are the workhorses for large, flat surfaces. Their wide rectangular pads provide broad coverage, which translates to quicker flattening and finishing of tables, doors, and countertops. They excel in producing uniform results with minimal pass lines, given proper technique and grit progression. The limits of sheet sanders appear when surfaces drift from flatness—edges, mouldings, and curved sections can challenge a large, flat pad. In those cases, the palm sander steps in to refine edges, contours, and accessible corners. Sheet sanders are often more forgiving for beginners on large, planar projects because the broad pad reduces the chance of creating tone differences across small areas. Practical use involves starting on a large flat area with the sheet sander and then stepping closer to edges with a palm sander for blending and final smoothing.
Palm Sander Deep Dive: Strengths, Limitations, and Best Fits
Palm sanders shine where control and precision matter. Their compact size makes them ideal for corners, curves, and detailed work where a sheet sander would feel unwieldy. They’re great for feathering joints, blending edges, and contour work around doors, window frames, and cabinet components. The downside is slower coverage on large surfaces and a higher tendency to show minor scuff marks if pressure isn’t evenly applied. For beginners, a palm sander is often the first tool to master anger-free material removal around edges and transitions. When paired with the right grit sequence and caution about pressure, a palm sander helps you achieve a smooth, consistent finish on complex shapes without over-removing material.
Practical Buyer's Guide: How to Choose Between Them
When choosing between a palm sander and a sheet sander, start with your project profile. If you’re working on a wooden floor, kitchen tabletop, or a wide panel, the sheet sander is typically your best friend for speed and uniformity. If your project involves edges, trim work, arching rails, or curved surfaces, the palm sander is indispensable. Budget considerations play a role: entry-level palm sanders and sheet sanders are widely available, but the total cost rises when you plan to own both tools. Look for models with comfortable grips, a reliable dust extraction option, and compatible sanding sheets or pads. Compatibility with typical grits and the availability of replacement pads is a practical factor. Finally, consider your storage space and maintenance routine; both tools benefit from a clean bag or vacuum system and periodic pad or belt checks to avoid performance drops.
Maintenance and Longevity: Pads, Belts, and Replacement Tips
Pad life and belt wear depend on grit choice, pressure, and frequency of use. Regularly inspect the pad surface for embedded debris and replace pads when they become glazed or worn to avoid gouges on your workpiece. For sheet sanders, ensure the sanding sheets are properly attached and aligned to avoid chatter and uneven results. Clean the pad surface after each session to extend life and maintain consistent results. Lubricate or inspect moving parts per manufacturer guidance, and store tools in a dry environment to prevent corrosion. A well-tuned sander setup, paired with regular maintenance, reduces downtime and keeps palm sander vs sheet sander performance high.
Common Mistakes and Pro Tips
Common mistakes include applying excessive pressure, which can cause gouges or burnished patches, and skipping gradual grit progression, which can leave visible scratches. Pro tips for palm sander users emphasize testing on a scrap piece first, using light, sweeping motions, and blending passes. For sheet sander users, the key is to keep the pad flat and maintain even pressure across the surface to avoid wave patterns. After sessions, vacuum or wipe surfaces gently to remove sanding dust and inspect edges for uniformity. A disciplined approach to grit sequencing and tool swapping will generally deliver superior results with either tool.
Quick Decision Framework for Projects
To decide quickly between palm sander vs sheet sander, assess shape and size first: curved edges and contours point to the palm sander, while large flat planes point to the sheet sander. Consider the level of finish required and your timeline—sheet sanders speed up flat areas, palm sanders excel at detail blending. Finally, plan to use both tools where needed to achieve a seamless finish across the entire project.
Comparison
| Feature | Palm Sander | Sheet Sander |
|---|---|---|
| Best For | Edges, contours, and detailed work | Large flat surfaces and rapid material removal |
| Surface Fit | Curves and irregular shapes | Flat panels and wide boards |
| Dust Management | Good with bag or vac connection | Excellent with robust dust extraction on wide surfaces |
| Pad Type | Small square/rectangular pad, flexible for corners | Larger rectangular pad for broad contact |
| Ease of Edge Sanding | Excellent edge and corner control | Less manual control near edges, more uniform flats |
| Initial Cost | Typically lower entry price for basic models | Variable; higher upfront can be common depending on kit |
| Maintenance | Pads or papers replaceable; gear simple | Pads and belts require specific replacements; check compatibility |
What's Good
- Two-tool versatility covers edges and flats
- Better finish when used for the right surface
- Control and precision for intricate work
- Wide availability and affordable entry options
- Dust management improves results and comfort
Weaknesses
- Requires storage and investment in two tools
- Different pad systems mean extra maintenance
- Learning curve to optimize tool switching
- Dust control depends on setup and PPE
Use both tools for best results, selecting the palm sander for contours and the sheet sander for flats.
The palm sander handles edges and curves with precision, while the sheet sander accelerates flattening of large surfaces. For most projects, stacking both tools and using them in tandem yields the smoothest finish.
Your Questions Answered
What is a palm sander best used for?
A palm sander excels at edges, contours, and detailed work where a larger sander would be cumbersome. It’s ideal for blending joints and smoothing curved surfaces. For beginners, it’s a forgiving tool to practice control and finish quality on small areas.
A palm sander is best for edges and curves. It helps you blend joints and smooth detailed areas with good control.
Can I use a palm sander on large flat surfaces?
While you can use a palm sander on flat surfaces, it’s slower and prone to minor variation if not kept perfectly flat. For large, flat work, a sheet sander is typically more efficient and consistent.
You can, but a sheet sander is usually faster for large flat areas.
Are dust bags enough for safety, or should I use a vacuum?
Dust bags help, but connecting your sander to a vacuum or dust extractor dramatically improves safety and cleanliness. Consistent extraction also extends pad life by reducing embedded debris.
Dust extraction with a vacuum is best for safety and finish quality.
Which tool should beginners buy first?
Beginners often start with a palm sander to learn control on edges. A sheet sander can be added later for faster finish across large flat areas. This progression builds skills without overwhelming beginners.
Start with a palm sander, then add a sheet sander for flats.
What maintenance do palm and sheet sanders require?
Regularly check pads for wear, replace sheets or pads promptly, and clean dust paths. For sheet sanders, inspect belt or clamp mechanisms and keep the pad surface clean to prevent gouging.
Keep pads clean, replace worn parts, and maintain dust paths.
Is there a risk of gouging with a sheet sander?
Yes, if you apply excessive pressure or tilt the sander, you can create gouges. Maintain even pressure and keep the sander flat to minimize risk.
Yes—avoid heavy pressure and keep it flat to prevent gouges.
Main Points
- Start with surface shape in mind; pick tool accordingly
- Use sheet sander for flats, palm sander for edges
- Invest in good dust extraction for cleaner work
- Progress through grits and test on scrap first
- Maintain pads and belts to preserve performance