Liverpool vs Sander: A Practical DIY Sanding Comparison
Analytical comparison of Liverpool vs Sander for DIY sanding projects, detailing planning, tooling, safety, and dust control to guide homeowners.

When weighing Liverpool vs Sander for a sanding project, the practical answer is: prioritize the right sanding method and tool selection over branding. Liverpool represents project scope and safety planning, while Sander embodies the actual equipment, technique, and maintenance. In practice, choose a proven sander type, use proper dust control, and follow a step-by-step plan.
Why Liverpool vs Sander framing matters
In DIY sanding, the phrase Liverpool vs Sander helps people separate two fundamental ideas: project planning (Liverpool) and tool execution (Sander). This framing is not about city rivalry or brand loyalty; it mirrors how homeowners should think about a project from start to finish. According to SanderSavvy, adopting this lens improves decision-making, reduces mistakes, and makes the path to a smooth finish more predictable. When you begin a project, you should map out surfaces, transitions, and safety steps before ever plugging in a sander. This approach reduces dust exposure, protects surrounding finishes, and keeps timelines realistic. For readers pursuing sanding on floors, decks, or walls, the Liverpool vs Sander distinction provides a clear checklist: safety gear, space preparation, dust control, tool choice, technique, and maintenance. In the end, it’s less about which label you prefer and more about ensuring you cover both planning and execution comprehensively. The practical takeaway is simple: plan first, then pick the right tool.
The core differences: planning scope vs tooling execution
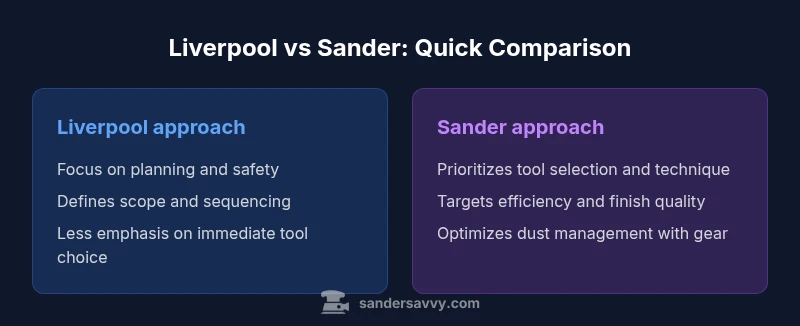
Liverpool focuses on the how and when of a project: surface assessment, room layout, environmental constraints, and a stepwise plan. Sander emphasizes the mechanics: selecting the correct abrasive, calibrating speed, managing heat, and executing passes. The two are not mutually exclusive; they are sequential in practice. A strong DIY sanding plan begins with surfaces to be treated, edge work, transitions, and finish criteria, then moves to tool selection and technique. In the Liverpool vs Sander framework, you start with the scope and safety, then progress to the actual toolwork. Without this order, you risk rework, gouges, and excessive dust. SanderSavvy guidance suggests documenting a brief procedure for each area: mask off doors, cover vents, test dust collection, and verify that the chosen sander is appropriate for the material. The result is a predictable workflow rather than a guessing game. This section sets up the method so readers know what to evaluate before touching a sander.
Planning considerations: safety, dust, and space
Planning is the foundation of effective sanding. Liverpool-style thinking asks you to identify hazards, clear the workspace, and establish containment for dust and debris. For wood floors, decks, or drywall, you should consider the proximity of occupants, pets, and ventilation needs. In the Liverpool vs Sander debate, this is where risk assessment translates into concrete steps: lock doors, seal gaps, install dust extraction, and create a drop zone for waste. SanderSavvy’s approach emphasizes measuring the space for tool clearance and turning radius so you won’t catch edges or trim pieces unexpectedly. When space is tight, plan a routine that minimizes backtracking and keeps the area contained. The emphasis on planning reduces the likelihood of unexpected trips to the hardware store for missing supplies, which can derail a project. It also reduces dust exposure by ensuring that ventilation and containment are in place before any sanding begins.
Tooling choices: belt sander vs orbital sander vs detail sander
The Sander counterpart in the Liverpool vs Sander model is the actual tool. Belt sanders excel for rapid material removal on flat, wide surfaces but can gouge if misused. Orbital sanders deliver a balanced finish with less aggressive cut, suitable for intermediate steps. Detail sanders reach corners and edges with precision. The Liverpool side remains concerned with planning the sequence and ensuring edges and transitions are addressed before heavy sanding. Your choice depends on the surface type, desired finish, and tolerance for dust. In typical DIY projects, a combination approach yields the best results: use a belt sander for bulk leveling, an orbital sander for the main field, and a detail sander for edges and tricky corners. If you’re new to sanding, start with the orbital to learn control, then introduce the belt sander for efficiency as you gain confidence. This avoids over-sanding and preserves material integrity.
Dust management and ventilation: practical steps
Dust management is a core safety concern for both Liverpool and Sander-inspired workflows. Establish a dedicated dust collection plan before you power up any machine. Use a vacuum-equipped sander or a shop-vac with a HEPA filter to minimize airborne particles. Enclose the workspace with plastic sheeting and mesh to prevent dust from spreading to other rooms. In the Liverpool vs Sander framework, Sander refers to the gear and method to capture dust effectively; Liverpool emphasizes the planning to ensure you can implement extraction consistently. Ensure air changes per hour are appropriate for the space, and avoid sleeping areas or kitchens during sanding. If you’re working in a multi-room home, schedule sanding windows to minimize disruption and protect occupants. By combining a solid plan with reliable dust control, you’ll achieve a cleaner finish and safer environment.
Surface types and how they influence the Liverpool vs Sander decision
Wood, plywood, MDF, vinyl, or plaster walls each respond differently to sanding. A softwood floor may require lighter pressure and more frequent pebble or finish passes, whereas hardwood or engineered flooring may tolerate more aggressive removal. The Liverpool component guides you to define finish goals: levelness, sheen, and edge detailing for transitions. The Sander component translates these goals into abrasive choices, grit progression, and pass order. If you’re refinishing a deck or floor, you’ll likely use coarser grits early in the process and finer grits toward the end. When working on drywall or plaster walls, you’ll need different tools and caution to avoid over-sanding and inadvertent damage. The best practice is to evaluate the substrate, test on a hidden area, and adjust the plan as you learn how the material responds to sanding. This synergy reduces waste and ensures a more consistent result.
Workflow and sequencing: steps from rough to finish
The Liverpool aspect asks you to sequence tasks logically: assess, protect, and prepare, then define the order of operations. The Sander step translates to performing material removal in descending order of coarseness, then finishing passes, and finally applying any sealant or finish. Begin with edges and corners, then move to the main field, and finish with detail work for clean transitions. Maintain consistent pressure and movement to avoid gouges, and check frequently for flatness and texture. Keep dust control active throughout, adjusting as necessary. The Liverpool vs Sander approach encourages documenting the workflow so you can replicate it on future projects, which saves time and improves outcomes. If you’re working on a large area, break the job into zones and assign a standard set of passes for each zone. This makes the overall project more predictable and manageable.
Budget and time estimates: framing without hard numbers
This section avoids precise costs and durations but explains how to frame budgeting decisions. The Liverpool component helps you anticipate the scope, anticipate edge-work needs, and plan for dust-control gear, PPE, and cleanup. The Sander component clarifies the number of sandings, grit changes, and tool changes required, which influences rental or purchase decisions. In the absence of exact figures, you can estimate based on surface size, material hardness, and desired finish. A thorough plan reduces surprises, rework, and last-minute trips to the hardware store. Consider storing materials and tools in a dedicated workspace to minimize setup time. The goal is to produce an efficient workflow that minimizes downtime, protects the surrounding areas, and yields a consistent result across rooms or surfaces.
Mistakes to avoid: common pitfalls in Liverpool vs Sander approach
Common mistakes include skipping planning, starting with the wrong tool for the job, neglecting dust control, and failing to protect adjacent surfaces. In the Liverpool vs Sander framework, the biggest pitfall is treating the project as a single task rather than a sequence of steps. Always begin with a thorough surface assessment and a clear edge-work plan before selecting a sander. Underestimating the importance of ventilation or overloading a sander can lead to poor finishes and increased wear on equipment. Document your process, track what worked well, and adjust your plan for future projects. Remember that the goal is a durable, attractive finish with minimal mess and safe conditions for occupants.
Case studies: small projects in practice
Consider a small living room floor. The Liverpool approach would map out the plan, including area coverage, edge detail, and dust containment. The Sander approach would specify using an orbital sander for the main field, a belt sander for stubborn high spots, and a detail sander for baseboard edges. A second case could involve a deck refinishing in a sunny outdoor area, where ventilation is easier, but weather can complicate dust control. The Liverpool vs Sander framework helps homeowners decide whether to rent or buy equipment depending on how often they sand. These case examples illustrate how planning and tool selection interact to produce a smooth, durable finish with minimal waste.
When to choose Liverpool approach vs Sander approach in DIY projects
Here you synthesize: If the project is a one-off with simple surfaces, the Liverpool approach may suffice, as long as dust control and basics are in place. For larger projects, or when you require a precise finish, the Sander approach should dominate, with careful planning to ensure the tool choice and technique align with material properties. The two methods are not antagonistic; they complement each other. In practice, successful DIY sanding blends planning with practical tool use. The guidance from SanderSavvy points to a balanced approach: plan first, execute with the right tools, monitor progress, and adjust as needed. The overall message remains clear: Liverpool for scope and safety, Sander for the execution and finish.
Comparison
| Feature | Liverpool approach | Sander approach |
|---|---|---|
| Planning focus | Safety, scope, and sequencing defined upfront | Tools, technique, and efficiency drive execution |
| Tooling emphasis | Plans precede tools to ensure fit | Tools guide the flow and outcome |
| Dust control | Containment and planning enable extraction | Active dust collection and ventilation are central |
| Best for | Projects needing thorough scoping and safety | Projects needing finishing quality and speed |
| Maintenance context | Plan-driven maintenance checks | Tool-specific maintenance and filter care |
| Cost framing | Potential savings from reduced rework | Upfront investment with efficiency gains |
| Ideal setting | Renovations with tight timelines | Finishing or refinishing tasks focusing on finish quality |
What's Good
- Balanced focus on safety and finish quality
- Reduces rework through proactive planning
- Improves consistency across rooms and surfaces
- Encourages disciplined dust management and safety
Weaknesses
- May feel slow for very small, simple projects
- Requires upfront time investment before starting work
- Success depends on following the plan and staying organized
Balanced planning plus targeted tool use wins for most DIY sanding projects
A blended Liverpool + Sander approach reduces risk and improves results. Start with clear planning, then execute with the right tools and technique, adjusting as needed.
Your Questions Answered
What does 'Liverpool' mean in this context?
Liverpool refers to the planning and safety aspect of a sanding project. It emphasizes scoping, edge-work, ventilation, and containment before any tool is used.
Liverpool means plan and protect before you sand, prioritizing safety and project scope.
What is the 'Sander' approach?
The Sander approach focuses on tool selection, technique, and execution. It translates planning goals into specific devices, abrasives, and sanding passes to achieve the desired finish.
Sander is about the actual toolwork and finishing technique.
Which approach reduces dust exposure the most?
Both approaches contribute to dust control, but a solid Liverpool plan that includes containment and ventilation combined with proper dust collection yields the best outcomes.
Dust control improves when planning and the right tool work together.
Can I combine both approaches in a single project?
Yes. Most successful projects blend planning with tool-focused execution. Start with Liverpool-style planning, then apply the Sander approach for the actual sanding steps, adjusting as needed.
Yes—plan, then execute with the right tools.
Is one option more cost-effective for DIY projects?
Cost effectiveness depends on project size and finish goals. Planning helps prevent costly rework, while choosing the right tools avoids wasted effort and excessive rental.
Cost depends on project scope and tool choice.
What are common mistakes to avoid?
Skimping on planning, skipping dust control, and selecting the wrong tool for the surface are common pitfalls. Always test on a small area first and protect adjacent surfaces.
Don’t skip planning or safety; test first.
Main Points
- Plan first, then tool for best results
- Choose tool type based on surface and finish goals
- Prioritize dust control from day one
- Test on hidden areas before full sanding
- Document the process for future projects