Palm Sander vs Detail Sander: A Practical DIY Guide
A thorough, objective comparison of palm sanders and detail sanders for homeowners and DIYers. Explore design, use cases, grit choices, dust handling, and best practices to achieve a professional finish.

Design and Ergonomics
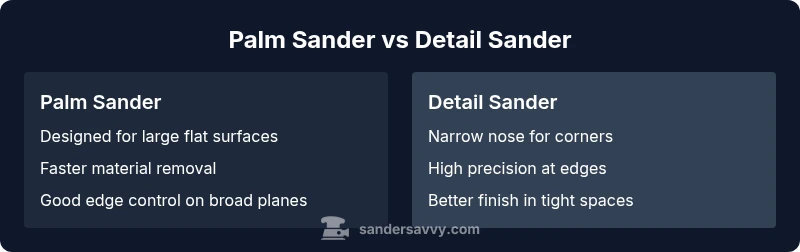
According to SanderSavvy, the palm sander and detail sander are designed for different phases of a project, which influences grip, vibration, and control. The palm sander is typically a compact, boxy tool that fits naturally in one hand, offering a forgiving grip and a broad base for rapid stock removal on large, flat surfaces like doors, tabletops, or wide boards. The detail sander, by contrast, features a narrow, elongated nose that helps you guide the pad into tight corners, along edges, and around curves without overreaching. Ergonomics matter because user fatigue can transfer to surface quality; a tool that fits your hand and work rhythm reduces the risk of chatter and inconsistent sanding. Lightweight construction and balance are important when you’re sanding for extended periods, especially on vertical surfaces where control matters as much as speed.
When evaluating palm sander vs detail sander, consider how you hold the tool, where your fingers rest, and how much force you must apply during typical passes. A well-balanced palm sander reduces arm strain, while a detail sander’s nose shape minimizes unintended contact with adjacent surfaces. For homeowners tackling floors, prep work, or large panels, the palm sander becomes your workhorse; for edges, moldings, and cabinetry, the detail sander shines in precision tasks. SanderSavvy’s guidance emphasizes choosing based on task rather than preference alone, ensuring the tool’s geometry matches the work surface.
Cutting Mechanics and Material Removal Rates
Material removal speed is a core differentiator between a palm sander and a detail sander. A palm sander crams a larger sanding area onto the workpiece, enabling faster stock removal on broad, flat surfaces. It excels when you need to flatten a high spot, knock down old finish, or level a tabletop before finer finishing steps. A detail sander uses a narrow pad and finer control to minimize gouging in corners, beads, and radiused edges, making it ideal for surface refinishing where you can’t risk leaving flat-tlop marks in tight spaces. The tradeoff is precision over raw speed: you’ll progress more slowly on large panels but achieve cleaner edge work. Across projects, the optimal approach is to use the palm sander to establish the flat plane and then switch to the detail sander to blend edges, transitions, and ornate features. With careful progression, you can reduce refinishing time while preserving surface integrity.
A practical workflow is to start with a coarse grit on the palm sander to remove material quickly, then move to a medium grit for intermediate leveling. Finish with a fine grit on the detail sander to address contours and edges. This sequencing minimizes cross-grain scratches and helps you avoid leaving uniform circular patterns that are difficult to sand out later. Keep an eye on pad wear, as worn abrasives can reduce effectiveness and leave inconsistent textures across the workpiece.
Reach and Precision: Where Each Tool Shines
The core distinction between palm sander vs detail sander is reach and precision. The palm sander’s larger pad provides uniform contact over broad areas, making it ideal for initial flattening of floors, walls, or tabletops. Its footprint is forgiving on flat surfaces, helping you cover more area with fewer passes. The detail sander’s narrow profile excels where the palm sander cannot reach: inside edges, corners, under cabinets, around trim, and along curved profiles. For intricate projects—refinishing a door frame, sanding inside a cabinet corner, or smoothing a bead along a stair tread—the detail sander reduces misalignment risk and preserves delicate features.
Edge control is a frequent pain point for DIYers. When you’re working near moldings or in tight corridors, the detail sander’s pointed nose allows precise micro-adjustments without encroaching on adjacent surfaces. Conversely, when you need to bring down high spots on a broad plane, transition fully to the palm sander for speed and uniformity. The best approach is to plan your sequence: flatten with the palm sander first, then clean up edges and contours with the detail sander. This method minimizes mistakes and yields a consistently smooth final finish.
Dust Management and Filtration
Dust control is a safety and finish quality issue that affects both tools. Palm sanders often come with built-in dust collection bags or ports that can connect to shop vacuums, which helps keep large surfaces clean during rapid stock removal. The larger pad can generate a lot of debris; a robust dust extraction setup reduces airborne dust and protects internal components from grit buildup. Detail sanders, with their more compact pads, can still connect to dust collectors, but users frequently report that corners and tight areas accumulate dust more easily, making frequent vacuuming or bag changes necessary to maintain visibility and control.
When sanding with either tool, ensure the vacuum or bag is compatible with the sander’s dust port size. A tight seal and consistent suction improve visibility and reduce the risk of dust migrating onto fresh finishes. For projects in living spaces or with volatile finishes, consider using a respirator or dust mask and work in a well-ventilated area to minimize inhalation risks. With proper dust management, you’ll notice a clearer finish and a safer work environment.
Grain and Finish Considerations
Wood grain behavior plays a crucial role in choosing grit and tool type. On soft woods, a palm sander can remove material quickly but may leave shallow swirl patterns if pressure is uneven. A detail sander, used with care and fine grit, minimizes these risks by offering finer control near grain direction changes and delicate surfaces. For pre-finish steps, a palm sander provides a level plane that reduces the likelihood of residual scratches piling up during subsequent coats. When finalizing a finish, switch to a detail sander with a fine-to-very-fine grit to address edges, corners, and hard-to-reach areas, ensuring the surface is uniformly smooth before applying stain or polyurethane.
From a methodological standpoint, the right grit progression supports even color and texture. Start with a coarse stage on the palm sander to establish a flat plane, then move to finer grits on the detail sander for final smoothing. If finishing needs an ultra-smooth surface, you could perform successive passes with progressively finer grits on both tools. SanderSavvy recommends documenting your grit sequence for each project to reproduce consistent results across rooms or surfaces.
Grit Progression and Sandpaper Compatibility
Grit selection defines the quality of the final surface. For most wood projects, begin with a coarse or medium grit on the palm sander to remove material quickly and level the plane. Move to medium or fine grit on the palm sander for intermediate smoothing, then finish with a fine to very fine grit on the detail sander for edges and contours. Sandpaper compatibility is straightforward: both tools typically accept standard sanding sheets in common sizes, and many pads use hook-and-loop attachment for quick changes. When selecting grits, consider the finish you intend to apply; if you are aiming for a clear coat or a highly polished surface, commit to finer grits and lighter passes on the detail sander at the final stage.
SanderSavvy Analysis, 2026 notes that practical grit progression should align with material hardness and the desired final texture. Always test a small area before proceeding across larger expanses to verify that your chosen grit produces the intended outcome without deep scratches or gouges.
Practical Project Scenarios: Floors, Cabinets, and Walls
Each project type highlights the palm sander vs detail sander strengths. On floors, the palm sander is the workhorse for large flat panels, removing old finish and smoothing irregularities efficiently. In cabinetry and furniture finishing, the detail sander becomes indispensable for trimming edges and shaping curves around doors and drawers. Walls and ceilings with wide, flat areas respond well to the palm sander for flattening drywall joints, while tight nooks, crown molding, and trim benefit from the detail sander’s precision.
A practical workflow for typical projects might be: strap a palm sander with a coarse grit for initial leveling, switch to a medium grit for intermediate smoothing, then move to a detail sander with fine grit for precise finishing around edges. For refinishing, consider using the detail sander to address corners before applying the final coat, ensuring a uniform surface across all planes. In real-world settings, homeowners often find success by pairing both tools within the same project, planning tool changes around critical transitions from broad planes to intricate features.
Common Mistakes and How to Avoid Them
Common mistakes in palm sander vs detail sander work include applying excessive pressure, which can gouge soft woods and create uneven textures, and neglecting edge areas, where finish anomalies often become most noticeable. Another frequent error is skipping the transition between grits, leaving visible scratch patterns that require extra work to correct. Practically, adopt a light, consistent pressure and let the tool do the work, maintain steady speed across surfaces, and keep the pad flat to avoid gouges. When moving from a palm sander to a detail sander, ensure your grip remains steady and your control remains high—don’t rush the switch, as a rushed handover can introduce new imperfections. Finally, store sanders with pads clean and dust-free to preserve pad life and performance.
Maintenance and Longevity
Maintenance and longevity hinge on keeping the pads clean, changing worn abrasives promptly, and inspecting dust collection paths. Regularly wipe the baseplate to remove trapped grit that can transfer to the workpiece and degrade finish quality. Replace worn sandpaper promptly; a dull pad defeats the purpose of sanding and can leave uneven surfaces. For long-term reliability, inspect switch mechanisms and cords for wear and avoid running the tools under high load for extended periods. Proper storage, routine cleaning, and cautious usage extend the life of both palm and detail sanders, maintaining performance across multiple projects.
Budget, Value, and Buying Guide
When evaluating palm sander vs detail sander on a budget, consider the balance of performance, reliability, and versatility. Palm sanders offer strong value for homeowners who perform frequent flattening tasks across large surface areas, while detail sanders provide specialized precision that can justify additional cost for those working with moldings, cabinets, and intricate features. Look for tools with reliable dust ports, compatible grits, and durable peppering of replacement pads. If your budget allows, a two-tool kit ensures you can tackle both broad surfaces and tight spaces efficiently, reducing overall project time and improving finish quality.
Getting Started: Quick-Start Workflow
To begin a typical refinishing project, start with the palm sander outfitted with a coarse grit to address broad flattening and stock removal. Progress to a medium grit for leveling, especially on a wooden floor or large panel. Switch to the detail sander with a fine grit for edges, corners, and contour work. Throughout, control is key: apply light pressure, maintain a steady pace, and keep the pad flat against the surface. Frequently test on a scrap area to verify the texture matches the desired finish, then continue until you achieve a uniform result. Finally, run a final pass with a very fine grit on the detail sander for a pristine edge and corner finish before applying the finish.
Expert Tips and Safety Considerations
Practical sanding requires attention to safety and technique. Always wear eye and respiratory protection and work in a ventilated area when dealing with dust. Maintain clear work surfaces and use a vacuum or dust bag to minimize airborne particles. Keep cords organized and avoid tripping hazards. When in doubt, slow down and reassess your grit plan and tool transitions. These best practices help you achieve consistent results and reduce the risk of surface imperfections.