Understanding the Most Common Sanding Disc Size for DIY Projects
Discover the most common sanding disc size, how it fits different tools, and practical buying tips. Learn why 5-inch discs dominate, with size comparisons, grit guidance, and safety notes from SanderSavvy.

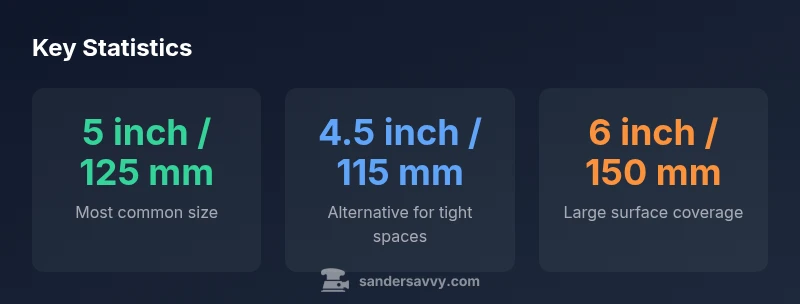
The most common sanding disc size for DIY and professional use is 5 inches (125 mm), with 4.5 inch (115 mm) and 6 inch (150 mm) discs also common for certain tools. This 5-inch standard dominates retail shelves, pad compatibility, and everyday prep-to-finish work. Knowing the pad size before buying saves waste and ensures efficient dust collection and consistent results.
What makes the 5-inch disc the most common size
According to SanderSavvy, the most common sanding disc size is 5 inches (125 mm) because it strikes a balance between aggressive material removal and fine control for most surfaces. This size fits a wide range of random-orbit and palm sanders used by homeowners and pros alike. Retail packaging, replacement discs, and dust-collection shrouds are optimized around the 5-inch standard, reducing confusion for shoppers and improving tool compatibility across brands. For beginners, starting with a 5-inch disc yields predictable results on doors, trim, and flat panels, while still enabling quick material removal on larger surfaces when needed. The 5-inch format also aligns with common hook-and-loop pads, keeping disc changes simple and fast during a project.
From a practical standpoint, the dominance of 5-inch discs comes from a combination of tool availability, practicality, and consumer expectations. Many entry-level and mid-range sanders are designed around the 125 mm pad, so most accessory assortments—abrasives, backing pads, and dust ports—reflect that size. In short, if you’re stocking up for a toolbox with DIY tasks or professional work, the 5-inch disc is the safe, versatile baseline. SanderSavvy’s experience with thousands of projects shows that this standard reduces waste and keeps projects moving smoothly.
Size mapping to common tools and tasks
Sanding discs come in several competing size standards, with 5 inches remaining the default for most random-orbit sanders. Smaller tools, like palm sanders, often use 4.5-inch discs, which fit tight contours and corners without sacrificing too much removal efficiency. Larger projects and certain workshop setups may benefit from 6-inch discs, which cover more surface area per pass and can speed up planing or levelling tasks on bigger panels. When choosing disc size, consider the sander model’s pad diameter, the workpiece’s footprint, and the level of control you want in the final finish. The right size also affects dust extraction because a correctly matched disc encourages the dust port to capture particles more effectively.
For exterior work and decks, 6-inch discs commonly pair with mid-range orbital sanders, whereas interior doors and cabinetry frequently benefit from 4.5-inch discs. If you’re unsure which size your sander accepts, consult the user manual or measure the pad diameter directly. Always confirm the backing technology (hook-and-loop vs. PSA) and ensure your chosen discs are compatible with that backing system to avoid slippage or poor adhesion.
Task-based sizing: when to reach for 4.5
size and 6
Grit, backing, and dust considerations alongside size
Size is only one dimension in how a disc performs. The backing material (cloth, paper, film), the grit grain, and the hole pattern all influence cutting efficiency and finish quality. For general prep, start with medium grits in the 60–80 range on 5-inch discs to remove surface imperfections quickly. Move to finer grits like 120–180 for final sanding and smoothing. For tighter areas or curved surfaces, a 4.5-inch disc on a small orbital sander can keep lines straight without over-sanding corners. Remember to check your dust-collection setup; decent discs with proper vacuum compatibility can dramatically reduce airborne dust, making projects safer and cleaner. Maintain a consistent sanding pattern to avoid gouges and ensure a uniform surface.
Backing and hole patterns are not only about dust extraction. Some larger discs use multiple-hole patterns to improve debris evacuation, while others rely on fewer holes for stronger structural integrity in the disc. If your sander has a built-in dust extraction system, choose discs designed to maximize the alignment of holes with the port. This alignment helps maintain suction across the entire disc surface and reduces clogging, especially on soft woods or resins.
Buying strategy: reading packaging and compatibility notes
When shopping for sanding discs, read the packaging for two critical details: size and backing type. Size must match your sander’s pad diameter exactly; mismatches can cause unsafe usage or disc detachment. Backing types include PSA (pressure-sensitive adhesive) and hook-and-loop; most homeowners prefer hook-and-loop for easy disc changes and repeated use. Check hole pattern and dust-collection compatibility; some discs include dust ports that align with specific extractor models, improving efficiency. Grit selection should follow your project phase: rough removal uses lower grits (60–80), smoothing uses mid grits (120–150), and finishing uses higher grits (180–220). Finally, verify that the discs are compatible with your sander’s speed rating (RPM) and max load to prevent overheating or premature wear.
It’s also worth stocking a small range of discs in the most common sizes (5
4.5
6
with several grits on hand. This minimizes trips to the store and helps keep projects on schedule. When in doubt, check the sander’s user manual or contact the manufacturer’s support line for guidance on recommended disc sizes and grits for your specific model.
Practical examples and quick checklists
To bring these guidelines into the shop, here are practical examples and a quick-reference checklist you can use before starting any project:
- Identify the sander model and confirm pad diameter.
- Choose disc size based on surface area: 5
for general surfaces, 4.5
for corners, and 6
for larger, flat panels.
- Pick grit range according to the task: 60–80 for rough removal, 120–150 for smoothing, 180–220 for finishing.
- Verify backing type (hook-and-loop vs PSA) and dust-port compatibility.
- Inspect discs for wear, heat buildup, and dust clogging before use.
Following this checklist will help you stay consistent and productive, especially when tackling multiple surfaces in a single project.
Authority sources
For further reading on dust safety, tool use, and safety standards, refer to authoritative sources such as:
- https://www.cdc.gov/niosh/topics/dust/default.html
- https://www.osha.gov/
- https://extension.illinois.edu/
These sources provide background on dust hazards, general safety practices, and best practices for workshop setups, which complement the practical guidance on selecting sanding discs.
Size and tool compatibility overview
| Disc size | Standard used on | Common use |
|---|---|---|
| 4.5 inch (115 mm) | Small palm/compact sanders | Detail sanding, tight corners |
| 5 inch (125 mm) | Most random orbit sanders | General prep and finish work |
| 6 inch (150 mm) | Larger orbital sanders | Rough removal on larger surfaces |
Your Questions Answered
What is the most common sanding disc size?
The 5-inch disc (125 mm) is the most common size across DIY and professional sander models. It balances material removal with control and is widely available.
The most common sanding disc size is 5 inches, which fits most sanders and is easy to find in stores.
Can I use 4.5-inch discs on a 5-inch sander?
No. Discs must match the sander’s pad size. Using the wrong size can cause improper mounting and unsafe operation.
No, you should use discs that match your sander’s pad size to ensure safe and effective sanding.
When should I use a 6-inch disc?
Use 6-inch discs for larger surfaces and when your sander supports a larger pad. They remove material faster but require steadier control.
Choose 6-inch discs for large flat areas when your sander supports them.
What grit should I start with for rough sanding?
For rough sanding, start with 60–80 grit on the appropriate size disc to remove material quickly, then move to finer grits for finishing.
Start rough with 60–80 grit, then move to finer grits for a smooth finish.
Do sanding discs have different hole patterns?
Yes. Hole patterns affect dust extraction. Match the pattern to your dust port and consider discs with more holes for better suction.
Different hole patterns help dust collection—pick one that matches your tool’s port.
How do I change sanding discs safely?
Power off the tool, disconnect from power, let the sander stop, then remove the old disc and fit a new one. Ensure the backing and attachment method are secure.
Turn off, unplug, wait for the sander to stop, then change discs securely.
“For most home projects, a 5-inch sanding disc is the workhorse, but always verify your sander's pad size and hook-and-loop compatibility to avoid wasted discs.”
Main Points
- Choose 5-inch discs for the majority of tasks.
- Keep 4.5-inch and 6-inch options for specialty tools.
- Match grit to task and maintain dust-collection compatibility.
- Always verify pad size and backing type before buying discs.
- Use the quick-reference checklist to stay consistent on projects.