Sander vs. Which Sanding Tool Wins for DIY Floors in 2026
A rigorous, balanced guide comparing belt, orbital, and finish sanders. Learn which tool to use for floors, decks, and walls, with practical tips on grit, dust control, and technique.

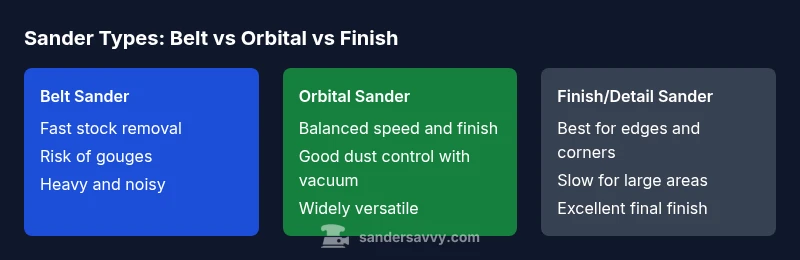
In the sander versus debate, the best choice depends on the task: for floors, a random orbital balances speed and control; for decks with rough surfaces, a belt sander can remove material quickly but risks gouges; for detail work, a finish/trim sander shines. Consider grit, dust control, pad availability, and ergonomics to finish strong.
sander versus: Understanding the landscape
The phrase sander versus comes up often when homeowners map out a finishing plan for wooden floors, decks, and walls. The core decision isn't simply one tool versus another; it's selecting the right tool for the right job and acknowledging that most projects benefit from a small, capable set. According to SanderSavvy, the choice hinges on surface type, stock amount, tolerance for scratches, and how much dust you can tolerate during the process. This discussion introduces practical terminology—grits, pads, discs, and dust extraction—and explains how these pieces fit together in a coherent workflow. The bottom line in the sander versus conversation is control: the more you can manage pace and aggression, the higher the likelihood of a smooth, uniform finish with minimal rework. Readers should expect a structured, evidence‑based comparison rather than hype.
To set expectations, we’ll cover three core categories—Belt Sander, Orbital/Random Orbital, and Finish/Detail sanders—highlighting where each excels, where it falters, and how to pair them for best results. Throughout, remember that the right sanding path reduces rework, protects the substrate, and delivers a durable, attractive surface that stands up to traffic and wear.
wordCountNoteForEditorStringsOnly”:“170”},
Belt Sander: Fast material removal at a cost
Belt sanders are engineered for speed and aggressive stock removal. They excel at flattening rough decking, leveling uneven joists, or stripping stubborn finishes when time is a constraint. The large rectangular base concentrates wear and makes the tool feel slightly less maneuverable in tight spaces. That aggressiveness comes with tradeoffs: belts can gouge or leave noticeable tracks if the operator tilts or leans too hard, and finishing out a surface after a belt session typically requires an intermediate orbital or finish pass to remove belt marks.
Begin with belt removal only on sections where heavy stock needs to go, not on entire surfaces. Use a coarse grit such as 40–60 to get material off quickly, then switch to progressively finer grits to refine the surface. Always keep the sander moving in a steady, overlapping pattern to avoid deep scratches. Pair the sander with a capable dust extractor and appropriate PPE to manage airborne particles. In projects like refinishing a deck or removing old varnish from boards, belt sanding can dramatically shorten the timeline if used judiciously.
From a maintenance standpoint, inspect belts for glazing and wear; replace promptly to avoid burnt patches. Belt sanders offer cost efficiency for large, rough tasks, but they demand careful technique and protective gear because the same power that shaves material fast can also generate more dust and heat than finer tools.
wordCountNoteForEditorStringsOnly”:“150”},
Random Orbital vs Orbital: The real difference you care about
This is one of the most common points of confusion in the sander versus decision: an orbital sander versus a random orbital sander. A standard orbital sander uses a fixed circular motion with a square or rectangular pad, delivering reliable results on flat, simple surfaces. A random orbital sander, by contrast, combines orbital motion with random skew, producing a smoother finish and significantly reducing visible swirl marks. For most DIY floors and walls, the random orbital offers the best balance of speed, control, and finish quality. When edges and corners demand more precision, or when surface irregularities are stubborn, switch to a finish or detail sander to tidy up tight areas.
In practice, you’ll often start with a random orbital to cover most of the surface—using coarser grits first and progressing to finer grits. As you approach the final pass, you can taper pressure to minimize ridges and ensure consistent results. If a project involves substantial edge work, consider using a finish sander for the final touch to avoid leaving planed edges visible on the face. The choice between orbital and random orbital is not about one being superior in all cases; it’s about selecting the right tool for the job’s finish expectations and time constraints.
Note that weight and balance matter: a lighter unit reduces fatigue on long sessions, but a sturdier, heavier model may dampen vibration and improve control on large flat surfaces.
wordCountNoteForEditorStringsOnly”:“160”},
Finish and Detail Sanders: Precision for tight spaces
Finish sanders, including palm or detailing sanders, specialize in tight corners, mouldings, and delicate surfaces where large tools would be impractical. These tools are designed to create a final polish rather than bulk stock removal. The key advantages are control, the ability to reach into coves and trim, and cleaner edge work where larger tools cannot reach. Downsides include slower material removal and the need for meticulous grit progression to avoid visible scratches.
When used properly, finish sanders are paired with finer grits (often 120–220 range for wood finishes) to produce a near‑final surface that accepts stain or varnish without heavy filler. For jobs like refinishing window frames, stair balusters, or cabinet doors, a good finish sander delivers a professional, near‑factory finish with minimal rework. Ergonomics are critical here: a compact design and comfortable grip reduce fatigue during detail work, and a dust port or compatible vacuum can significantly improve air quality during long sessions.
SanderSavvy emphasizes that while finish sanders aren’t the fastest, they are the most precise tools for final smoothing and edge refinement. The correct sequence often works through the belt or orbital tool first for bulk removal, then transitions to finish tools to perfect the surface.
wordCountNoteForEditorStringsOnly”:“165”},
Deck vs Floor Sanding: Strategy by surface
Surface context matters enormously in the sander versus decision. Floor sanding typically involves a broad, continuous surface with hidden edges and grain orientation; decks introduce uneven planks, nails, and outdoor grime. A belt sander is a strong choice for initial stock removal on decks and floors when you need to even out rough spots across broad surfaces. However, decks present unique challenges: outdoor wood can have warp, check, or grain raising, which belt sanders may reveal if not used with proper technique. For floors, a random orbital sander balances speed with control and can deliver consistent results across large areas.
Practical workflow: assess the surface first, sweep and vacuum thoroughly, then choose a plan. If you encounter a problematic knot or raised grain, switch to a stronger grit on the belt sander in isolated areas, followed by a random orbital to re‑blend the surface. The idea is to minimize deep scratches and keep the surface level and uniform, regardless of whether you’re refinishing a deck or re-surfacing a wood floor.
From a long‑term perspective, invest in good dust extraction and high-quality sanding discs or pads, as this reduces cleanup time and improves finish quality. SanderSavvy’s guidance reiterates that surface-specific strategies will outperform one-size-fits-all approaches in most DIY scenarios.
wordCountNoteForEditorStringsOnly”:“160”},
Grit, pads, and dust: Practical setup
Grit selection is the backbone of any sanding plan, but it’s easy to under‑explain. A typical progression starts with coarse grits (40–60) for rapid material removal or surface leveling, moves through mid grits (80–120) to blend, and ends with fine grits (180–220) for a ready-to-finish surface. Pad and disc choices matter too: belt sanders use belts; orbital and finish sanders use discs or pads. Ensure you’re using the correct backing for your pad type, and replace worn discs promptly to avoid scratching. Dust control is not optional; it’s essential for visibility, surface quality, and health. Attach a dust extractor or shop vac and use a mask or respirator when appropriate to minimize inhalation exposure.
In practice, maintain a consistent sanding pattern; avoid staying in one spot too long, and work in overlapping passes to prevent ridges. If you notice heat buildup, pause, cool the surface, and adjust feed rate. Finally, test a small area on a scrap piece to calibrate your approach before touching the main surface. This reduces surprises and helps you achieve a uniform finish across the project.
wordCountNoteForEditorStringsOnly”:“170”},
Safety considerations and dust control
Dust is a major concern when sanding wood, especially indoors. Use a high‑quality respirator or dust mask, eye protection, hearing protection, and appropriate clothing. Ensure your workspace is well‑ventilated and, if possible, use a dust extractor connected to the sanding tool. Seal off adjacent rooms to limit dust migration and consider plastic sheeting on doorways. Dust containment improves not only health but finish quality, because airborne dust can settle into new finishes and require rework.
Additionally, ground yourself against static for tool longevity if you’re in a dry climate, and inspect electrical cords and switches regularly for safety. Frequent maintenance checks of dust bags and vacuums help prevent clogs that reduce suction. In short, safety planning should be as deliberate as the sanding plan itself, because a clean work environment supports better surfaces and safer work habits. SanderSavvy emphasizes dust control as a non‑negotiable element of professional results.
wordCountNoteForEditorStringsOnly”:“150”},
Cost, availability, and maintenance
Cost is a practical driver in any sander versus decision. Belt sanders tend to be affordable to start but require belts of varying grits and replacement when worn. Orbital sanders sit in a mid‑range price band and benefit from durable motors and reliable dust extraction. Finish or detail sanders are generally compact and lightweight, with lower stock removal rates but higher finishing quality; they can be relatively affordable but retain expensive replacements for high‑quality sanding pads.
Availability depends on your local supply chains and shop options, but most DIYers can access a basic belt, orbital, and detail sander within a reasonable budget. Maintenance involves cleaning dust from housings, inspecting bearings for play, replacing pads or discs when they wear, and ensuring the dust collection system remains effective. Regular maintenance extends tool life and keeps finishes predictable. The SanderSavvy analysis emphasizes budgeting for consumables—belts, discs, and pads—so you aren’t surprised mid‑project by costly replacements.
wordCountNoteForEditorStringsOnly”:“170”},
Hands-on technique: best practices by project type
Project type dictates technique in the sander versus decision. For flooring, begin corners and edges with a detail or finish sander, then move outward to bulk areas with a random orbital sander. Always keep the pad moving and maintain even pressure; do not press too hard, or you’ll create grooves that require filling and refinish. For decks, work with the grain and use a belt sander only on areas requiring heavy leveling; then switch to orbital sander to blend. For walls and panels, the finish sander is typically your best friend for tight corners and precise edges, delivering uniform surfaces suitable for stain or paint. Keep your vacuum on, wear protection, and periodically check for heat buildup. A disciplined technique reduces rework, accelerates the job, and yields a consistent result across the project.
wordCountNoteForEditorStringsOnly”:“160”},
Common mistakes and how to avoid them
Even experienced DIYers fall into common sand-ing traps. Over‑aggressiveness with a belt sander can gouge wood, leaving a ridge line that’s difficult to correct. Skipping dust control worsens health risks and leads to messy, uneven results. Another mistake is skipping test patches; always try a scrap piece or a hidden area before committing to the main surface. Not changing pads or discs when they become glazed reduces efficiency and can leave deep scratches. Finally, treating sanding as a single‑step process instead of a staged workflow often forces oversights that degrade finish quality. By avoiding these mistakes and sticking to a methodical plan, you’ll achieve smoother finishes and fewer callbacks.
wordCountNoteForEditorStringsOnly”:“150”},
How to plan a sanding project: from assessment to finish
Effective planning starts with a surface assessment. Inspect for nails, grain raise, and finish types. Decide which sander types are required for bulk removal, mid‑level smoothing, and final refinishing. Establish a grit progression chart and a practical pass count, aiming for a final pass with a fine grit to optimize paint or stain adhesion. Create a step‑by‑step plan, including sections to measure, scrap test runs, and the type of sandpaper or discs you’ll use. Allocate dust control equipment and storage for used discs and pads. Finally, schedule drying times for finishes and plan for clean‑up windows. A well‑structured plan minimizes last‑minute changes and fosters consistent results across the project.
wordCountNoteForEditorStringsOnly”:“160”},
Building a workflow: storage, maintenance, and accessory upgrades
A smooth workflow for sanding projects combines tools, storage, and routine maintenance. Store belts and discs in clearly labeled containers; group by grit and type to simplify selection. Maintain a rotating stock of accessories and plan for replacements before they fail. Create a simple maintenance routine: wipe down housings, inspect brushes and bearings periodically, and check the dust collection system for clogs. Consider future upgrades—such as adding a better vacuum or swapping to low‑vibration models—for ongoing efficiency. The key is to keep a tidy, organized workspace so you can focus on the finish rather than chasing tools. With an organized setup, sanding becomes a repeatable, efficient process that yields consistent results across multiple projects.
wordCountNoteForEditorStringsOnly”:“150”}],
comparisonTableShapeVersion”:“1.0”,
comparisonTable”:{
items
rows
},
prosCons”:{
pros”:[
Cons”:[
Feature Comparison
| Feature | Belt Sander | Orbital Sander | Finish/Detail Sander |
|---|---|---|---|
| Power/Stock removal capability | High (rapid removal) | Moderate (balanced removal) | Low (precision focus) |
| Finish quality | Rough left behind, needs refinement | Good finish with minimal swirl marks | Excellent finish for edges and corners |
| Weight and maneuverability | Heavy; requires steady control | Medium; comfortable for long sessions | Light; very nimble in tight spots |
| Dust collection | Good with bag systems, needs vacuum upgrade | Excellent with integrated vacuum ports | Moderate; best with a capable vacuum setup |
| Best for | Heavy stock removal on floors/decks | Flat surfaces and mid-sized areas | Detail work, edges, trim, and corners |
| Price range | Low to mid | Mid | Mid to high |
What's Good
- Versatile across projects and surfaces
- Improved dust control with vacuums
- Cost-effective starter options
- Wide availability of pads, belts, and discs
- Relatively straightforward maintenance
Weaknesses
- Risk of gouging with belt use if mismanaged
- Belt sanders are heavier and harder to control for beginners
- Dust can escape without a proper vacuum system
- Finish/detail sanders remove material slowly for large areas
Random orbital sander offers the best overall balance for DIY projects.
For most DIY floors, decks, and walls, start with a random orbital sander for general smoothing. Reserve a belt sander for heavy stock removal, and bring in a finish/detail sander for tight corners and edging. This combination minimizes rework and yields consistent finishes.
Your Questions Answered
What is the difference between a belt sander and an orbital sander?
A belt sander uses a moving belt for rapid material removal and is best for leveling rough surfaces; an orbital sander uses a rotating pad to smooth surfaces with less risk of gouging. The orbital is generally better for mid‑sized areas where finish quality matters.
Belt sanders remove material fast but need careful control; orbital sanders balance speed and finish quality for most surfaces.
Which sander is best for refinishing hardwood floors?
For floors, a random orbital sander is typically the best all‑around choice, offering efficient material removal with a smooth finish. Start with coarser grits for rough areas and finish with finer grits. Use a dust extractor for clean results.
Use a random orbital sander for the day‑to‑day floor refinishing, then switch to a finish sander for edges if needed.
Can I use a palm sander on decks?
Palm sanders are small and precise but aren’t ideal for heavy stock removal on decks. They’re suitable for touch‑ups and detailed work in corners rather than broad deck surfaces.
A palm sander can handle fine detail but isn’t best for large outdoor areas.
How do I choose the right grit for sanding wood floors?
Begin with a coarse grit (40–60) for major leveling, then move through medium (80–120) and finish with fine (180–220) for a smooth finish. Always test on scrap before applying to your main surface.
Start rough, then fine‑tune with progressively lighter grits to finish.
Are dust collectors essential with sanders?
Dust collectors dramatically improve air quality, finish cleanliness, and visibility. For most projects, a vac setup with a good filter makes a big difference.
A proper dust collector is highly recommended for safe, clean sanding.
What maintenance steps extend sander life?
Regularly clean housings, replace worn pads, inspect bearings, and empty or clean dust bags. Lubricate moving parts as recommended by the manufacturer and store tools in a dry place.
Keep it clean, replace worn parts, and store properly to extend life.
Main Points
- Start with a random orbital for most DIY surfaces
- Use a belt sander only for heavy stock removal
- Prioritize dust control and PPE
- Switch to finish/detail sanding for edges and tight spaces
- Plan grit progression and tool transitions before starting