Thickness Sander vs Planer: Picking the Best Woodworking Tool
A practical comparison of thickness sanders and planers for wood projects, covering stock shaping, finish quality, dust control, and workflow to help DIYers choose the right tool.

Using a thickness sander vs planer comes down to how you want to finish and dimension your stock. For precise thicknessing and a smooth final surface, the thickness sander shines; for rapid material removal and rough stock prep, the planer is the workhorse. Align the tool with your project goals and current workflow.
Why thickness sander vs planer matters in woodworking
In many wood projects, the first step is controlling thickness and achieving consistent surface quality across boards. The phrase thickness sander vs planer captures the core decision homeowners and DIYers face when preparing stock for doors, cabinets, tabletops, and panel layups. According to SanderSavvy, the best tool choice starts from project goals, stock type, and room for dust management. This section explains why the distinction matters and how to map your workflow to the tool that best fits your needs. A thickness sander provides gentle, controlled material removal and exceptional flatness, which makes it ideal for final finishes. A planer, by contrast, offers rapid material removal and broad stock leveling, which accelerates rough prep. Understanding these roles helps you design safer, cleaner, and more predictable sanding or planing sequences. The overall aim is to minimize waste while maximizing surface quality, so you can finish with confidence.
Core differences: what each tool does
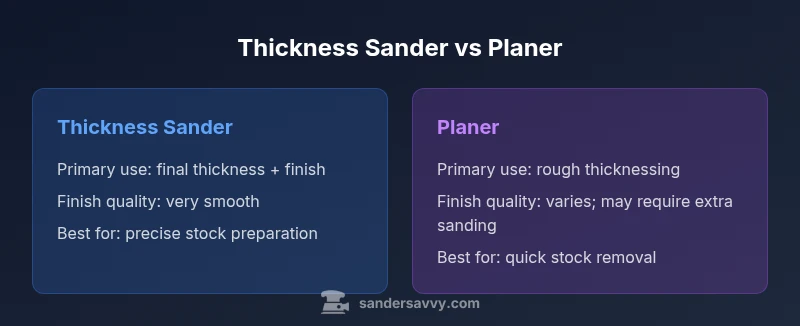
- Primary function: A thickness sander is designed to reduce stock to a precise final thickness with a uniformly smooth surface; a planer removes layer by layer to bring boards to a target dimension, often covering wide surface areas quickly.
- Mechanism: The thickness sander uses sanding belts or drums and relies on feed rate and pressure to regulate material removal; a planer uses fixed blades to shave off thin layers from the board's face.
- Feed and control: Thickness sanding emphasizes gentle passes and consistent contact, while planing emphasizes aggressive removal and parallel stock surfaces across the width.
- Surface outcome: Thickness sanding yields a finer finish and reduces tear-out on tricky grain; planing often leaves a rougher texture that may require subsequent sanding.
- Setup and maintenance: Sanding belts require occasional changes and tensioning; planers require knife or blade replacement and proper blade shimming.
This outlines the essential differences that influence project planning and safety considerations.
Surface finish and stock prep: how results differ
Finish quality on end grain and highly figured woods often benefits from thickness sanding, which can minimize tear-out by working with the existing grain texture. Planers can produce a uniform face quickly but may leave chatter marks or tear-out on difficult stock if feed is not carefully managed. The choice affects the number of subsequent steps; thicker boards may need fewer passes with a thickness sander, but more careful initial dimensioning when using a planer. This dynamic matters for projects like cabinet doors, panel tops, or hardwood flooring where flatness and consistent thickness drive fit and aesthetic. The combination of tool choice and sanding sequence ultimately determines how much hand sanding remains in the finish.
In practice, consider doing a light pass with the thickness sander after rough planing to even thickness, then use a final pass to produce the final surface.
Stock handling and material waste: efficiency and yield
Material yield matters for budget and waste reduction. A thickness sander efficiently removes small amounts to achieve target thickness and flatness, reducing the risk of stock failure from over-thinning in hard-to-mend species. A planer can remove large amounts quickly, but it may create snipe, thickness variation, or finger joins if stock is cupped or warped. You'll save time by choosing the right tool for the job, and by planning the sequence — rough thicknessing with a planer, then final passes with a thickness sander to reach precise thickness and finish. Also consider stock pre-checks, such as watching for warps and cupping to prevent roller jams and feed issues.
Dust management, safety, and ergonomic considerations
Both tools generate a lot of dust and noise; robust dust collection is essential. A thickness sander can be gentler on the operator's arms during long sessions because you control feed pressure, whereas a planer can cause more vibration and kickback if misaligned. Use PPE: eye protection, hearing protection, and a dust mask or respirator when working with hardwoods. Secure stock clamps, maintain a clean work area, and set up proper dust extraction at the source to minimize airborne particles. Plan the workflow to minimize repetitive movements and keep hands away from cutting edges. A small shop that uses proper mobile dust collectors can keep air quality within comfortable limits while maintaining clean surfaces.
When to choose a thickness sander
Choose a thickness sander when final dimension accuracy and surface flatness are critical. For projects that require consistent board thickness across multiple pieces, or when working with highly figured woods where tear-out could ruin the grain, a thickness sander shines. It excels in cabinets, tabletops, and panel production where uniform thickness ensures proper edge joins and veneer overlays. In addition, if you anticipate multiple passes to remove slight thickness variations, the thickness sander can deliver predictable results with minimal hand sanding. In this scenario, plan your workflow to run boards through the thickness sander after initial rough shaping to minimize stock loss and maximize yield.
When to choose a planer
Opt for a planer when you need to reduce thick stock quickly or bring boards to rough thickness with high removal rates. It shines on rough lumber, wide boards, and warped stock that requires flattening along its width. Planers are a staple for making multiple boards uniform before finishing, and they pair well with a thickness sander later in the process for final dimensioning. For denser species or thicker stock, planers can save time; however, you must anticipate more follow-up sanding and potential adjustment for blade wear. As soon as rough stock is flat and close to final thickness, move to the thickness sander to finish the surfaces and ensure a consistent final product.
Practical workflow: combining both tools
Below is a practical workflow that balances speed and finish without sacrificing quality:
-
Inspect stock for defects and plan the sequence. Mark cupped areas to avoid contact with knives and ensure safe feed.
-
Rough thicknessing with the planer: remove large amounts to bring boards to near target thickness across the width, paying attention to knot zones and grain direction.
-
Flatten and parity pass with the thickness sander: feed boards through to reduce thickness variation and achieve a uniform surface.
-
Final pass with the thickness sander: dial in precise thickness and a glass-smooth finish on the face.
-
Light hand-sanding or polishing if necessary, especially on highly figured woods or veneers.
-
Check thickness with calipers as you go to maintain consistent results.
If your stock is prone to tear-out, adjust feed rate, pressure, and rotation direction to minimize engraving and maximize surface quality.
Cost, availability, and maintenance considerations
Price and availability influence the decision to buy either tool. A planer generally provides broad capability for rough shapes and stock removal at a lower upfront price than some specialty thickness sander setups, but it requires more frequent blade maintenance and sharpness checks. A thickness sander represents a specialized investment for precise final thickness and ultra-smooth finishes, and it may demand additional maintenance like belt changes and drum alignment. Consider availability of service, compatible blades or belts in your shop, and the space required for dust collection and tool operation. Finally, factor in the overall workflow; the right sequence can reduce waste and storage needs, while poor setup can create risk of misalignment, snipe, or tear-out.
Practical tips: common mistakes and how to avoid them
Tips:
-
Do not force stock through the sander or planer; use consistent feed rate.
-
Check stock for warps and cupping; use fixtures to secure boards.
-
Align blades and sanding belts; verify planing knives and belt tension.
-
Start with a test piece to calibrate thickness.
-
Clean the work area and dust extraction after each use.
Comparison
| Feature | Thickness Sander | Planer |
|---|---|---|
| Primary function | Final thicknessing + finish | Rough stock removal + thicknessing |
| Surface finish quality | Very smooth, low tear-out on figured stock | Rougher initial surface; may require extra sanding |
| Material removal per pass | Small, controlled removal | Larger, more aggressive removal |
| Best for | Final dimensioning and finishing | Initial stock preparation and quick flattening |
| Dust management | Dedicated dust collection with sanding specifics | Dust collection needed for shavings and chips |
| Maintenance | Belt changes, drum/tension checks | Blade/knife sharpening or replacement, alignment |
| Space and setup | Requires belt/sand belt setup area | Requires table/stand, sufficient space for knives |
What's Good
- Clear separation of tasks: rough stock prep vs final finish
- Better surface quality on tricky stock with final passes
- Improved dimensional accuracy for finished products
- Potential to reduce hand sanding with proper sequencing
- Enhances repeatability for production runs
Weaknesses
- Higher upfront investment for a thickness sander
- Requires more shop space and dust management
- Maintenance demands for both tools (belts, blades)
- Learning curve to optimize the sequence and settings
Use both tools when possible; balance speed and finish by assigning rough stock work to the planer and final thicknessing to the sander
For most DIY shops, the optimal approach combines the planer for rapid dimensioning with a thickness sander for precise thickness and a refined surface. This reduces waste, speeds up workflows, and minimizes hand sanding while delivering consistent results.
Your Questions Answered
What is the main difference between a thickness sander and a planer?
The thickness sander finishes stock to a precise final thickness and surface quality, while a planer reduces stock quickly to rough dimensions. The sander uses abrasive belts for a smooth finish, whereas the planer uses blades to shave material away. Together they enable precise, consistent results with less hand sanding.
The thickness sander finishes to a precise thickness, while the planer handles rough dimensioning quickly. Use both to balance speed and finish.
Can I rely on one tool only for most projects?
It’s possible for very simple projects, but for best results you’ll typically want both. The planer handles rough stock removal and initial thicknessing, while the thickness sander refinishes and flattens to final thickness. Using both minimizes waste and improves surface quality.
One tool can work for simple jobs, but for best results, use both to balance speed and finish.
What stock types are best suited to each tool?
Planers are great for rough lumber and wide boards that need flattening, while thickness sanders excel with highly figured woods, veneer stock, or boards requiring precise final thickness and a smooth surface.
Planers are for rough stock; thickness sanders shine with figured woods and final thickness.
Is dust control easier with one tool over the other?
Both tools demand good dust collection. A thickness sander tends to produce sanding dust that benefits from an efficient filter setup, while planers create chips that require robust collection and sealing to keep the shop clean.
Dust control matters for both; set up strong dust collection and PPE.
What maintenance tasks are common for these tools?
Regular belt or drum maintenance for the sander and blade replacement or sharpening for the planer are essential. Check tension, alignment, and surface tracking frequently to avoid tear-out and ensure consistent results.
Maintain belts and blades; keep everything aligned for best results.
What is a typical workflow combining both tools?
Rough stock is planed to near thickness, then flattened and finished with the thickness sander for final thickness and a smooth surface. A final check with calipers helps maintain uniformity across pieces.
Plan rough stock first, then finish with the thickness sander and check thickness as you go.
Main Points
- Start with rough stock using the planer for speed
- Finish with a thickness sander to achieve precise thickness
- Plan dust collection and shop layout around both tools
- Match project goals to tool choice to minimize rework
- Practice safe setup and calibration to prevent tear-out